Konica Minolta magicolor plus magicolor plus Copyboard M-12S/M-12W/M-125 User - Page 23
Printing in the same ratio as the sheet surface (Model M-12W), Moving the sheet surface manually
 |
View all Konica Minolta magicolor plus manuals
Add to My Manuals
Save this manual to your list of manuals |
Page 23 highlights
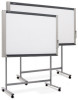
Printing Printing in the same ratio as the sheet surface (Model M-12W) The M-12W has a wide screen, so when printing, the image is reduced in the horizontal direction and printed over the entire surface of the A4 sheet (so for example circles become ovals). If you wish to print with the same vertical-to-horizontal aspect ratio as the sheet surface (with the same image as on the sheet), change the printing ratio. Upon shipment from the factory (by default), the copyboard is set to compress the image in the horizontal direction. Check that the power is turned on (that the display window is lit). 1. While pressing in the Density button, press the ON/ Standby button to switch to the function settings mode. "F1" appears on the display window. 2. Press the + or - button (the display switches each time one of the buttons is pressed) to display "F4", then press the Print button to finalize. When "F4" is displayed, the copyboard is in the printing ratio setting mode. Forward / Reverse 3. Press the Feed/Stop ratio mode. button to select the equal Lamps when the copyboard is set to condense the image in the horizontal direction: Color mode lamp: Off Density mode lamp: Lit Lamps when the copyboard is set to print in equal ratio: Color mode lamp: Lit Density mode lamp: Off Check that the lamps are lit or off as indicated at " Lamps when the copyboard is set to print in equal ratio" above, then press the Print button to finalize. The dot next to the "F4" dot flashes for several seconds. •To restore the copyboard to print with the image condensed in the horizontal direction, switch the mode so that the lamps are as indicated at "Lamps when the copyboard is set to condense the image in the horizontal direction", then press the print button. This completes the setting. Press the ON/Standby button to return to the normal mode. Dot flashes for several seconds Moving the sheet surface manually (Model M-12S/M-12W) The sheet can be moved even when the power of the copyboard is switched off. The sheet can be moved with your hand either in left or right. Please place your hand at the vertical center and move the sheet slowly. Quick movement can cause damage to the drive mechanism of the copyboard. Note • When the Erase Reminder function is set to "Enable", the function may not operate properly if the sheet surface is moved by hand. Notice • For model M-125, do not move the sheet surface by hand. Doing so could damage the copyboard. E-23
-
 1
1 -
2
-
3
-
4
-
5
-
6
-
7
-
8
-
9
-
10
-
11
-
12
-
13
-
14
-
15
-
16
-
17
-
 18
18 -
 19
19 -
 20
20 -
 21
21 -
 22
22 -
 23
23 -
 24
24 -
 25
25 -
 26
26 -
 27
27 -
 28
28 -
29
-
30
-
31
-
32
-
33
-
34
-
35
-
36
-
37
 |
 |
