Konica Minolta magicolor plus magicolor plus Copyboard M-12S/M-12W/M-125 User - Page 18
Printing, Preparing the Printer
 |
View all Konica Minolta magicolor plus manuals
Add to My Manuals
Save this manual to your list of manuals |
Page 18 highlights
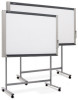
Printing Use a printer to print out the image that has been drawn on the sheet surface. Operations and names of parts differ from printer to printer. For details of operations, see your printer's operating instructions. Preparing the Printer Please check that the copyboard and the printer have been connected. See Page E-37. Set the paper. Please use A4 or letter size printer paper. See your printer instruction manual for details. 1) Arrange the paper edges so that they are even. 2) Insert paper at the specified position of the paper tray. 3) Press the paper guide gently until it touches the paper. Note See your printer's operating instructions for a description of the paper that can be used. Paper Paper guide Appearance of printer is for illustration purposes. Switch on the power. Press the power switch. The power indicator lights. This completes the preparation of the printer. Press the Print button on the copyboard's control panel. One page worth of data is read and the printing operation starts. Note • Depending on the printer, indicators, etc., may flash after the power is turned until the printer is prepared to print. In this case, see the printer's operating instructions and check that the printer is ready before starting the printing operation on the copyboard. Paper guide Power switch Paper tray When finished printing... Switch off the printer power and remove the paper. Close the paper tray. Notice • Caution: Do not turn off the power or disconnect the USB cable during printing. E-18
-
 1
1 -
2
-
3
-
4
-
5
-
6
-
7
-
8
-
9
-
10
-
11
-
12
-
 13
13 -
 14
14 -
 15
15 -
 16
16 -
 17
17 -
 18
18 -
 19
19 -
 20
20 -
 21
21 -
 22
22 -
 23
23 -
24
-
25
-
26
-
27
-
28
-
29
-
30
-
31
-
32
-
33
-
34
-
35
-
36
-
37
 |
 |
