Konica Minolta magicolor plus magicolor plus Copyboard M-12S/M-12W/M-125 User - Page 19
Basic Printing Operation, Press the ON/Standby
 |
View all Konica Minolta magicolor plus manuals
Add to My Manuals
Save this manual to your list of manuals |
Page 19 highlights
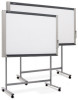
Printing This function prints the sheet screen of the copyboard on the printer connected to the copyboard. M-12S/M-12W Note • Text (titles, the company name, the date, etc.) or images can be inserted in the margins at the top and bottom of the pages and the same information printed on all pages. The information at the top of the page is called the header, the information at the bottom the footer. For instructions on creating headers and footers, see the separate "Software Operation Manual". Basic Printing Operation Preparation: Preparation: Check that the AC power plugs of the copyboard and printer are connected to wall power outlets. See Page E-15. Press the ON/Standby button and switch on the power. M-125 Prepare the printer. (See the previous page.) Note • When turning on the power, wait about 5 seconds after connecting the copyboard's AC power plug to the wall power outlet or after turning off the power (standby mode) before pressing the ON/Standby button. • Press the ON/Standby button to switch on the power. The LED of the display window will light. • Turn on the copyboard's power before turning on the printer's power. Press the Feed/Stop button (for model M-125, the Page change / buttons) and display the sheet surface you want to print. For models M-12S and M-12W A press of the Feed/Stop button scrolls the sheet surface one screen portion left and automatically stops it. To stop the operation part way through, press the Feed/ Stop button again. For model M-125 When the desired page is specified using the Page change / buttons (the corresponding page indicator flashes), the sheet scrolls to the specified page and stops automatically (the page indicator stops flashing, remaining lit). Note • The one-screen that is visible is printable position. • To fine-adjust the sheet surface position (M-12S and M-12W only), with the sheet stopped, move the sheet slowly by hand. The sheet can be moved either to the left or to the right. • It is not possible to print the image projected on the S page (screen) (model M-125 only). • Printing of the portion located around the sheet surface might not be possible. Please see "Effective reading size" on Page E-9. E-19 Continued on next page
-
 1
1 -
2
-
3
-
4
-
5
-
6
-
7
-
8
-
9
-
10
-
11
-
12
-
13
-
 14
14 -
 15
15 -
 16
16 -
 17
17 -
 18
18 -
 19
19 -
 20
20 -
 21
21 -
 22
22 -
 23
23 -
 24
24 -
25
-
26
-
27
-
28
-
29
-
30
-
31
-
32
-
33
-
34
-
35
-
36
-
37
 |
 |
