Kyocera ECOSYS FS-2020D FS-2020D/3920DN/4020DN Operation Guide (Basic) - Page 51
Custom Mode, Install, Finish, Custom Select, Add Standard TCP/IP Printer Port Wizard
 |
View all Kyocera ECOSYS FS-2020D manuals
Add to My Manuals
Save this manual to your list of manuals |
Page 51 highlights
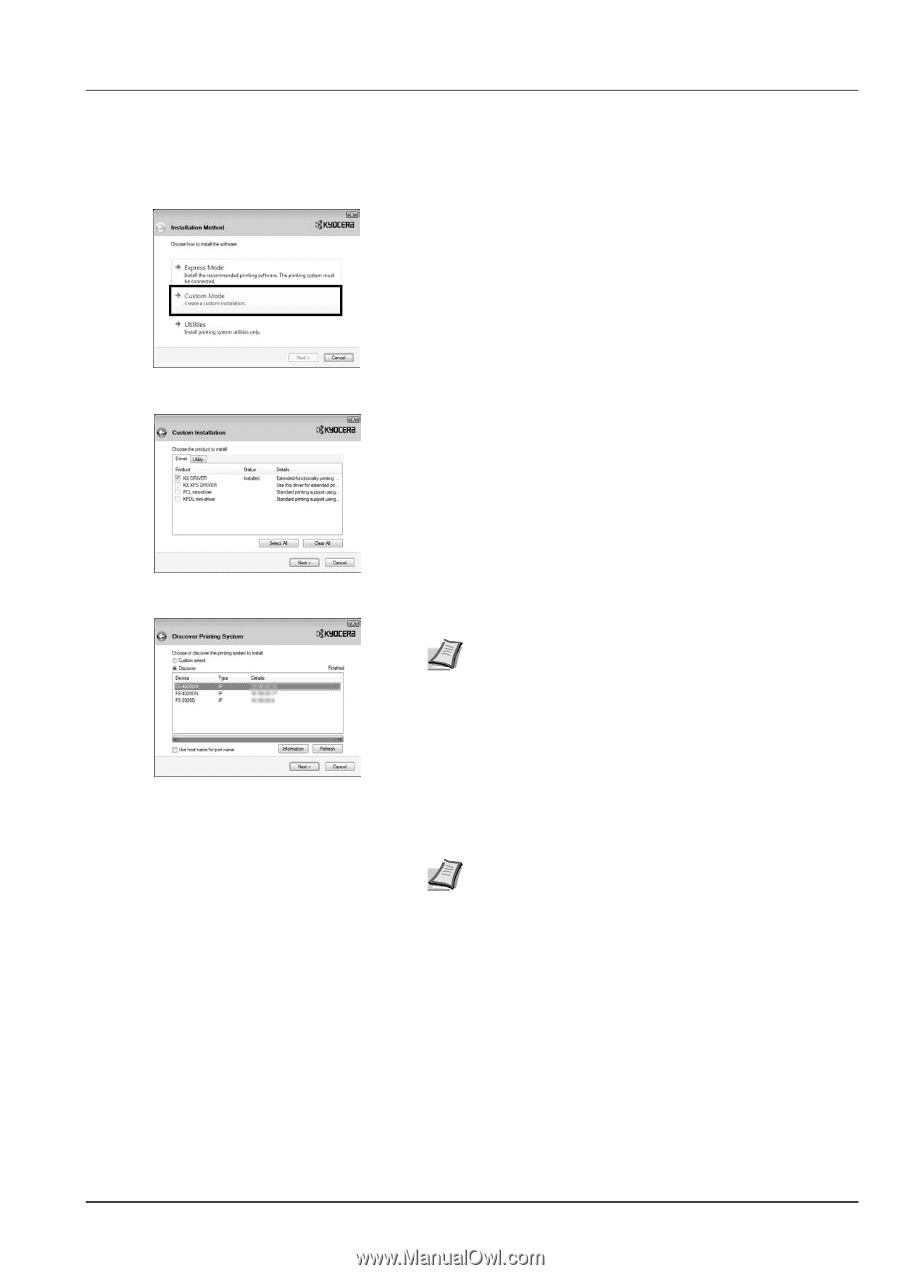
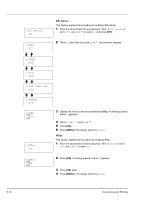
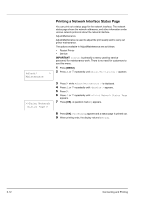
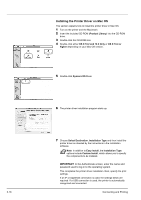
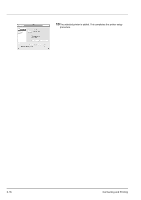
Custom Mode When selecting Custom Mode, printer port and utilities are changed as necessary. 1 On Installation Method screen, click Custom Mode. 2 On Driver tab and Utility tab of the Custom Installation screen, select the printer driver and utilities you want to install, and click Next. 3 Select the printer you want to install, and click Next. Note When you want to add or edit the port connected to the printer, select the printer and Custom Select, then click Next. Add Standard TCP/IP Printer Port Wizard appears. Follow the steps in the wizard to add or edit the port. 4 Confirm the settings and click Install. Printer driver installation starts. Note During any point in the installation process, if the Windows Security warning dialog box appears, click Install this driver software anyway. If the Hardware Installation screen appears in Windows XP, click Continue Anyway. 5 Installation Completed screen appears. Click Finish to return to the main menu. Connecting and Printing 3-15
-
 1
1 -
2
-
3
-
4
-
5
-
6
-
7
-
8
-
9
-
10
-
11
-
12
-
13
-
14
-
15
-
16
-
17
-
18
-
19
-
20
-
21
-
22
-
23
-
24
-
25
-
26
-
27
-
28
-
29
-
30
-
31
-
32
-
33
-
34
-
35
-
36
-
37
-
38
-
39
-
40
-
41
-
42
-
43
-
44
-
45
-
 46
46 -
 47
47 -
 48
48 -
 49
49 -
 50
50 -
 51
51 -
 52
52 -
 53
53 -
 54
54 -
 55
55 -
 56
56 -
57
-
58
-
59
-
60
-
61
-
62
-
63
-
64
-
65
-
66
-
67
-
68
-
69
-
70
-
71
-
72
-
73
-
74
-
75
-
76
-
77
-
78
-
79
-
80
-
81
-
82
-
83
-
84
-
85
-
86
-
87
-
88
-
89
-
90
-
91
-
92
-
93
-
94
-
95
-
96
-
97
-
98
-
99
-
100
 |
 |