Kyocera FS-6525MFP File Management Utility Operation Guide Rev 2.10 - Page 13
Front Panel Controls, Adding a Front Panel Control, Adding Selections to a Selection List
 |
View all Kyocera FS-6525MFP manuals
Add to My Manuals
Save this manual to your list of manuals |
Page 13 highlights
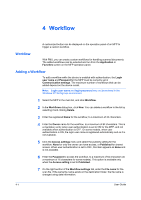
Workflow 8 If on a network, in Send folder (Share name), enter the share name for sending scan data, or click Browse and select the path to the share name folder. 9 In Personal Computer (IP address or Host name), enter the IP address or host name of the PC that sends scan data. You can enter a maximum of 39 ASCII characters. 10 In Login user name, enter the user name for SMB transfer, to a maximum of 64 characters. Then in Login password, enter the login password for the SMB transfer, to a maximum of 64 characters. 11 Click Apply to save the workflow settings. 12 Click Close to return to the main screen. Note: You need to set the front panel controls for some models. Front Panel Controls You can create a custom workflow and assign it to a button that appears on the operation panel. This feature allows a user to conveniently use a predefined set of conditions and distribution paths for handling scanned documents. The workflow guides the user to enter information that the application uses to distribute the scanned document to the correct folder. Adding a Front Panel Control 1 In Select type of control, select the type of control to display on the operation panel. 2 In Select type of instruction, choose the prompt message. 3 In Enter title of control, enter the name of the control. 4 Click Add to add the control to List of controls. Adding Selections to a Selection List If Select item is chosen for the type of control, you can set up a list of selections that can be chosen at the operation panel. The items appear as buttons or check boxes, depending on the model. These selections are matched to the User defined criteria in Distribution settings. 1 In Create a selection, type a selection item. 2 Click Add. The item appears in the List of selections below. 3 You can change the order of items in the list by clicking on an item, then using the up and down buttons to move it. File Management Utility 4-2
-
 1
1 -
2
-
3
-
4
-
5
-
6
-
7
-
 8
8 -
 9
9 -
 10
10 -
 11
11 -
 12
12 -
 13
13 -
 14
14 -
 15
15 -
 16
16 -
 17
17
 |
 |