Kyocera KM-5530 LDAP Converter Operation Guide
Kyocera KM-5530 Manual
 |
View all Kyocera KM-5530 manuals
Add to My Manuals
Save this manual to your list of manuals |
Kyocera KM-5530 manual content summary:
- Kyocera KM-5530 | LDAP Converter Operation Guide - Page 1
the LDAP Converter and thereby search for an email address See page 17 Sending scanned image data Have scanned image data sent directly to the received email address. 1 * For more detailed information on sending scanned image data, refer to the of your scanner's Operation Guide. - Kyocera KM-5530 | LDAP Converter Operation Guide - Page 2
is a trademark of Netscape Communications Corporation. • Adobe and Acrobat are registered trademarks of Adobe Systems Incorporated. All other company and product names contained in this Instruction Handbook are trademarks or registered trademarks of their respective companies. The designations ™ and - Kyocera KM-5530 | LDAP Converter Operation Guide - Page 3
use the included LDAP Converter Utility with the Send Email function of this scanner in order to search for email addresses within the information that is administered by an LDAP server. Be aware that this guide contains no special information or explanations in regard to technical matters relating - Kyocera KM-5530 | LDAP Converter Operation Guide - Page 4
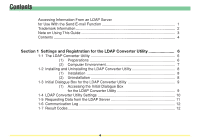
Send E-mail Function 1 Trademark Information 2 Note on Using This Guide 3 Contents ...4 Section 1 Settings and Registration for the LDAP Converter Box for the LDAP Converter Utility 9 1-4 LDAP Converter Utility Settings 10 1-5 Requesting Data from the LDAP Server 11 1-6 Communication Log 12 - Kyocera KM-5530 | LDAP Converter Operation Guide - Page 5
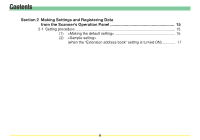
Contents Section 2 Making Settings and Registering Data from the Scanner's Operation Panel 15 2-1 Setting procedure 15 (1) - Kyocera KM-5530 | LDAP Converter Operation Guide - Page 6
running will appear in the Windows Task Bar. After that, the utility will basically wait to be accessed from the scanner for retrieval of data from corresponding password to log onto that server. 3. Use the scanner's operation panel or the Web Page Functions Interface and register in the scanner - Kyocera KM-5530 | LDAP Converter Operation Guide - Page 7
• Hardware IBM PC/AT or compatible • CPU Pentium 133 MHz or faster • Memory At least 64 MB • Hard Disk Space At least 20 MB • OS Windows 2000 • LDAP server (recommended Microsoft Exchange 2000 Server, Lotus Notes Domino Server R5 or Netscape Directory Server 4.1 7 - Kyocera KM-5530 | LDAP Converter Operation Guide - Page 8
1-2 Installation and Uninstallation (1) Installation 1. Double-click on the supplied Setup.exe file. The installation wizard will appear. Follow the instructions indicated in the wizard to continue the installation procedure. * Once installation is completed, the LDAP Converter Utility will start up - Kyocera KM-5530 | LDAP Converter Operation Guide - Page 9
server, as well as when you want to perform connection, search or password settings, you will need to access the initial dialogue box for the Utility is NOT running... Click on Start in the Windows Task Bar and then select Program -> Scanner User Software -> LDAP Converter in that order from the - Kyocera KM-5530 | LDAP Converter Operation Guide - Page 10
with the LDAP server, as well as saving log files, in the "Log" Tab. • "About" Tab settings Displays version information for the LDAP Converter Utility. 10 - Kyocera KM-5530 | LDAP Converter Operation Guide - Page 11
Section 1 Settings and registration for the LDAP Converter Utility 1-5 Requesting data from the LDAP server The LDAP Converter Utility can request the following information from an LDAP server. • Requesting English data "sn" (family name) and "givenname" (first name): up to 32 single-byte characters - Kyocera KM-5530 | LDAP Converter Operation Guide - Page 12
Section 1 Settings and registration for the LDAP Converter Utility 1-6 Communication Log The items contained in the log file of communication with the LDAP server are as follows. "Log file" is the "Log tab" appearing in the LDAP Converter Utility. It will appear by clicking on "Open log file". • - Kyocera KM-5530 | LDAP Converter Operation Guide - Page 13
running properly. E02 Cancel : Connection to the server was canceled. - - - E03 Bad DN : The data registered under "dn" Verify with your systems administrator that the (department name) is not valid. LDAP server is running properly. E04 Bad Search Filter : A restriction occurred in relation to - Kyocera KM-5530 | LDAP Converter Operation Guide - Page 14
origin has occurred. Verify that there is no abnormality with network cables or any other connections. If connections are appropriate, verify with your systems administrator that the settings in the LDAP Converter Utility are correct and that the LDAP server is running properly. Verify with your - Kyocera KM-5530 | LDAP Converter Operation Guide - Page 15
in order to use the Send E-mail function. Refer to your scanner's Operation Guide for more detailed information. (1) 1 . Press the default (*) key on the scanner's operation panel and then access the System Basic screen on the touch panel. Refer to "(3) Making settings - Kyocera KM-5530 | LDAP Converter Operation Guide - Page 16
Making Settings and Registering Data from the Scanner's Operation Panel 3 . To have the scanner attempt to detect the LDAP Converter Utility "Close" key to complete the setting procedure. * The factory default setting is "Off". * This setting procedure can also be accomplished using the Web Page - Kyocera KM-5530 | LDAP Converter Operation Guide - Page 17
" setting is turned ON) 1 . Select the "Address Book" under the scanner's Send E-mail function. Refer to "(3) Scanning under the Scan to PC and Send E-mail functions" on page 3-1 of the Set-Up Edition of your Operation Guide for the procedure on selecting the Address Book. 2 . Touch the "Extension - Kyocera KM-5530 | LDAP Converter Operation Guide - Page 18
Scanner's that the "Search by surname" (family name) default is selected under the "Search process type" setting whom you want to send the scanned image data. Refer to "(3) Scanning under the Scan to 3-1 of the Set-Up Edition of your Operation Guide to continue the procedure. * You can verify - Kyocera KM-5530 | LDAP Converter Operation Guide - Page 19
(2) (lorsque le réglage "Carnet d'adresses étendu" est activé) 1 . Sélectionner "Carnet d'adresses" dans la fonction Envoi e-mail du scanner. Se reporter à "(3) Balayage sous Balayer au PC et Envoyer le courrier électronique" de la page 3-1 de l'édition Installation du manuel - Kyocera KM-5530 | LDAP Converter Operation Guide - Page 20
et enregistrement des données depuis le panneau de fonctionnement du scanner 3 . Effleurer la touche "Recherche par lettres". Entrer dans de cette touche. 4 . Sélectionner la destination à laquelle envoyer les données d'image balayées. Se reporter à "(3) Balayage sous Balayer au PC et Envoyer le - Kyocera KM-5530 | LDAP Converter Operation Guide - Page 21
Cómo escanear con las funciones de escaneado a PC y envío de correo electrónico" en la página 3-1 de la edición para instalación de su manual de instrucciones para el procedimiento de selección del libro de direcciones. 2 . Toque la ficha "Extensiones". Aparece la pantalla del "Libro de extensiones - Kyocera KM-5530 | LDAP Converter Operation Guide - Page 22
escanear con las funciones de escaneado a PC y envío de correo electrónico" en la página 3-1 de la edición para instalación de su manual de instrucciones para continuar con el procedimiento. * Puede verificar la información registrada (dirección de correo electrónico, nombre de pila, apellido, secci - Kyocera KM-5530 | LDAP Converter Operation Guide - Page 23
> (wenn die Einstellung „Erweitertes Adressbuch." eingestellt ist) 1 . Wählen Sie den Eintrag „Addressbuch" in der Funktion E-Mail senden des Scanners. Siehe Abschnitt „(3) Bedienungsvorgänge zum Scannen mit den Funktionen „Z. PC send." und „Zu E-Mail"" auf Seite 3-1 der Funktion Einrichtung - Kyocera KM-5530 | LDAP Converter Operation Guide - Page 24
Abschnitt 2 Durchführung der Einstellungen und Registrierung der Daten am Bedienungsfeld des Scanners 3 . Tippen Sie die Schaltfläche „Buchstaben suchen" an. Geben Sie im daraufhin angezeigten Schriftzeicheneingabe-Bildschirm den Namen der Person an, deren Informationen Sie finden möchten, - Kyocera KM-5530 | LDAP Converter Operation Guide - Page 25
(2) (quando è attivato il settaggio "Estensione address book") 1 . Selezionare "Lista indirizzi" nella funzione Spedito e-mail dello scanner. Fare riferimento a "(3) Come eseguire la scansione con Invia a PC e Spedire e-mail" a pagina 3-1 dell'edizione di messa a punto della - Kyocera KM-5530 | LDAP Converter Operation Guide - Page 26
Capitolo 2 Come eseguire i settaggi e registrare i dati dal pannello operativo dello scanner 3 . Toccare il tasto "Ricerca lettere". Impostare nella schermata d'immissione dei caratteri risultante la persona della quale si desiderano cercare le informazioni, partendo dalla prima lettera
-
 1
1 -
 2
2 -
 3
3 -
 4
4 -
 5
5 -
 6
6 -
 7
7 -
8
-
9
-
10
-
11
-
12
-
13
-
14
-
15
-
16
-
17
-
18
-
19
-
20
-
21
-
22
-
23
-
24
-
25
-
26
 |
 |
1
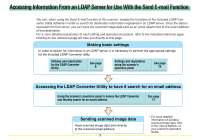
Accessing Information From an LDAP Server for Use With the Send E-mail Function
You can, when using the Send E-mail function of this scanner, employ the functions of the included LDAP Con-
verter Utility software in order to search for destination information registered in an LDAP server. Once the data is
received from that server, you can have the scanned image data sent as an email attachment to the email address
of that destination.
For a more detailed explanation of each setting and operation procedure, refer to the indicated reference page.
Clicking on the reference page will take you directly to that page.
Accessing the LDAP Converter Utility to have it search for an email address
Sending scanned image data
Have scanned image data sent directly
to the received email address.
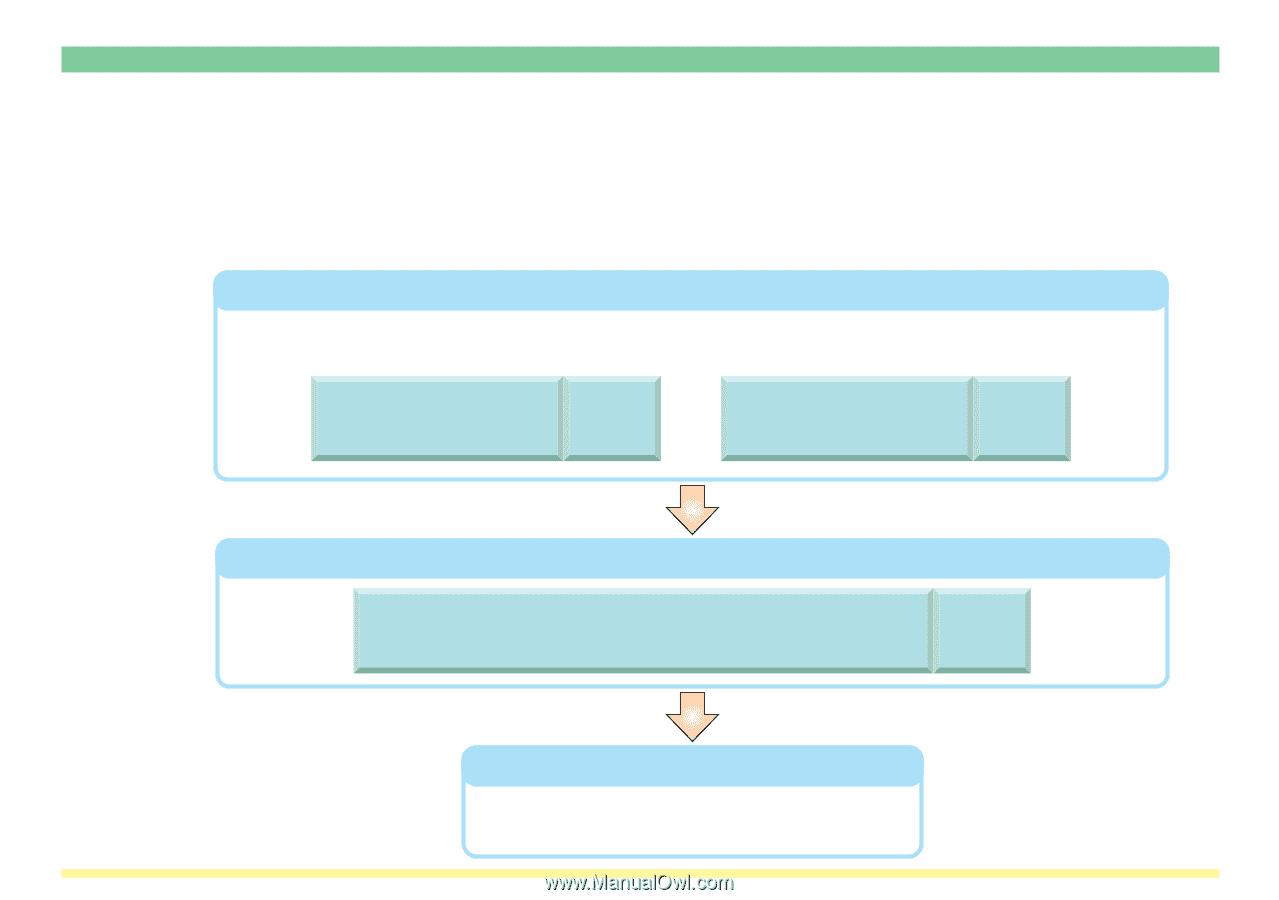
Making basic settings
In order to search for information in an LDAP server, it is necessary to perform the appropriate settings
for the included LDAP Converter utility.
See page
6
Settings and registration
for the LDAP Converter
Utility
See page
15
Settings and registration
using the scanner's
operation panel
See page
17
Using the scanner's operation panel to access the LDAP Converter
and thereby search for an email address
* For more detailed
information on sending
scanned image data, refer
to the <Setup Edition> of
your scanner's Operation
Guide.