Kyocera KM-5530 LDAP Converter Operation Guide - Page 17
(2) <Sample setting> (when the “Extension address book” setting is turned ON) - network scanner
 |
View all Kyocera KM-5530 manuals
Add to My Manuals
Save this manual to your list of manuals |
Page 17 highlights
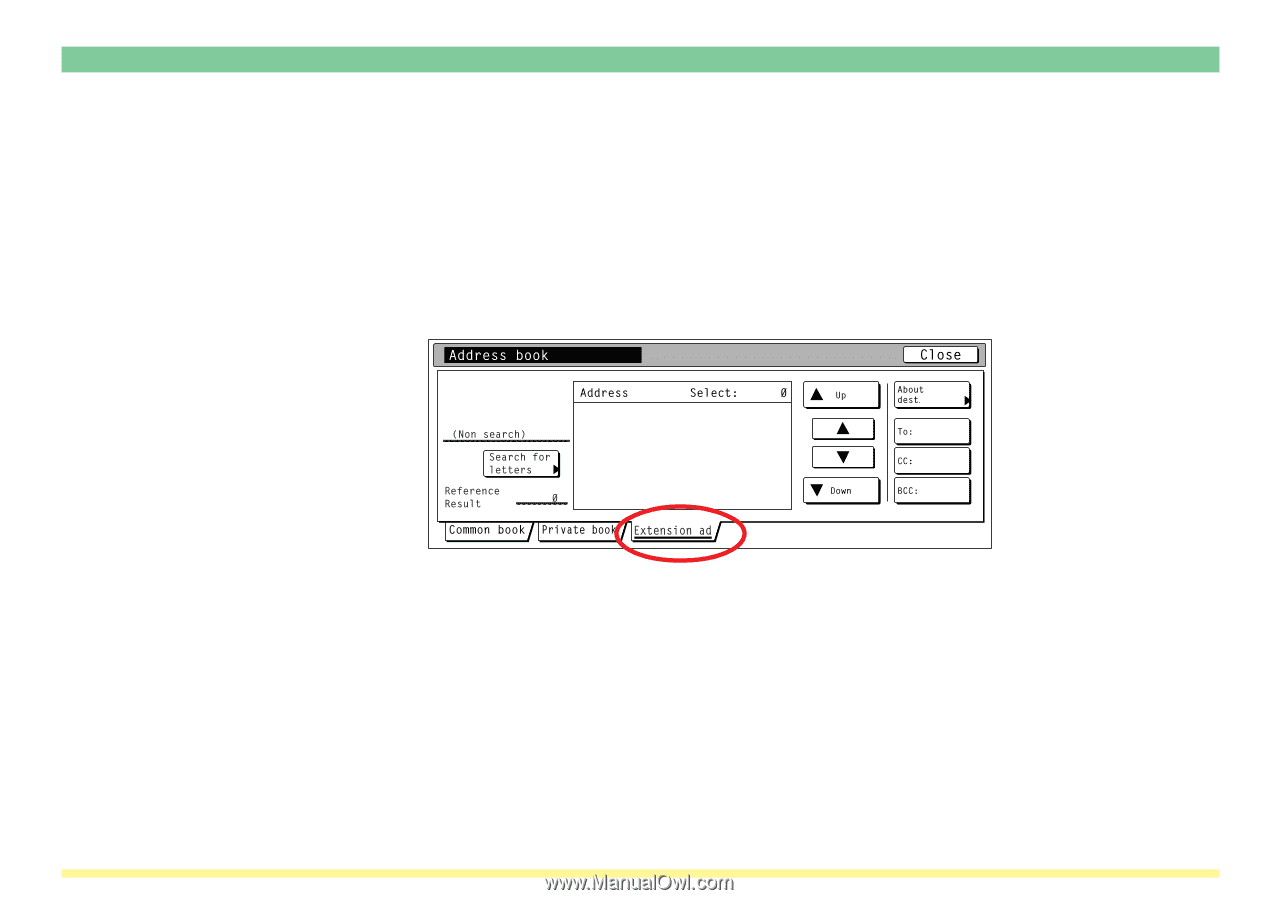
Section 2 Making Settings and Registering Data from the Scanner's Operation Panel (2) (when the "Extension address book" setting is turned ON) 1 . Select the "Address Book" under the scanner's Send E-mail function. Refer to "(3) Scanning under the Scan to PC and Send E-mail functions" on page 3-1 of the Set-Up Edition of your Operation Guide for the procedure on selecting the Address Book. 2 . Touch the "Extension ad" Tab. The "Extension address book" screen will appear. * If the "Extension address book" screen does not appear, verify that the LDAP Converter Utility is running properly and that the computer in which the LDAP Converter Utility is installed is connected properly to the network. 17
-
 1
1 -
2
-
3
-
4
-
5
-
6
-
7
-
8
-
9
-
10
-
11
-
 12
12 -
 13
13 -
 14
14 -
 15
15 -
 16
16 -
 17
17 -
 18
18 -
 19
19 -
 20
20 -
 21
21 -
 22
22 -
23
-
24
-
25
-
26
 |
 |
17
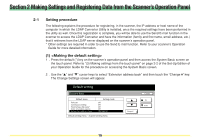
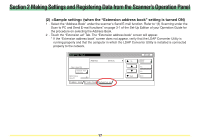
Section 2 Making Settings and Registering Data from the Scanner’s Operation Panel
(2)
<Sample setting> (when the “Extension address book” setting is turned ON)
1
. Select the “Address Book” under the scanner’s Send E-mail function. Refer to “(3) Scanning under the
Scan to PC and Send E-mail functions” on page 3-1 of the Set-Up Edition of your Operation Guide for
the procedure on selecting the Address Book.
2
.Touch the “Extension ad” Tab. The “Extension address book” screen will appear.
*
If the “Extension address book” screen does not appear, verify that the LDAP Converter Utility is
running properly and that the computer in which the LDAP Converter Utility is installed is connected
properly to the network.