LG LMU240HE Service Manual - Page 19
Preparing work for Installation Artcool Type Only
 |
View all LG LMU240HE manuals
Add to My Manuals
Save this manual to your list of manuals |
Page 19 highlights
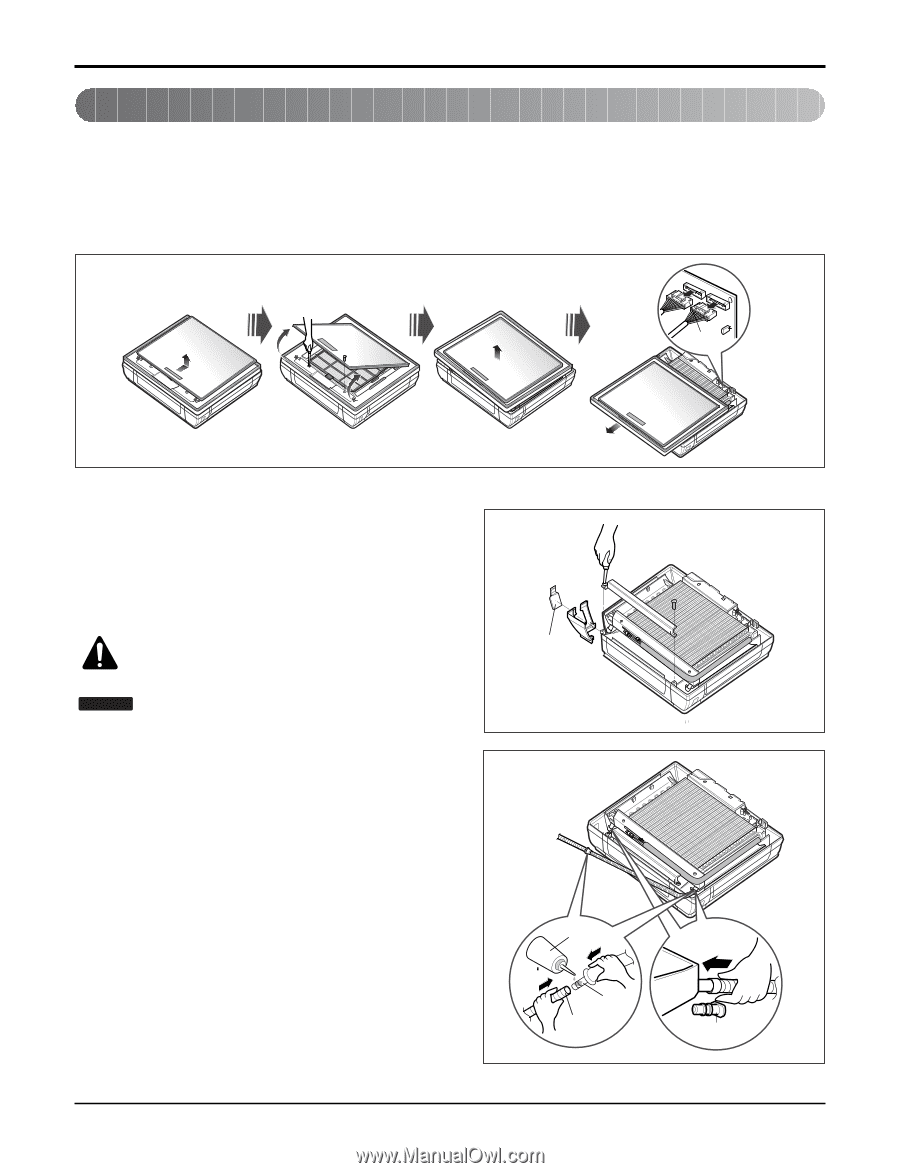
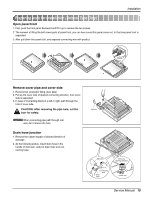
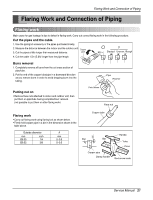
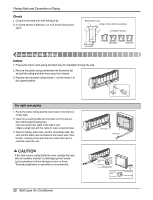
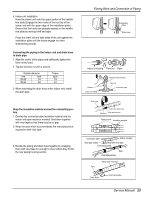
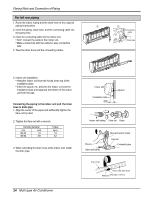
Installation Preparing work for Installation (Artcool Type Only) Open panel front 1. First, push the front panel backward and lift it up to remove the two screws. 2. The moment of lifting the both lower parts of panel front, you can hear sound this panel came out, In this time panel front is separated 3. After pull down this panel a bit, and separate connecting wire with product. Panel Front Connector Remove cover pipe and cover side 1. Remove two screws(for fixing cover pipe) 2. Pull up the cover side of desired connecting direction, then cover side is separated. 3. In case of connecting direction is left or right, path through the hole of cover side. CAUTION: After removing the pipe hole, cut the burr for safety. NOTICE When connecting pipe path through rear wall, don't remove the hole. Drain hose junction 1. Remove the rubber stopple of desired direction of drainage. 2. As the following picture, Insert drain hose in the handle of drain pan, and join drain hose and connecting hose. Pipe hole Adhesive Only one desiring direction Connecting part Drain hose rubber cap Service Manual 19
-
 1
1 -
2
-
3
-
4
-
5
-
6
-
7
-
8
-
9
-
10
-
11
-
12
-
13
-
 14
14 -
 15
15 -
 16
16 -
 17
17 -
 18
18 -
 19
19 -
 20
20 -
 21
21 -
 22
22 -
 23
23 -
 24
24 -
25
-
26
-
27
-
28
-
29
-
30
-
31
-
32
-
33
-
34
-
35
-
36
-
37
-
38
-
39
-
40
-
41
-
42
-
43
-
44
-
45
-
46
-
47
-
48
-
49
-
50
-
51
-
52
-
53
-
54
-
55
-
56
-
57
-
58
-
59
-
60
-
61
-
62
-
63
-
64
-
65
-
66
-
67
-
68
-
69
-
70
-
71
-
72
-
73
-
74
-
75
-
76
-
77
-
78
-
79
-
80
-
81
-
82
-
83
-
84
-
85
-
86
 |
 |