LG LSC121PMA Service Manual - Page 38
Re-air purging
 |
View all LG LSC121PMA manuals
Add to My Manuals
Save this manual to your list of manuals |
Page 38 highlights
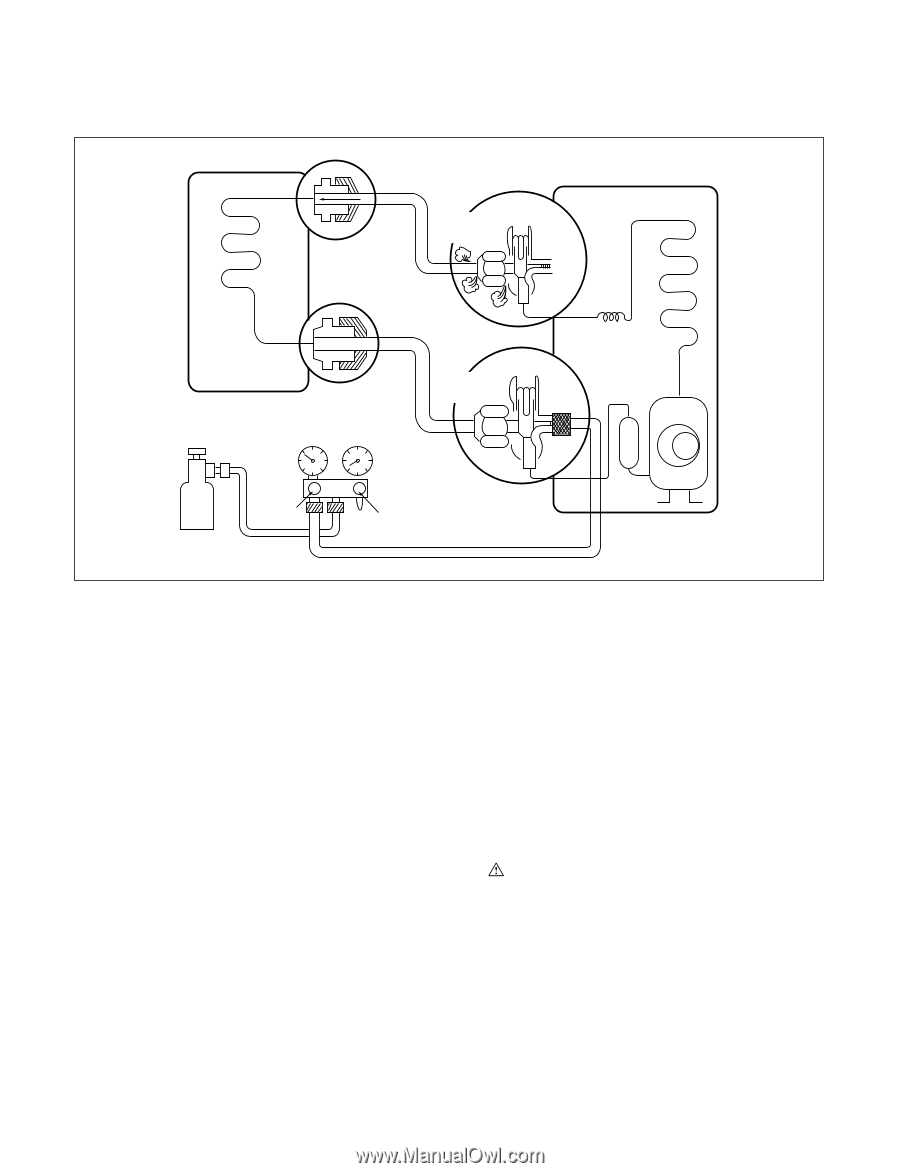
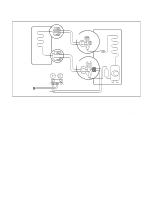
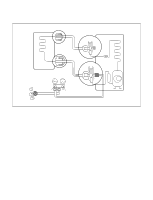
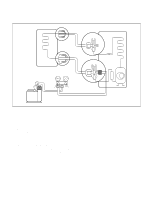
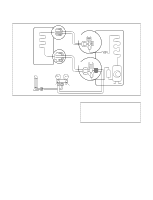
1) Re-air purging (Re-installation) Indoor unit Liquid side Closed 2-Way valve Outdoor unit Gas cylinder Gas side Closed 3-Way valve Lo R22 OPEN CLOSE • Procedure (1) Confirm that both the 2-way valve and the 3way valve are set to the closed position. (2) Connect the charge set and a gas cylinder to the service port of the 3-way valve. - Leave the valve on the gas cylinder closed. (3) Air purging. - Open the valves on the gas cylinder and the charge set. Purge the air by loosening the flare nut on the 2-way valve approximately 45° for 3 seconds then closing it for 1 minute; repeat 3 times. - After purging the air, use a torque wrench to tighten the flare nut on the 2-way valve. (4) Check for gas leakage. - Check the flare connections for gas leakage. (5) Discharge the refrigerant. - Close the valve on the gas cylinder and discharge the refrigerant until the gauge indicates 3 to 5 kg/cm2g. (6) Disconnect the charge set and the gas cylinder, and set the 2-way and 3-way valves to the open position. - Be sure to use a hexagonal wrench to operate the valve stems. (7) Mount the valve stem nuts and the service port nut. - Use torque wrench to tighten the service port nut to a torque of 1.8 kg.m. - Be sure to check for gas leakage. * CAUTION: Do not leak the gas in the air during Air Purging. -38-
-
 1
1 -
2
-
3
-
4
-
5
-
6
-
7
-
8
-
9
-
10
-
11
-
12
-
13
-
14
-
15
-
16
-
17
-
18
-
19
-
20
-
21
-
22
-
23
-
24
-
25
-
26
-
27
-
28
-
29
-
30
-
31
-
32
-
 33
33 -
 34
34 -
 35
35 -
 36
36 -
 37
37 -
 38
38 -
 39
39 -
 40
40 -
 41
41 -
 42
42 -
 43
43 -
44
-
45
-
46
-
47
-
48
-
49
-
50
-
51
-
52
-
53
-
54
-
55
-
56
-
57
-
58
-
59
-
60
-
61
-
62
-
63
 |
 |