Lenovo ThinkPad 380ED TP 380, Aptiva - Real Estate Solution - Setup and Tips G - Page 7
Setting Up Your Aptiva System
 |
View all Lenovo ThinkPad 380ED manuals
Add to My Manuals
Save this manual to your list of manuals |
Page 7 highlights
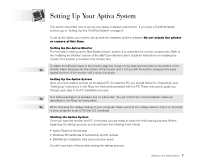
Setting Up Your Aptiva System This section describes how to set up your Aptiva computer and monitor. If you have a ThinkPad laptop solution, go to "Setting Up Your ThinkPad System" on page 8. To set up the Aptiva, you need to set up both the hardware and the software. Do not attach the printer or camera at this time. Setting Up the Aptiva Monitor The first step in setting up the Real Estate Solution system is to assemble the monitor components. Refer to the "Installing the Monitor" section of the IBM Color Monitor User's Guide for instructions on installing the monitor. This booklet is located in the monitor box. To attach the tilt/swivel base to the monitor, align the hooks on the base with the slots on the bottom of the Tip monitor. Press the base into the bottom of the monitor until it is flush with the bottom and push the base toward the front of the monitor until it clicks into place. Setting Up the Aptiva System Next, you must unpack and set up the Aptiva PC. To install the PC, you should follow the "Unpacking" and "Setting Up" instructions in the Read me first booklet provided with the PC. These instructions guide you through each step in the PC installation process. Tip Your Aptiva package has speakers, but no subwoofer. You will not find tan-colored adapter cables as described in the Read me first booklet. Tip When checking the voltage setting on your computer, make sure that the voltage selector switch on the back of your computer is set to 115 (the U.S. standard). Starting the Aptiva System Once you have the monitor and PC connected, you are ready to begin the initial startup process. Before beginning the startup process, you should have the following items handy: • Aptiva Read me first booklet • Windows 95 Certificate of Authenticity and ID number • IBM Monitor Installation Disk and instruction sheet You will need each of these items during the startup process. Setting up Your Aptiva System 7
-
 1
1 -
 2
2 -
 3
3 -
 4
4 -
 5
5 -
 6
6 -
 7
7 -
 8
8 -
 9
9 -
 10
10 -
 11
11 -
 12
12 -
13
-
14
-
15
-
16
-
17
-
18
-
19
-
20
 |
 |