Lenovo ThinkPad 380ED TP 380, Aptiva - Real Estate Solution - Setup and Tips G - Page 8
Aptiva Adventure Starts Here icon on your desktop. Double-click this icon. On the next panel, click
 |
View all Lenovo ThinkPad 380ED manuals
Add to My Manuals
Save this manual to your list of manuals |
Page 8 highlights
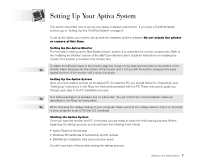
Follow the "Getting Started" instructions in the Read me first booklet to power on the monitor and system. When you power on the system and monitor, the PC begins a series of steps to start up the machine. Several times during the startup process, you are prompted to enter information or select actions appropriate for your setup such as the language and keyboard layout (the standard choice is United States 101) for your system, the Windows 95 Certificate of Authenticity ID number, and a user ID and password. Follow the instructions on the screen. Some options, such as the mouse tutorial and the IBM and Lotus product registration, can be performed when you start up the system or at a later time. You might choose to postpone these options to speed up the initial setup. Tip The product ID number is located on the Windows 95 Certificate of Authenticity. Keep this in a safe place. You will need this number if you experience problems with your computer. When Windows 95 displays the Add Printer wizard, select the Cancel button to cancel the process. (The Add Tip Printer wizard might appear several times.) You will be provided with a simpler method to complete the printer setup later in this document. Once you have started the system and have completed the Windows 95 setup, you should find the "Your Aptiva Adventure Starts Here" icon on your desktop. Double-click this icon. On the next panel, click the Home, Office, or School button. Then, click the Now button. This step installs IBM Antivirus software, helpful settings, and runs the Aptiva Welcome Multimedia demonstration. You can press the Esc key to exit the demonstration at any time. Tip To speed up processing, turn off the animated icons. To do so, select Start, Settings, Control Panel, Aptiva Desktop Customization, and remove the check mark for Animated Icons. Then, click OK. Finally, insert the Monitor Installation Disk (in the monitor package) and follow the instruction sheet provided with the diskette. This diskette will set up your system with the latest color-matching technology, which allows programs to provide color consistency among monitors, scanners, and printers. Now continue with "Setting Up the Printer" on page 11 of this document. 8 Setting up Your Aptiva System
-
 1
1 -
2
-
 3
3 -
 4
4 -
 5
5 -
 6
6 -
 7
7 -
 8
8 -
 9
9 -
 10
10 -
 11
11 -
 12
12 -
 13
13 -
14
-
15
-
16
-
17
-
18
-
19
-
20
 |
 |