Lexmark 1200 Setup Guide
Lexmark 1200 - Optra Color LED Printer Manual
 |
UPC - 734646167000
View all Lexmark 1200 manuals
Add to My Manuals
Save this manual to your list of manuals |
Lexmark 1200 manual content summary:
- Lexmark 1200 | Setup Guide - Page 1
Optra Color 1200 Setup Guide - Lexmark 1200 | Setup Guide - Page 2
Eire, send to Lexmark International Ltd., Marketing and Services Department, Westhorpe House, Westhorpe, Marlow Bucks SL7 3RQ. Lexmark may use or countries, contact your point of purchase. Lexmark, MarkNet, MarkVision, and Optra are trademarks of Lexmark International, Inc., registered in the United - Lexmark 1200 | Setup Guide - Page 3
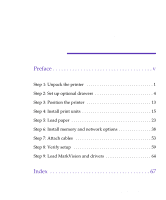
1 Step 2: Set up optional drawers 4 Step 3: Position the printer 13 Step 4: Install print units 15 Step 5: Load paper 23 Step 6: Install memory and network options 38 Step 7: Attach cables 53 Step 8: Verify setup 59 Step 9: Load MarkVision and drivers 64 Index 67 Table of contents iii - Lexmark 1200 | Setup Guide - Page 4
iv Table of contents - Lexmark 1200 | Setup Guide - Page 5
your new Optra Color 1200 printer. It complements the wordless setup poster, which provides a quick overview of the steps necessary for basic printer setup. This manual, by contrast, provides detailed instructions for installing the four colored print units, installing options, loading paper in the - Lexmark 1200 | Setup Guide - Page 6
appears on the operator panel display, you must install a new black toner cartridge before you can resume printing. • Notes, warnings, and cautions appear in the left column for easy reference. • Optional steps you may want to skip are identified in a colored arrow at the bottom of selected pages - Lexmark 1200 | Setup Guide - Page 7
Lexmark phone number for your country. Save the carton and packing materials in case you need to repack the printer. - Setup Guide, User's Guide, and Quick Reference - Box containing print units - Rear output bin - CD - Power cord - Extended paper support and hooks - Printer Printer Unpack - Lexmark 1200 | Setup Guide - Page 8
Toner cartridge Photoconductor The print unit box includes: • 4 color-coded toner cartridges • 4 color-coded photoconductors 2 Unpack the printer - Lexmark 1200 | Setup Guide - Page 9
2 Remove any visible tape or other packing material from the printer. If you purchased an optional drawer, continue with Step 2: "Set up optional drawers" on page 4. Otherwise, skip to Step 3: "Position the printer" on page 13. Unpack the printer 3 - Lexmark 1200 | Setup Guide - Page 10
Step 2: Set up optional drawers Your printer supports up to two optional 250-sheet drawers. If you are installing only one optional drawer, go to "Connecting the printer to the drawer" on page 8. If you are installing two drawers, complete the steps in the following section. Connecting two drawers - Lexmark 1200 | Setup Guide - Page 11
4 Remove the connector cover from the back of the other drawer. 5 Set this drawer directly on top of the first, as shown. Set up optional drawers 5 - Lexmark 1200 | Setup Guide - Page 12
6 Plug the option cable from the lower drawer into the connector on the upper drawer. 7 Reattach the connector cover on the upper drawer. 6 Set up optional drawers - Lexmark 1200 | Setup Guide - Page 13
8 Locate the lock switch on the left side of the lower drawer. 9 Push the lock switch toward the back of the drawer to lock the options together. 10 Continue with "Connecting the printer to the drawer" on page 8. Set up optional drawers 7 - Lexmark 1200 | Setup Guide - Page 14
. 2 Place the drawer (or the two drawers you already connected) in the location you have chosen for your printer. See page 14 for more information about the appropriate environment for the printer. 3 Make sure the lock switch on the left side of the drawer is unlocked. 4 Remove the connector cover - Lexmark 1200 | Setup Guide - Page 15
Caution! This printer weighs 43 kg (95 lb) and requires at least two people to lift. 6 Have someone help you lift the printer. Use the handholds under the printer. Set up optional drawers 9 - Lexmark 1200 | Setup Guide - Page 16
7 Carefully place the printer on top of the drawer(s), as shown. 8 Plug the option cable from the drawer into the connector on the back of the printer. 10 Set up optional drawers - Lexmark 1200 | Setup Guide - Page 17
9 Reattach the connector cover on the back of the printer. 10 Locate the lock switch on the left side of the drawer. 11 Push the lock switch toward the back of the drawer to lock the drawer to the printer. Set up optional drawers 11 - Lexmark 1200 | Setup Guide - Page 18
12 Attach the appropriate label to the front of each tray. The standard tray is tray 1. The optional trays are tray 2 and tray 3, consecutively. Instructions for loading paper in the trays begin on page 23. Skip to Step 4: "Install print units" on page 15. 12 Set up optional drawers - Lexmark 1200 | Setup Guide - Page 19
Step 3: Position the printer Caution! This printer weighs 43 kg (95 Ib) and requires at least two people to lift. 1 Have someone help you lift the printer. Use the handholds under the printer. Position the printer 13 - Lexmark 1200 | Setup Guide - Page 20
3 Find a convenient location for the Quick Refer- ence: a Locate a visible spot in the vicinity of the printer or on the printer itself for the Quick Reference. b Remove the protective paper from the back of the plastic sleeve. c Firmly attach the adhesive-backed sleeve to the designated area. 14 - Lexmark 1200 | Setup Guide - Page 21
print units Your printer ships with four color-coded toner cartridges and four photoconductors. Together, the toner cartridge and photoconductor create a color-specific print unit. Complete the following steps to install each of the photoconductors into the appropriate toner cartridge: 1 Open the - Lexmark 1200 | Setup Guide - Page 22
5 Remove the photoconductor with the same color label as the toner cartridge from the packing material. To avoid damaging the photoconductor, do not touch the glossy green surface of the drum. Do not expose the photoconductor to light for more than 10 minutes. If you need more time to assemble - Lexmark 1200 | Setup Guide - Page 23
7 Slide the metal post on the right side of the photo- conductor into the hole in the toner cartridge. 8 Insert the post on the opposite end of the photo- conductor into the slot on the left side of the toner cartridge. Install print units 17 - Lexmark 1200 | Setup Guide - Page 24
9 Rotate the green clip on the left end of the toner cartridge, as shown, to lock the photoconductor in place. If the clip does not lock easily, make sure the photoconductor is properly positioned, and then try again. 10 Repeat steps 1-9 for the remaining three print units. 18 Install print units - Lexmark 1200 | Setup Guide - Page 25
them in the printer. Each color print unit has its appropriate color-coded position in the printer. Complete the black. 1 Press the release button on the printer's top cover. 2 Raise the cover. Do not touch the LEDs inside the top cover or the LEDs transport belt in the bottom of the printer - Lexmark 1200 | Setup Guide - Page 26
. This opens the protective cover over the photoconductor drum. If the tab accidentally releases as you install printer, or you may damage the photoconductor. If the print unit does not slide easily into place, make sure the green tab is pressed in. 5 Slide the print unit into the appropriate color - Lexmark 1200 | Setup Guide - Page 27
6 Press the print unit until it is completely seated. 7 Repeat steps 3-6 to install the remaining print units. 8 After you have installed all four print units, gently close the top cover until it clicks in place. If the cover does not close easily, make sure each print unit is installed correctly. - Lexmark 1200 | Setup Guide - Page 28
9 Close the rear cover. 22 Install print units - Lexmark 1200 | Setup Guide - Page 29
the types of media your printer supports, refer to the User's Guide. Note: If you load transparen- cies in tray 1, make sure you change the Paper Type setting for that tray. See page 61 for more information. If you attached an optional drawer or drawers, the instructions are the same for loading - Lexmark 1200 | Setup Guide - Page 30
slide it to the appropriate position for the size paper you are loading. The position of the rear paper guide tells the printer the size of the paper in the tray. If the rear paper guide is in the wrong position, you may experience paper feeding problems or incorrect formatting of pages. If you are - Lexmark 1200 | Setup Guide - Page 31
place the top of the page at the front of the tray. The printer recognizes either B4 and A3 size paper or legal and 11x17 size paper, depending on the paper conventions in your geographic region. If you need to change this printer setting, refer to the information on the Size Detection menu item in - Lexmark 1200 | Setup Guide - Page 32
5 Squeeze the right paper guide and slide both width guides until they just touch the paper. 6 Hold the paper tray with both hands and firmly slide it all the way into the printer. 26 Load paper - Lexmark 1200 | Setup Guide - Page 33
Paper stop 7 If you're printing on large paper, raise the paper stop in the top output bin to neatly stack the sheets as they exit the printer. Load paper 27 - Lexmark 1200 | Setup Guide - Page 34
You can also use the multipurpose feeder for manually feeding single sheets of media. Refer to the User's Guide for more details about printing transparencies and envelopes and general media support for the multipurpose feeder. To load paper in the multipurpose feeder: 1 Firmly press the indentation - Lexmark 1200 | Setup Guide - Page 35
2 If you plan to print on longer paper (for example, A3 or 11x17), insert the extended paper support shipped with the printer. The extended paper support may not be necessary for smaller paper sizes. See page 35 for recommended storage of the extended paper support when not in use. a Hold the metal - Lexmark 1200 | Setup Guide - Page 36
3 Flip open the standard paper support. 4 Before loading media, flex the sheets back and forth to loosen them, then fan them. Straighten the edges on a level surface. If a new stack of media, press the bottom of the feeder until it clicks into the loading position before loading media. 30 Load paper - Lexmark 1200 | Setup Guide - Page 37
sheets face up, as shown, and then slide the right and left paper guides until they just touch the stack. The orientation of the media in the Position A4, A5, B5, and letter size media so the long edge enters the printer first. If you're loading preprinted letterhead, place the top of the page to - Lexmark 1200 | Setup Guide - Page 38
Envelopes - Load envelopes flap-down, short-edge first, as shown. Do not load stamped envelopes. 6 Press the green release lever to the left to position the media for printing. Refer to the User's Guide for more information about printing from the multipurpose feeder. 32 Load paper - Lexmark 1200 | Setup Guide - Page 39
Closing the multipurpose feeder To close the multipurpose feeder after you have finished printing: 1 Press the bottom of the feeder until it clicks. 2 Slide the paper guides all the way out. Load paper 33 - Lexmark 1200 | Setup Guide - Page 40
3 Fold in the standard paper support. 4 Remove the extended paper support, if installed. a Rotate the support to a near vertical position. b Pull the support out of the multipurpose feeder. 34 Load paper - Lexmark 1200 | Setup Guide - Page 41
feeder. 6 Store the extended paper support. a Attach the adhesive backed hooks shipped with the printer to the right side of the printer, as shown. b Hang the extended paper support on the hooks when the multipurpose feeder is not in use. Make sure the tips of the support wrap around the back of - Lexmark 1200 | Setup Guide - Page 42
. This creates a straight paper path for the media and prevents curling. If you attach the rear output bin, you must remove it to access the printer system board or connect cables to the back of the printer. To install the rear output bin: 1 Remove the bin from the packing materials. 2 Locate the - Lexmark 1200 | Setup Guide - Page 43
4 Hold the bin flush against the back of the printer. 5 Press the bin straight down, so the slots in the bin slide firmly over the posts. If you purchased memory or disk with Step 6: "Install memory and network options" on page 38. Otherwise, skip to Step 7: "Attach cables" on page 53. Load paper 37 - Lexmark 1200 | Setup Guide - Page 44
disk, network adapter, tri-port adapter, or parallel port adapter. Instructions for reinstalling the system board begin on page 52. To remove the system board: 1 If you are installing options after initial printer setup, make sure the printer power is off and the power cord is unplugged. 38 Install - Lexmark 1200 | Setup Guide - Page 45
up and remove it from the printer. 3 Disconnect all cables from the back of the printer. If you installed an optional drawer, you do not need to unplug the option cable. 4 Loosen the six thumbscrews on the system board faceplate at the back of the printer. Install memory and network options 39 - Lexmark 1200 | Setup Guide - Page 46
5 Slide the system board completely out of the printer and place it on a level surface. 6 Turn to the appropriate section for instructions on installing your options. Installing options Option Printer memory Hard disk Network adapter Tri-port adapter Parallel port adapter See... "Installing - Lexmark 1200 | Setup Guide - Page 47
Memory options designed for other Lexmark laser printers do not work with your printer. Refer to the User's Guide for more information. Memory connectors the steps in "Removing the system board" on page 38. 2 Locate the memory connectors on the system board. The two standard memory cards are - Lexmark 1200 | Setup Guide - Page 48
pull the card out of the connector. d Place the card in its original packaging. If you did not save the packaging, wrap the card in paper and store it in a box. e Repeat steps a-d to remove the second memory card. 42 Install memory and network options - Lexmark 1200 | Setup Guide - Page 49
the connection points along the edge of the card. Save the packaging. 5 Hold the memory card with the connection points pointing toward the system board and the notch positioned as shown. Notch 6 Insert the card all the way into the leftmost open connector at a 45 degree angle. 7 Rotate the - Lexmark 1200 | Setup Guide - Page 50
have other options to install, continue with "Installing a hard disk" on page 45 or "Installing adapters" on page 48. Otherwise, go to "Reinstalling the system board" on page 52. 44 Install memory and network options - Lexmark 1200 | Setup Guide - Page 51
alone that you can use to install any other Lexmark or third-party hard disk meeting the following criteria cable for a separate hard disk, follow these instructions to attach the cable to the disk. If screws for securing the hard disk to the system board. Stripe 1 Locate the 47-hole connector on - Lexmark 1200 | Setup Guide - Page 52
the disk Disk bracket You need a Phillips screwdriver to install the disk. 1 Complete the steps in "Removing the system board" on page 38. 2 Locate the disk bracket underneath the system board. 3 Hold the hard disk so the ribbon cable extends upward. 4 Slide the disk all the way into the bracket - Lexmark 1200 | Setup Guide - Page 53
6 Connect the ribbon cable to the connector on top of the system board. If you have trouble connecting the cable, make sure all four screws are securely attached to the back of the disk. 7 If you have other options to install, continue - Lexmark 1200 | Setup Guide - Page 54
1284C connector requires a 1284 A-C cable. You can purchase a 3 m (9.8 ft) cable meeting these specifications from Lexmark. Refer to the documentation that came with your adapter for more information. Note: Depending on your printer model, you may already have an Ethernet INA installed in connector - Lexmark 1200 | Setup Guide - Page 55
you touch an adapter. 1 Complete the steps in "Removing the system board" on page 38. 2 Complete the following steps if you need to remove pull the adapter completely out of the system board connector. c Angle the adapter away from the system board. d Place the adapter in its original packaging - Lexmark 1200 | Setup Guide - Page 56
designed for that purpose. Covering the opening ensures proper airflow around the system board. If you do not have a metal plate, contact your service representative and request a blank cover for the controller cage. 3 Before installing an adapter, remove the metal plate covering the opening for - Lexmark 1200 | Setup Guide - Page 57
6 Align the adapter connector with the connector on the system board. 7 Push the adapter firmly into the system board con- nector until it is completely seated. The two connectors should fit snugly together. 8 Insert the two screws saved from the metal plate (or the - Lexmark 1200 | Setup Guide - Page 58
the connector on the back of the system board inserts completely into the connector at the back of the printer opening. 5 Securely tighten the six thumbscrews on the sys- tem board faceplate. 6 If necessary, reattach the rear output bin. If you have trouble installing the bin, make sure the screws - Lexmark 1200 | Setup Guide - Page 59
). If you use something other than an IEEE-compliant cable, you may not be able to access all of your printer's functions. If you're attaching a serial cable, we recommend Lexmark part number 1038693 (50 ft). Attach the cable to the serial connector on the optional tri-port adapter you installed in - Lexmark 1200 | Setup Guide - Page 60
. 2 If the rear output bin is attached to the back of the printer, lift it straight up and remove it from the printer. Optional parallel, serial, or network connectors Standard parallel connector 3 At the back of the printer, locate the parallel, serial, or network cable connector. One parallel - Lexmark 1200 | Setup Guide - Page 61
receive faxes. Faxes received print in black only. You cannot send faxes from your printer. To set up the serial port to receive faxes: 1 Make sure the printer power is off and the power cord is unplugged. 2 Turn the modem power off. 3 Follow the instructions included with the modem to connect the - Lexmark 1200 | Setup Guide - Page 62
example, if you installed a tri-port adapter in connector 2, look for Ser Option 2. f Press Select. The printer resets. You are now ready to receive faxes. Refer to the printer User's Guide for information about changing the fax communication settings, such as baud and parity. Note: Do not attempt - Lexmark 1200 | Setup Guide - Page 63
from a computer equipped with an infrared port. The optional tri-port adapter, which includes an infrared port, lets you connect the infrared adapter to your printer. After you have installed the tri-port adapter, follow the steps below to connect the infrared adapter to your - Lexmark 1200 | Setup Guide - Page 64
5 Draw an imaginary line between the infrared port on the computer and the infrared port on the front of the adapter. Refer to the documentation that came with your computer for information about your computer's infrared port. 6 Aim the infrared port on your computer within 15 degrees of either side - Lexmark 1200 | Setup Guide - Page 65
to the User's Guide. 1 Make sure the printer is turned off (O). 2 Plug one end of the power cord into the connector at the back of the printer and the other end into a properly grounded electrical outlet. Power switch 3 Turn the printer on ( | ). Installing new photoconductors adds to the warmup - Lexmark 1200 | Setup Guide - Page 66
time. Both messages indicate that the printer is ready to receive print jobs. Refer to the User's Guide for more information about modifying the , make sure the selected paper source holds A4, letter, or legal size paper and the Paper Type setting for the source is Plain Paper. 3 Press the Select - Lexmark 1200 | Setup Guide - Page 67
printer's automatic source selection capability, as well as the tray linking function. For these reasons, it's important to change the setting each time you change the media in the tray or feeder. Refer to the User's Guide for more detailed information about the paper types supported by each paper - Lexmark 1200 | Setup Guide - Page 68
If you need to change a Paper Type setting: 1 From the printer operator panel, press the Menu> or until PAPER TYPE appears on the second - Lexmark 1200 | Setup Guide - Page 69
Printing an adapter setup page If you installed a network adapter and want detailed information about the option and the active protocols, follow the instructions below to print the adapter setup page: 1 From the operator panel, press Menu> or - Lexmark 1200 | Setup Guide - Page 70
the User's Guide for more information about getting updated drivers. To support all the printer's features, install the custom Lexmark drivers on your system. If you use drivers designed for printers other than the Optra Color 1200, you may not be able to control all of the printer's functions. For - Lexmark 1200 | Setup Guide - Page 71
to the CD Readme for the latest information about the contents of the CD. Congratulations! You have successfully set up your Optra Color 1200 printer. Refer to the User's Guide for complete information about all of the unique features of your Lexmark color printer. Load MarkVision and drivers 65 - Lexmark 1200 | Setup Guide - Page 72
66 Load MarkVision and drivers - Lexmark 1200 | Setup Guide - Page 73
64 online documentation 65 conventions used in manual v Index D disk attaching an adapter ribbon cable 45 available options 45 installing 45, 46 requirements 45 DOS support 64 drawers See optional drawers drivers 64 E Ethernet support 48 extended paper support inserting 29 removing 34 storing 35 - Lexmark 1200 | Setup Guide - Page 74
photoconductor 15 print unit 19 toner cartridge 17 tri-port adapter 48 L labels, optional drawers 12 language, changing CD program 65 letterhead loading 25, 31 loading paper letterhead 25, 31 multipurpose feeder 28 trays 23 LocalTalk support 48 M Macintosh support the printer 8 - Lexmark 1200 | Setup Guide - Page 75
28 loading trays 23 size sensing 24 paper stop 27 Paper Type settings 61 parallel port adapter installing 48 removing 49 photoconductor installing 15 Power Saver message 60 print unit assembling 15 installing 19 printer clearance requirements 14 drivers 64 placement 13 unpacking 1 weight (without - Lexmark 1200 | Setup Guide - Page 76
W warnings vi Windows support 64 70 Index - Lexmark 1200 | Setup Guide - Page 77
Optra Color 1200 Setup Guide Part Number 11F0812 3/98 Reader's Comment Form You may use this form to communicate your comments about this publication, with the understanding that Lexmark your job title? Questions or comments about supplies, service, applications, and so on will slow response time - Lexmark 1200 | Setup Guide - Page 78
NECESSARY IF MAILED IN THE UNITED STATES BUSINESS REPLY MAIL FIRST CLASS MAIL PERMIT NO. 2659 LEXINGTON KY POSTAGE WILL BE PAID BY ADDRESSEE Lexmark International, Inc. Department F95, Building 035-3 740 NEW CIRCLE ROAD NW LEXINGTON KY 40511-9954 Fold Here Tape Please Do Not Staple Tape
-
 1
1 -
 2
2 -
 3
3 -
 4
4 -
 5
5 -
 6
6 -
 7
7 -
8
-
9
-
10
-
11
-
12
-
13
-
14
-
15
-
16
-
17
-
18
-
19
-
20
-
21
-
22
-
23
-
24
-
25
-
26
-
27
-
28
-
29
-
30
-
31
-
32
-
33
-
34
-
35
-
36
-
37
-
38
-
39
-
40
-
41
-
42
-
43
-
44
-
45
-
46
-
47
-
48
-
49
-
50
-
51
-
52
-
53
-
54
-
55
-
56
-
57
-
58
-
59
-
60
-
61
-
62
-
63
-
64
-
65
-
66
-
67
-
68
-
69
-
70
-
71
-
72
-
73
-
74
-
75
-
76
-
77
-
78
 |
 |

Optra Color 1200
Setup Guide