Lexmark 1200 Setup Guide - Page 66
Printing the menu settings Printing the, menu settings
 |
UPC - 734646167000
View all Lexmark 1200 manuals
Add to My Manuals
Save this manual to your list of manuals |
Page 66 highlights
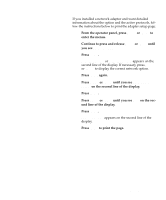
Ready Supplies Menu Select Return If Power Saver is set On (the factory default), Power Saver replaces the Ready status message after the specified period of time. Both messages indicate that the printer is ready to receive print jobs. Refer to the User's Guide for more information about modifying the Power Saver setting. If an error message is displayed, refer to the User's Guide for helpful tips. Go Stop Printing the menu settings page Complete the following steps to print the menu settings page. Refer to the User's Guide for more information about using the printer operator panel and changing settings from the menus. 1 From the printer operator panel, press the Menu> or or
-
 1
1 -
2
-
3
-
4
-
5
-
6
-
7
-
8
-
9
-
10
-
11
-
12
-
13
-
14
-
15
-
16
-
17
-
18
-
19
-
20
-
21
-
22
-
23
-
24
-
25
-
26
-
27
-
28
-
29
-
30
-
31
-
32
-
33
-
34
-
35
-
36
-
37
-
38
-
39
-
40
-
41
-
42
-
43
-
44
-
45
-
46
-
47
-
48
-
49
-
50
-
51
-
52
-
53
-
54
-
55
-
56
-
57
-
58
-
59
-
60
-
 61
61 -
 62
62 -
 63
63 -
 64
64 -
 65
65 -
 66
66 -
 67
67 -
 68
68 -
 69
69 -
 70
70 -
 71
71 -
72
-
73
-
74
-
75
-
76
-
77
-
78
 |
 |

60
Verify setup
If Power Saver is set On (the factory default),
Power Saver
replaces the
Ready
status message after
the specified period of time. Both messages indicate
that the printer is ready to receive print jobs. Refer
to the
User’s Guide
for more information about mod-
ifying the Power Saver setting.
If an error message is displayed, refer to the
User’s
Guide
for helpful tips.
Printing the
menu settings
page
Complete the following steps to print the menu settings
page. Refer to the
User’s Guide
for more information about
using the printer operator panel and changing settings
from the menus.
1
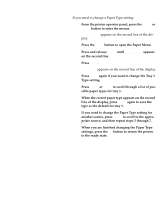
From the printer operator panel, press the
Menu>
or
<Menu
button to enter the menus.
2
Continue to press and release
Menu>
or
<Menu
until
you see
TESTS MENU
.
Note:
Before printing the
menu settings page, make sure
the selected paper source holds
A4, letter, or legal size paper
and the Paper Type setting for
the source is Plain Paper.
3
Press the
Select
button.
TESTS MENU
is then displayed on the first line, and
Print Menus
is on the second line
.
4
Press
Select
again to print the page.
The message
Printing Menu Settings
is displayed. The
printer returns to
Ready
status after the menu set-
tings page prints.
If an error message appears on the display, refer to
the
User’s Guide
for more information.
Menu
Select
Go
Return
Stop
Ready
Supplies