Lexmark 25C0010 Scan Destination and Alert Message Setup Guide - Page 11
Setting up Scan to PC on the Embedded Web Server, One Touch Button, Full Name Required
 |
UPC - 734646054492
View all Lexmark 25C0010 manuals
Add to My Manuals
Save this manual to your list of manuals |
Page 11 highlights
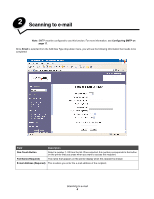
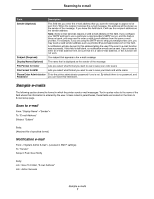
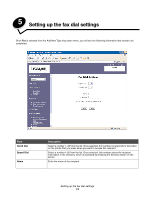
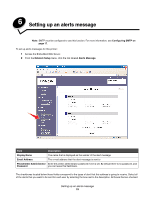
Scanning to a computer Setting up Scan to PC on the Embedded Web Server Once PC is selected from the Add New Type drop-down menu, you will see the following information that needs to be completed: Field One Touch Button Full Name (Required) Service Name (Required) User Name (Optional) Password (Optional) Description Select a number 1-20 from the list. Once selected, this number corresponds to the button on the printer that you press when you want to scan to this computer. The name that appears on the printer display when this computer is chosen The first field is where you enter the computer name or the IP address of the computer where the shared folder is located. The second field is for the share name of the shared folder on the computer. Note: Do not enter a drive letter or file path for the second field, only the share name. The location of the folder on the computer does not matter, it will be located by using the share name. If the shared resource is protected, you can enter a user name here. If the shared resource is protected, you can enter a password here. Setting up Scan to PC on the Embedded Web Server 11
-
 1
1 -
2
-
3
-
4
-
5
-
 6
6 -
 7
7 -
 8
8 -
 9
9 -
 10
10 -
 11
11 -
 12
12 -
 13
13 -
 14
14 -
 15
15 -
 16
16 -
17
-
18
 |
 |
