Lexmark 25C0010 Scan Destination and Alert Message Setup Guide - Page 4
Overview
 |
UPC - 734646054492
View all Lexmark 25C0010 manuals
Add to My Manuals
Save this manual to your list of manuals |
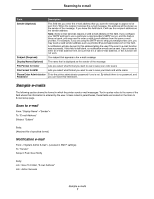
Page 4 highlights
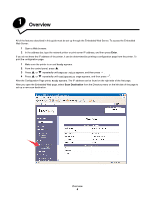
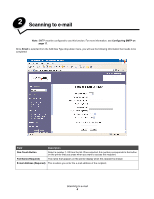
1 Overview All of the features described in this guide must be set up through the Embedded Web Server. To access the Embedded Web Server: 1 Open a Web browser. 2 In the address bar, type the network printer or print server IP address, and then press Enter. If you do not know the IP address of the printer, it can be determined by printing a configuration page from the printer. To print the configuration page: 1 Make sure the printer is on and Ready appears. 2 From the control panel, press . 3 Press or repeatedly until Reports Print appears, and then press . 4 Press or repeatedly until Configuration Page appears, and then press . After the Configuration Page prints, Ready appears. The IP address can be found on the right side of the first page. After you open the Embedded Web page, select Scan Destination from the Directory menu on the left side of the page to set up a new scan destination. Overview 4
-
 1
1 -
 2
2 -
 3
3 -
 4
4 -
 5
5 -
 6
6 -
 7
7 -
 8
8 -
 9
9 -
 10
10 -
11
-
12
-
13
-
14
-
15
-
16
-
17
-
18
 |
 |
