Lexmark 4227 Lexmark 4227 Plus User's Guide - Page 40
Menu Options
 |
UPC - 734646117104
View all Lexmark 4227 manuals
Add to My Manuals
Save this manual to your list of manuals |
Page 40 highlights
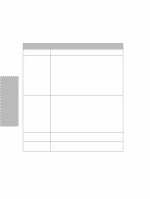
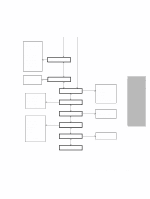
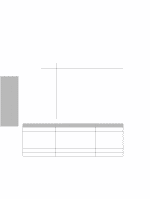
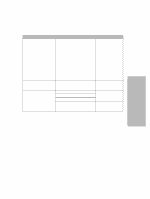
Using the Operator Panel Menu Options The following table provides information on where to find specific functions on the printer operator panel. Those selections in italics may or may not appear on the panel, depending on the printer settings or what printer options are installed. Navigating Through the Function Menus Press: Item ↑ Item ↓ Next → Prev. ← When you want to move: Up through the Main, Primary, or Secondary levels. For example, if the operator panel displays Control Options and you want Data Options, press Item ↑. Down through the Main, Primary, or Secondary levels. For example, if the operator panel displays Print Demo and you want Print Settings, press Item ↓. To the Primary or Secondary level of options. For example, if the operator panel displays Paper Hand Opt. and you want to select Auto Tear-off, press Next →. Back to a Main or Primary level of options. For example, if you have selected Auto Tear-off and want to return to Paper Hand Opt., press Prev. ←. Main Menu Primary Options Set Top of Form - Select Tractor • Tractor 1 Allows you to specify which • Tractor 2 tractor you would like to use. Does not appear unless the Tractor 2 Option is installed. Print Demo - Print Settings - Secondary Options - - - - 34 Chapter 3: Using the Operator Panel
-
 1
1 -
2
-
3
-
4
-
5
-
6
-
7
-
8
-
9
-
10
-
11
-
12
-
13
-
14
-
15
-
16
-
17
-
18
-
19
-
20
-
21
-
22
-
23
-
24
-
25
-
26
-
27
-
28
-
29
-
30
-
31
-
32
-
33
-
34
-
 35
35 -
 36
36 -
 37
37 -
 38
38 -
 39
39 -
 40
40 -
 41
41 -
 42
42 -
 43
43 -
 44
44 -
 45
45 -
46
-
47
-
48
-
49
-
50
-
51
-
52
-
53
-
54
-
55
-
56
-
57
-
58
-
59
-
60
-
61
-
62
-
63
-
64
-
65
-
66
-
67
-
68
-
69
-
70
-
71
-
72
-
73
-
74
-
75
-
76
-
77
-
78
-
79
-
80
-
81
-
82
-
83
-
84
-
85
-
86
-
87
-
88
-
89
-
90
-
91
-
92
-
93
-
94
-
95
-
96
-
97
-
98
-
99
-
100
-
101
-
102
-
103
-
104
-
105
-
106
-
107
-
108
-
109
-
110
-
111
-
112
-
113
-
114
-
115
-
116
-
117
-
118
-
119
-
120
-
121
-
122
-
123
-
124
-
125
-
126
-
127
-
128
-
129
-
130
-
131
-
132
-
133
-
134
-
135
-
136
-
137
-
138
 |
 |
