Lexmark E120 User's Guide - Page 22
Using the operator panels, Jam in Tray 1 / priority feeder
 |
View all Lexmark E120 manuals
Add to My Manuals
Save this manual to your list of manuals |
Page 22 highlights
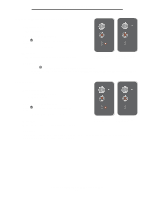
Using the operator panels Jam in Tray 1 / priority feeder Note: All jams show the same primary code. To determine the jam location, view the secondary light sequence. Light sequence: Error-Blinking Secondary light sequence: Press twice quickly to see the secondary light sequence. • Ready / Data-Blinks four times • Error-On Message: A jam has occurred in Tray 1 / priority feeder. Solution: See Clearing jams on page 53 for more information. Primary light sequence Secondary light sequence Overview of the Lexmark E120 operator panel 22

Overview of the Lexmark E120 operator panel
22
Using the operator panels
Jam in Tray 1 / priority feeder
Note:
All jams show the same primary code. To determine
the jam location, view the secondary light sequence.
Light sequence:
Error—Blinking
Secondary light sequence:
Press
twice quickly to see the secondary light sequence.
•
Ready / Data—Blinks four times
•
Error—On
Message:
A jam has occurred in Tray 1 / priority feeder.
Solution:
See
Clearing jams on page 53
for more information.
Primary light
sequence
Secondary light
sequence


