Lexmark E120 User's Guide - Page 63
From a Macintosh computer, Printing on letterhead - drivers
 |
View all Lexmark E120 manuals
Add to My Manuals
Save this manual to your list of manuals |
Page 63 highlights
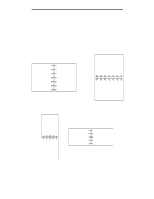
Printing tasks 4 To print a visible border around each page image, select Print page borders. 5 Click OK. 6 Click OK on the Print window to send the job to print. From a Macintosh computer 1 From the computer software application, select File Æ Print. 2 From the Copies & Pages pop-up, select Layout. 3 From the Pages per Sheet pop-up, choose the appropriate pages per sheet, layout direction, and border. 4 Click Print (if using the priority feeder, press the Continue button on the printer). Printing on letterhead To print on letterhead, make sure paper is loaded with the proper orientation. • Tray 1-Load letterhead with the design side facing up and the top (logo) edge inserted first. • priority feeder-Load letterhead with the design side facing up with the top (logo) edge inserted first.). From a Windows computer 1 Click File Æ Print. 2 Click Preferences (or Options, Printer, or Setup, depending on the application) to view printer driver settings. 3 Click the Paper tab. 4 Select Letterhead from the Paper type drop-down list. 5 Select the appropriate paper size and tray. 6 Click OK. 7 Click OK on the Print window to send the job to print. 8 Click OK. From a Macintosh computer 1 Click File Æ Print. 2 From the Copies & Pages pop-up, select Paper. 3 From the Paper type pop-up, select Letterhead. 4 Click Print. Printing on letterhead 63
-
 1
1 -
2
-
3
-
4
-
5
-
6
-
7
-
8
-
9
-
10
-
11
-
12
-
13
-
14
-
15
-
16
-
17
-
18
-
19
-
20
-
21
-
22
-
23
-
24
-
25
-
26
-
27
-
28
-
29
-
30
-
31
-
32
-
33
-
34
-
35
-
36
-
37
-
38
-
39
-
40
-
41
-
42
-
43
-
44
-
45
-
46
-
47
-
48
-
49
-
50
-
51
-
52
-
53
-
54
-
55
-
56
-
57
-
 58
58 -
 59
59 -
 60
60 -
 61
61 -
 62
62 -
 63
63 -
 64
64 -
 65
65 -
 66
66 -
 67
67 -
 68
68 -
69
-
70
-
71
-
72
-
73
-
74
-
75
-
76
-
77
-
78
-
79
-
80
-
81
-
82
-
83
-
84
-
85
-
86
-
87
 |
 |
