Lexmark E120 User's Guide - Page 60
From a Macintosh computer, Continue, Setup, Format for, Paper Size, Print, Copies & s - printer manual
 |
View all Lexmark E120 manuals
Add to My Manuals
Save this manual to your list of manuals |
Page 60 highlights
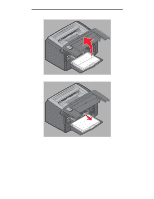
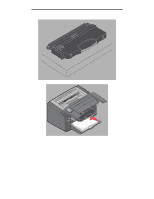
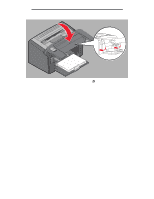
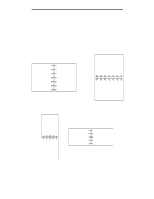
Printing tasks 10 Hold both sides of the print media close to the priority feeder and push into the printer until the media stops. Note: Do not force the print media into feeder. Forcing media causes jams. 11 Press the flashing Continue button to print the job. From a Macintosh computer 1 Click File Æ Page Setup. 2 From the Format for pop-up, choose your Printer. 3 From the Paper Size pop-up, choose your paper size. 4 Click OK. 5 From the computer software application, select File Æ Print. 6 From the Copies & Pages pop-up, choose Paper. 7 From the Paper Type pop-up, choose your paper type. 8 From the Paper pop-up, choose Paper Feed. 9 Select Manual Paper or Manual Envelope as appropriate. 10 Adjust the priority feeder guides to the width of the print media, and make sure the Tray 1 paper cover is in place. 11 Place selected print media with side to be printed facing up, at the center of the priority feeder. If you load more than one sheet, the stack should rest on the Tray 1 paper cover. • Hold transparencies by the edges, and avoid touching the print side. Oil from fingers can affect print quality. • Insert envelopes with the flap side down and return address first. The stamp area will feed through last. • Load letterhead face up, top of sheet first. Hold both sides of the print media close to the priority feeder and push into the printer until the media stops. 12 Press Print. Printing from the priority feeder 60
-
 1
1 -
2
-
3
-
4
-
5
-
6
-
7
-
8
-
9
-
10
-
11
-
12
-
13
-
14
-
15
-
16
-
17
-
18
-
19
-
20
-
21
-
22
-
23
-
24
-
25
-
26
-
27
-
28
-
29
-
30
-
31
-
32
-
33
-
34
-
35
-
36
-
37
-
38
-
39
-
40
-
41
-
42
-
43
-
44
-
45
-
46
-
47
-
48
-
49
-
50
-
51
-
52
-
53
-
54
-
 55
55 -
 56
56 -
 57
57 -
 58
58 -
 59
59 -
 60
60 -
 61
61 -
 62
62 -
 63
63 -
 64
64 -
 65
65 -
66
-
67
-
68
-
69
-
70
-
71
-
72
-
73
-
74
-
75
-
76
-
77
-
78
-
79
-
80
-
81
-
82
-
83
-
84
-
85
-
86
-
87
 |
 |
