Lexmark Interpret S402 User's Guide - Page 17
Address Book, Redial/Pause, Dialtone, Color/Black, Using the printer control panel buttons and menus
 |
View all Lexmark Interpret S402 manuals
Add to My Manuals
Save this manual to your list of manuals |
Page 17 highlights
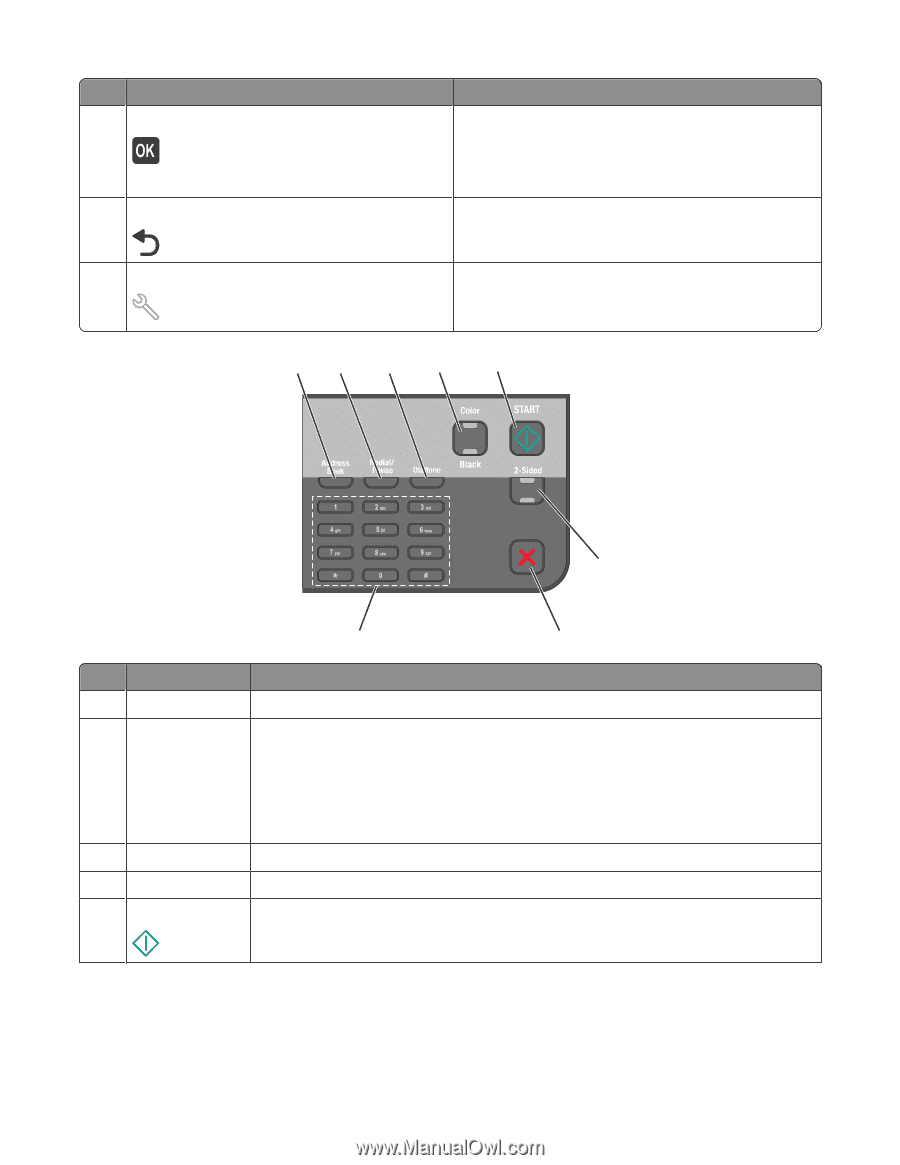
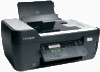
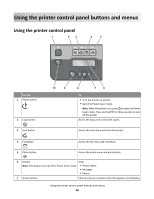
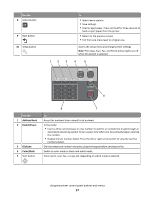
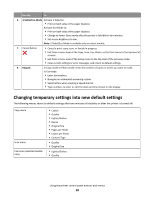
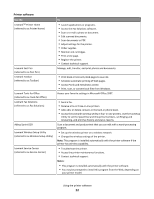
Use the 8 Select button 9 Back button 10 Setup button 12 3 To • Select menu options. • Save settings. • Feed or eject paper. Press and hold for three seconds to feed or eject paper from the printer. • Return to the previous screen. • Exit from one menu level to a higher one. Access the setup menu and change printer settings. Note: The Copy, Scan, Fax, and Photo button lights are off when this button is selected. 4 5 Eco-Mode Cancel 6 Use the 1 Address Book 2 Redial/Pause 3 Dialtone 4 Color/Black 5 Start button 8 7 To Access fax numbers from a saved list of numbers. In Fax mode: • Insert a three-second pause in a fax number to wait for an outside line or get through an automated answering system. Enter a pause only when you have already begun entering the number. • Display the last number dialed. Press the left or right arrow button to view the last five numbers dialed. Dial the telephone number manually using the keypad before sending the fax. Switch to color mode or black-and-white mode. Start a print, scan, fax, or copy job, depending on which mode is selected. Using the printer control panel buttons and menus 17
-
 1
1 -
2
-
3
-
4
-
5
-
6
-
7
-
8
-
9
-
10
-
11
-
 12
12 -
 13
13 -
 14
14 -
 15
15 -
 16
16 -
 17
17 -
 18
18 -
 19
19 -
 20
20 -
 21
21 -
 22
22 -
23
-
24
-
25
-
26
-
27
-
28
-
29
-
30
-
31
-
32
-
33
-
34
-
35
-
36
-
37
-
38
-
39
-
40
-
41
-
42
-
43
-
44
-
45
-
46
-
47
-
48
-
49
-
50
-
51
-
52
-
53
-
54
-
55
-
56
-
57
-
58
-
59
-
60
-
61
-
62
-
63
-
64
-
65
-
66
-
67
-
68
-
69
-
70
-
71
-
72
-
73
-
74
-
75
-
76
-
77
-
78
-
79
-
80
-
81
-
82
-
83
-
84
-
85
-
86
-
87
-
88
-
89
-
90
-
91
-
92
-
93
-
94
-
95
-
96
-
97
-
98
-
99
-
100
-
101
-
102
-
103
-
104
-
105
-
106
-
107
-
108
-
109
-
110
-
111
-
112
-
113
-
114
-
115
-
116
-
117
-
118
-
119
-
120
-
121
-
122
-
123
-
124
-
125
-
126
-
127
-
128
-
129
-
130
-
131
-
132
-
133
-
134
-
135
-
136
-
137
-
138
-
139
-
140
-
141
-
142
-
143
-
144
-
145
-
146
-
147
-
148
-
149
-
150
-
151
-
152
-
153
-
154
-
155
-
156
-
157
-
158
-
159
-
160
-
161
-
162
-
163
-
164
-
165
-
166
-
167
-
168
-
169
-
170
-
171
-
172
-
173
-
174
-
175
-
176
-
177
-
178
-
179
 |
 |