Lexmark Interpret S402 User's Guide - Page 78
Creating a contact list, Creating a contact list using the printer control panel
 |
View all Lexmark Interpret S402 manuals
Add to My Manuals
Save this manual to your list of manuals |
Page 78 highlights
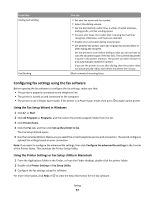
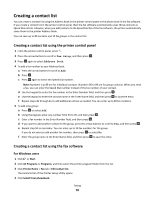
Creating a contact list You can create a contact list using the Address Book in the printer control panel or the phone book in the fax software. If you create a contact list in the printer control panel, then the fax software automatically saves those contacts as Speed Dial entries. Likewise, when you add contacts to the Speed Dial list of the fax software, the printer automatically saves them to the printer Address Book. You can save up to 89 contacts and 10 fax groups in the contact list. Creating a contact list using the printer control panel 1 From the printer control panel, press . 2 Press the arrow buttons to scroll to Fax Setup, and then press . 3 Press again to select Address Book. 4 To add a fax number to your Address Book: a Press the arrow buttons to scroll to Add. b Press . c Press again to select the Speed Dial number. Note: Numbers 1 to 89 are for individual contacts. Numbers 90 to 99 are for group contacts. When you send a fax, you can enter the Speed Dial number instead of the fax number of your contact. d Use the keypad to enter the fax number in the Enter Number field, and then press . e Use the keypad to enter the contact name in the Enter Name field, and then press to save the entry. f Repeat steps 4b through 4e to add additional entries as needed. You can enter up to 89 fax numbers. 5 To add a fax group: a Press to select Add. b Using the keypad, enter any number from 90 to 99, and then press . c Enter a fax number in the Enter Number field, and then press . d If you want to add another contact to the group, press the arrow buttons to scroll to Yes, and then press . e Repeat step 5d as necessary. You can enter up to 30 fax numbers for the group. If you do not want to add another fax number, then press to select No. f Enter the group name in the Enter Name field, and then press to save the entry. Creating a contact list using the fax software For Windows users 1 Click or Start. 2 Click All Programs or Programs, and then select the printer program folder from the list. 3 Click Printer Home > Fax tab > Edit contact list. The Contacts tab of the Printer Setup Utility opens. 4 Click Select from phonebook. Faxing 78
-
 1
1 -
2
-
3
-
4
-
5
-
6
-
7
-
8
-
9
-
10
-
11
-
12
-
13
-
14
-
15
-
16
-
17
-
18
-
19
-
20
-
21
-
22
-
23
-
24
-
25
-
26
-
27
-
28
-
29
-
30
-
31
-
32
-
33
-
34
-
35
-
36
-
37
-
38
-
39
-
40
-
41
-
42
-
43
-
44
-
45
-
46
-
47
-
48
-
49
-
50
-
51
-
52
-
53
-
54
-
55
-
56
-
57
-
58
-
59
-
60
-
61
-
62
-
63
-
64
-
65
-
66
-
67
-
68
-
69
-
70
-
71
-
72
-
 73
73 -
 74
74 -
 75
75 -
 76
76 -
 77
77 -
 78
78 -
 79
79 -
 80
80 -
 81
81 -
 82
82 -
 83
83 -
84
-
85
-
86
-
87
-
88
-
89
-
90
-
91
-
92
-
93
-
94
-
95
-
96
-
97
-
98
-
99
-
100
-
101
-
102
-
103
-
104
-
105
-
106
-
107
-
108
-
109
-
110
-
111
-
112
-
113
-
114
-
115
-
116
-
117
-
118
-
119
-
120
-
121
-
122
-
123
-
124
-
125
-
126
-
127
-
128
-
129
-
130
-
131
-
132
-
133
-
134
-
135
-
136
-
137
-
138
-
139
-
140
-
141
-
142
-
143
-
144
-
145
-
146
-
147
-
148
-
149
-
150
-
151
-
152
-
153
-
154
-
155
-
156
-
157
-
158
-
159
-
160
-
161
-
162
-
163
-
164
-
165
-
166
-
167
-
168
-
169
-
170
-
171
-
172
-
173
-
174
-
175
-
176
-
177
-
178
-
179
 |
 |