Lexmark MX611 Quick Reference - Page 7
Without an optional staple finisher, With an optional staple finisher
 |
View all Lexmark MX611 manuals
Add to My Manuals
Save this manual to your list of manuals |
Page 7 highlights
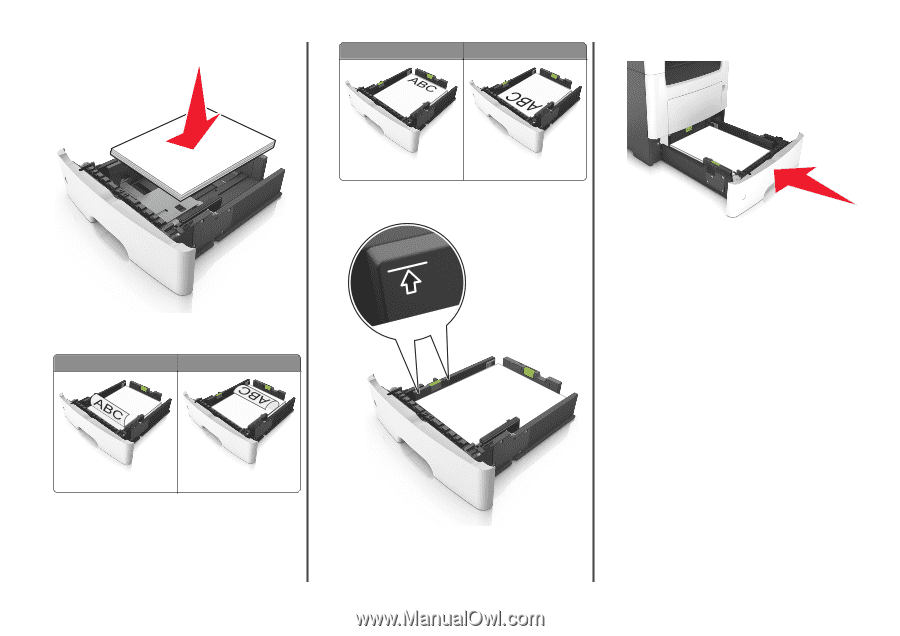
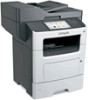
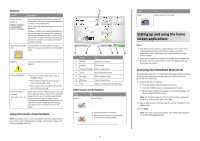
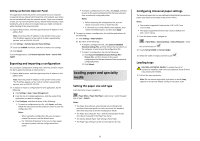
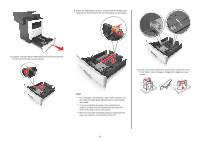
5 Load the paper stack with the printable side facedown. Without an optional staple finisher With an optional staple finisher 6 Insert the tray. • There are different ways of loading letterhead depending on whether an optional staple finisher is installed or not, and whether two sided printing is needed. Without an optional staple finisher With an optional staple finisher Two‑sided (duplex) printing Two‑sided (duplex) printing • Make sure the paper is below the maximum paper fill indicator located on the side of the width guide. Overfilling may cause paper jams. 7 From the printer control panel, set the paper size and paper type in the Paper menu to match the paper loaded in the tray. Note: Set the correct paper size and paper type to avoid paper jams and print quality problems. One‑sided printing One‑sided printing 7
-
 1
1 -
 2
2 -
 3
3 -
 4
4 -
 5
5 -
 6
6 -
 7
7 -
 8
8 -
 9
9 -
 10
10 -
 11
11 -
 12
12 -
13
-
14
-
15
-
16
-
17
-
18
-
19
-
20
-
21
-
22
-
23
-
24
-
25
 |
 |