Lexmark MX711 Quick Reference - Page 22
Warning-Potential Damage, Notes
 |
View all Lexmark MX711 manuals
Add to My Manuals
Save this manual to your list of manuals |
Page 22 highlights
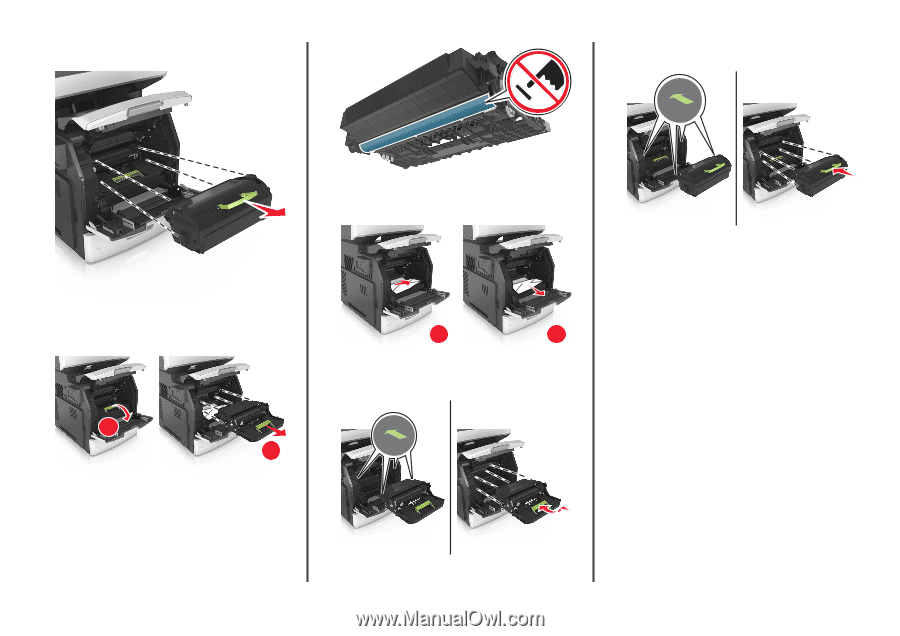
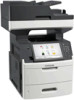
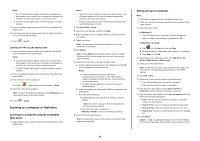
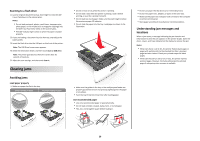
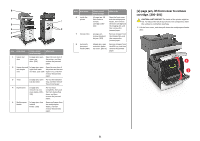
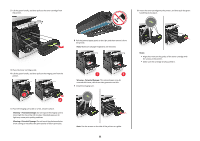
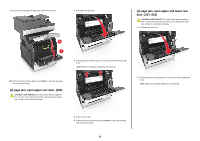
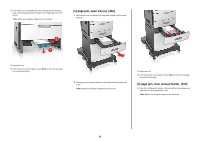
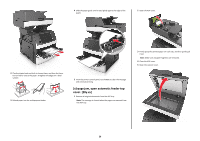
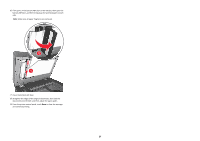
2 Lift the green handle, and then pull out the toner cartridge from the printer. 8 Insert the toner cartridge into the printer, and then push the green handle back into place. 6 Pull the jammed paper gently to the right, and then remove it from the printer. Note: Make sure all paper fragments are removed. 3 Place the toner cartridge aside. 4 Lift the green handle, and then pull out the imaging unit from the printer. 1 2 5 Place the imaging unit aside on a flat, smooth surface. Warning-Potential Damage: Do not expose the imaging unit to direct light for more than 10 minutes. Extended exposure to light may cause print quality problems. Warning-Potential Damage: Do not touch the photoconductor drum. Doing so may affect the print quality of future print jobs. 1 2 Warning-Potential Damage: The jammed paper may be covered with toner, which can stain garments and skin. 7 Install the imaging unit. Note: Use the arrows on the side of the printer as a guide. 22 Notes: • Align the arrows on the guides of the toner cartridge with the arrows in the printer. • Make sure the cartridge is fully pushed in.
-
 1
1 -
2
-
3
-
4
-
5
-
6
-
7
-
8
-
9
-
10
-
11
-
12
-
13
-
14
-
15
-
16
-
 17
17 -
 18
18 -
 19
19 -
 20
20 -
 21
21 -
 22
22 -
 23
23 -
 24
24 -
 25
25 -
 26
26 -
 27
27
 |
 |