Lexmark MX711 Quick Reference - Page 24
jam, remove standard bin, jam. [203], jam, remove tray 1 to clear, duplex. [235-239]
 |
View all Lexmark MX711 manuals
Add to My Manuals
Save this manual to your list of manuals |
Page 24 highlights
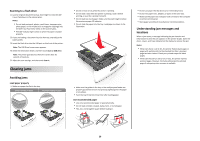
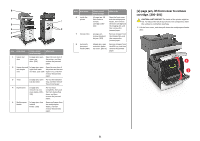
2 3 Close the rear door. 4 Push the back of the standard tray. 5 Press down the rear duplex flap, then firmly grasp the jammed paper, and then gently pull the paper out. Note: Make sure all paper fragments are removed. 1 6 Insert the standard tray. 7 From the printer control panel, touch Done to clear the message and continue printing. [x]‑page jam, remove standard bin jam. [203] 1 Firmly grasp the jammed paper on each side, and then gently pull it out. Note: Make sure all paper fragments are removed. 2 From the printer control panel, touch Done to clear the message and continue printing. [x]‑page jam, remove tray 1 to clear duplex. [235-239] 1 Pull out the tray completely. Note: Lift the tray slightly, and then pull it out. 2 3 1 24
-
 1
1 -
2
-
3
-
4
-
5
-
6
-
7
-
8
-
9
-
10
-
11
-
12
-
13
-
14
-
15
-
16
-
17
-
18
-
 19
19 -
 20
20 -
 21
21 -
 22
22 -
 23
23 -
 24
24 -
 25
25 -
 26
26 -
 27
27
 |
 |
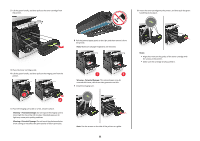
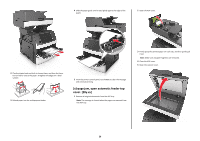
3
Close the rear door.
4
Push the back of the standard tray.
5
Press down the rear duplex flap, then firmly grasp the jammed
paper, and then gently pull the paper out.
Note:
Make sure all paper fragments are removed.
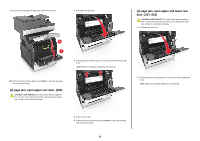
2
1
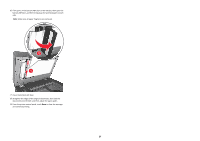
6
Insert the standard tray.
7
From the printer control panel, touch
Done
to clear the message
and continue printing.
[x]
‑
page jam, remove standard bin
jam. [203]
1
Firmly grasp the jammed paper on each side, and then gently pull
it out.
Note:
Make sure all paper fragments are removed.
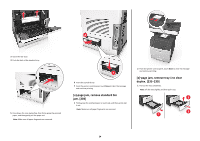
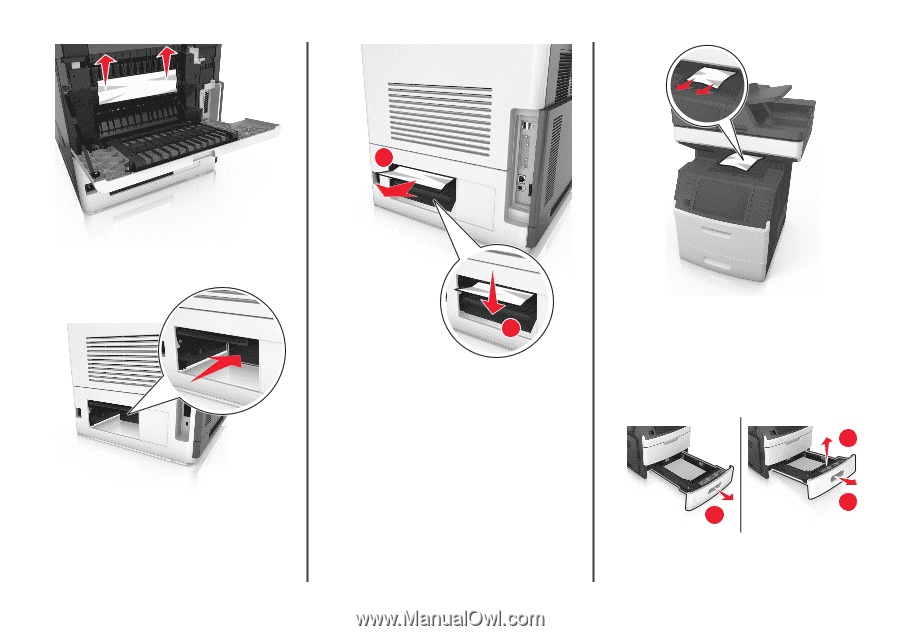
2
From the printer control panel, touch
Done
to clear the message
and continue printing.
[x]
‑
page jam, remove tray 1 to clear
duplex. [235–239]
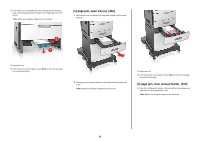
1
Pull out the tray completely.
Note:
Lift the tray slightly, and then pull it out.
1
3
2
24