Lexmark MX711 User's Guide - Page 146
Scanning to a flash drive, Understanding the scan options, FTP, File Name, Save As Shortcut
 |
View all Lexmark MX711 manuals
Add to My Manuals
Save this manual to your list of manuals |
Page 146 highlights
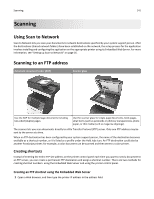
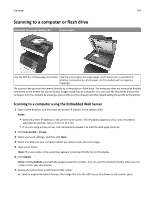
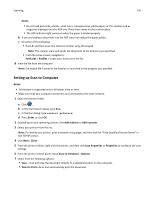
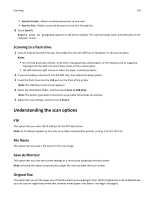
Scanning 146 • Scan for E‑mail-Attach a scanned document to an e‑mail. • Scan for Fax-Attach a scanned document to be sent through fax. 8 Touch Send It. Remote scan in progress appears on the printer display. The scanned image opens automatically on the computer screen. Scanning to a flash drive 1 Load an original document faceup, short edge first into the ADF tray or facedown on the scanner glass. Notes: • Do not load postcards, photos, small items, transparencies, photo paper, or thin media (such as magazine clippings) into the ADF tray. Place these items on the scanner glass. • The ADF indicator light comes on when the paper is loaded properly. 2 If you are loading a document into the ADF tray, then adjust the paper guides. 3 Insert the flash drive into the USB port on the front of the printer. Note: The USB Drive home screen appears. 4 Select the destination folder, and then touch Scan to USB drive. Note: The printer goes back to the home screen after 30 seconds of inactivity. 5 Adjust the scan settings, and then touch Scan It. Understanding the scan options FTP This option lets you enter the IP address for the FTP destination. Note: An IP address appears as four sets of numbers separated by periods, such as 123.123.123.123. File Name This option lets you type a file name for the scan image. Save As Shortcut This option lets you save the current settings as a shortcut by assigning a shortcut name. Note: Selecting this option automatically assigns the next available shortcut number. Original Size This option lets you set the paper size of the documents you are going to scan. When Original Size is set to Mixed Sizes, you can scan an original document that contains mixed paper sizes (letter‑ and legal‑size pages).
-
 1
1 -
2
-
3
-
4
-
5
-
6
-
7
-
8
-
9
-
10
-
11
-
12
-
13
-
14
-
15
-
16
-
17
-
18
-
19
-
20
-
21
-
22
-
23
-
24
-
25
-
26
-
27
-
28
-
29
-
30
-
31
-
32
-
33
-
34
-
35
-
36
-
37
-
38
-
39
-
40
-
41
-
42
-
43
-
44
-
45
-
46
-
47
-
48
-
49
-
50
-
51
-
52
-
53
-
54
-
55
-
56
-
57
-
58
-
59
-
60
-
61
-
62
-
63
-
64
-
65
-
66
-
67
-
68
-
69
-
70
-
71
-
72
-
73
-
74
-
75
-
76
-
77
-
78
-
79
-
80
-
81
-
82
-
83
-
84
-
85
-
86
-
87
-
88
-
89
-
90
-
91
-
92
-
93
-
94
-
95
-
96
-
97
-
98
-
99
-
100
-
101
-
102
-
103
-
104
-
105
-
106
-
107
-
108
-
109
-
110
-
111
-
112
-
113
-
114
-
115
-
116
-
117
-
118
-
119
-
120
-
121
-
122
-
123
-
124
-
125
-
126
-
127
-
128
-
129
-
130
-
131
-
132
-
133
-
134
-
135
-
136
-
137
-
138
-
139
-
140
-
 141
141 -
 142
142 -
 143
143 -
 144
144 -
 145
145 -
 146
146 -
 147
147 -
 148
148 -
 149
149 -
 150
150 -
 151
151 -
152
-
153
-
154
-
155
-
156
-
157
-
158
-
159
-
160
-
161
-
162
-
163
-
164
-
165
-
166
-
167
-
168
-
169
-
170
-
171
-
172
-
173
-
174
-
175
-
176
-
177
-
178
-
179
-
180
-
181
-
182
-
183
-
184
-
185
-
186
-
187
-
188
-
189
-
190
-
191
-
192
-
193
-
194
-
195
-
196
-
197
-
198
-
199
-
200
-
201
-
202
-
203
-
204
-
205
-
206
-
207
-
208
-
209
-
210
-
211
-
212
-
213
-
214
-
215
-
216
-
217
-
218
-
219
-
220
-
221
-
222
-
223
-
224
-
225
-
226
-
227
-
228
-
229
-
230
-
231
-
232
-
233
-
234
-
235
-
236
-
237
-
238
-
239
-
240
-
241
-
242
-
243
-
244
-
245
-
246
-
247
-
248
-
249
-
250
-
251
-
252
-
253
-
254
-
255
-
256
-
257
-
258
-
259
-
260
-
261
-
262
-
263
-
264
-
265
-
266
-
267
-
268
-
269
-
270
-
271
-
272
-
273
-
274
-
275
-
276
-
277
-
278
-
279
-
280
-
281
-
282
-
283
-
284
-
285
-
286
-
287
-
288
-
289
-
290
-
291
-
292
-
293
-
294
-
295
-
296
-
297
-
298
-
299
-
300
-
301
-
302
-
303
-
304
-
305
-
306
-
307
-
308
-
309
-
310
-
311
-
312
-
313
-
314
-
315
-
316
-
317
-
318
-
319
-
320
-
321
-
322
-
323
-
324
-
325
-
326
-
327
-
328
-
329
-
330
-
331
-
332
-
333
-
334
-
335
-
336
-
337
-
338
-
339
-
340
-
341
-
342
-
343
-
344
-
345
-
346
-
347
-
348
-
349
-
350
-
351
-
352
-
353
-
354
-
355
-
356
-
357
-
358
-
359
-
360
-
361
-
362
-
363
-
364
 |
 |