Lexmark Pro915 Quick Reference - Page 18
Maintaining ink cartridges, Aligning the printhead
 |
View all Lexmark Pro915 manuals
Add to My Manuals
Save this manual to your list of manuals |
Page 18 highlights
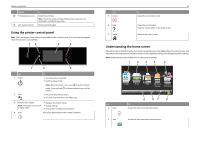
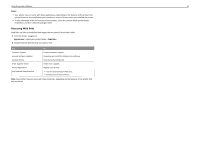
Ordering and replacing supplies 3 Press the release tab, and then remove the used ink cartridge or cartridges. 18 2 Insert each ink cartridge. Slide your finger along the ink cartridge until the cartridge clicks into place. Installing ink cartridges 1 Remove the ink cartridge from the pack, and then remove the protective cap from the ink cartridge. If your ink cartridge comes with a twist cap, then remove the cap. Notes: • Insert the color cartridges first, and then the black cartridge. • Insert the new ink cartridges immediately after removing the protective cap to avoid exposing the ink to air. 3 Close the printer. Maintaining ink cartridges In addition to the following tasks that you can perform, your printer performs an automatic maintenance cycle every week if it is plugged into an electrical outlet. It will briefly come out of Sleep mode or will temporarily power on if it is turned off. Aligning the printhead If the characters or lines on your printed image appear jagged or wavy, then you may need to align the printhead. 1 Load plain paper. 2 From the home screen, navigate to: > More Options > Align Printer An alignment page prints. Note: Do not remove the alignment page until printing is finished.
-
 1
1 -
2
-
3
-
4
-
5
-
6
-
7
-
8
-
9
-
10
-
11
-
12
-
 13
13 -
 14
14 -
 15
15 -
 16
16 -
 17
17 -
 18
18 -
 19
19 -
 20
20 -
 21
21 -
 22
22 -
 23
23 -
24
-
25
-
26
-
27
-
28
-
29
-
30
-
31
-
32
-
33
-
34
-
35
-
36
-
37
-
38
-
39
-
40
-
41
-
42
-
43
-
44
-
45
-
46
-
47
-
48
-
49
-
50
-
51
-
52
-
53
-
54
-
55
-
56
-
57
 |
 |
