Lexmark Pro915 Quick Reference - Page 43
Configuring Wi-Fi Protected Setup manually, Use the Push Button Configuration (PBC) method - support
 |
View all Lexmark Pro915 manuals
Add to My Manuals
Save this manual to your list of manuals |
Page 43 highlights
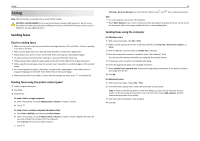
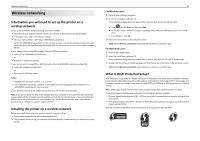
Wireless networking 43 You can find these WPS logos on the side, back, or top of your access point. For more information on accessing the wireless settings and determining the WPS capability of your access point, see the documentation that came with the access point or contact your system support person. Configuring Wi‑Fi Protected Setup manually Note: Make sure your access point (wireless router) is Wi‑Fi Protected Setup (WPS) certified. For more information, see the User's Guide. If your printer or device has not yet been configured for wireless connection and you want to configure it using WPS, then push the WPS button on the wireless router. Wait for the printer control panel to display a message to begin WPS configuration. There might be a short delay before the message appears. If nothing happens after 30 seconds, then do one of the following: USE THE PUSH BUTTON CONFIGURATION (PBC) METHOD 1 From the printer control panel, navigate to: > Network Setup > Wireless Networking > Wi‑Fi Protected Setup > Push Button Method 2 Follow the instructions on the printer display. USE THE PERSONAL IDENTIFICATION NUMBER (PIN) METHOD 1 From the printer control panel, navigate to: > Network Setup > Wireless Networking > Wi‑Fi Protected Setup > PIN Method 2 Follow the instructions on the printer display.
-
 1
1 -
2
-
3
-
4
-
5
-
6
-
7
-
8
-
9
-
10
-
11
-
12
-
13
-
14
-
15
-
16
-
17
-
18
-
19
-
20
-
21
-
22
-
23
-
24
-
25
-
26
-
27
-
28
-
29
-
30
-
31
-
32
-
33
-
34
-
35
-
36
-
37
-
 38
38 -
 39
39 -
 40
40 -
 41
41 -
 42
42 -
 43
43 -
 44
44 -
 45
45 -
 46
46 -
 47
47 -
 48
48 -
49
-
50
-
51
-
52
-
53
-
54
-
55
-
56
-
57
 |
 |
