Magnavox 52MF437S User manual, English (US) - Page 11
Widescreen picture format, 2 Buttons on the left of the TV, 3 Turn the TV - remote
 |
View all Magnavox 52MF437S manuals
Add to My Manuals
Save this manual to your list of manuals |
Page 11 highlights
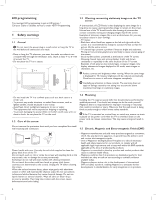
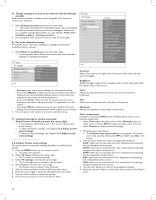
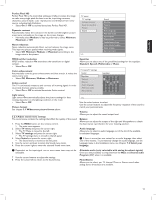
ENGLISH 3.1 Widescreen picture format Avoid black bars on the sides or on top and bottom of the picture. Change the picture format to a format that fills the screen. 1. Press FORMAT to switch on the Picture format menu. 2. Press Î or ï to select an available picture format. 3. Press Î to shift the picture upwards to make partly covered subtitles visible. 3.2 Buttons on the left of the TV Should your remote be lost or broken you can still change some of the basic settings with the buttons on the left side of your TV. Tip The format Automatic is recommended for minimal distortion. Automatic (Not for PC.) Enlarges the picture automatically to fill the screen. Subtitles remain visible. Super zoom (Not for HD.) Removes the black bars on the side of 4:3 broadcasts. There is a minimal distortion. 4:3 (Not for HD.) Shows the classical 4:3 format. Movie expand 14:9 (Not for HD.) Scales classical 4:3 format to 14:9. Movie expand 16:9 (Not for HD.) Scales classical 4:3 format to 16:9. Press the POWER . switch to turn the TV on. The MENU button can be used to summon or exit the TV menu without the remote control. Use the VOLUME + and - buttons to adjust the volume. Use the CHANNEL + and - buttons to browse through the TV channels and sources stored and marked in the Favorite channel lists 3.3 Turn the TV on • Press the . POWER switch at the left side of the TV. > An indicator on the front of the TV lights up. • Press the + CH - button or the POWER button on the remote control. The first time (and only the first time) you turn on your TV, you see a welcome screen followed by the installation procedure. See Chapter 4 First time installation. Wide screen Stretches 4:3 format to 16:9. Unscaled (Only for HD and PC.) Maximum sharpness. Distortion may appear on borders. Black bars may appear with pictures from your PC. Note Do not forget to name the connection in the Connections menu. See chapter 7.5 Select your connections. 7
-
 1
1 -
2
-
3
-
4
-
5
-
 6
6 -
 7
7 -
 8
8 -
 9
9 -
 10
10 -
 11
11 -
 12
12 -
 13
13 -
 14
14 -
 15
15 -
 16
16 -
17
-
18
-
19
-
20
-
21
-
22
-
23
-
24
-
25
-
26
-
27
-
28
-
29
-
30
-
31
-
32
-
33
-
34
-
35
-
36
-
37
-
38
-
39
-
40
-
41
-
42
-
43
-
44
-
45
-
46
-
47
-
48
-
49
-
50
-
51
-
52
-
53
-
54
-
55
-
56
-
57
-
58
-
59
-
60
-
61
-
62
-
63
-
64
-
65
-
66
-
67
-
68
-
69
-
70
-
71
-
72
-
73
-
74
-
75
-
76
-
77
-
78
-
79
-
80
-
81
-
82
-
83
-
84
-
85
-
86
-
87
-
88
-
89
-
90
-
91
-
92
-
93
-
94
-
95
-
96
-
97
-
98
-
99
-
100
-
101
-
102
-
103
-
104
-
105
-
106
-
107
-
108
-
109
-
110
-
111
-
112
-
113
-
114
-
115
-
116
-
117
-
118
-
119
-
120
-
121
 |
 |
