Magnavox ZC320MW8 Owners Manual - Page 10
Functional Overview - inputs
 |
View all Magnavox ZC320MW8 manuals
Add to My Manuals
Save this manual to your list of manuals |
Page 10 highlights
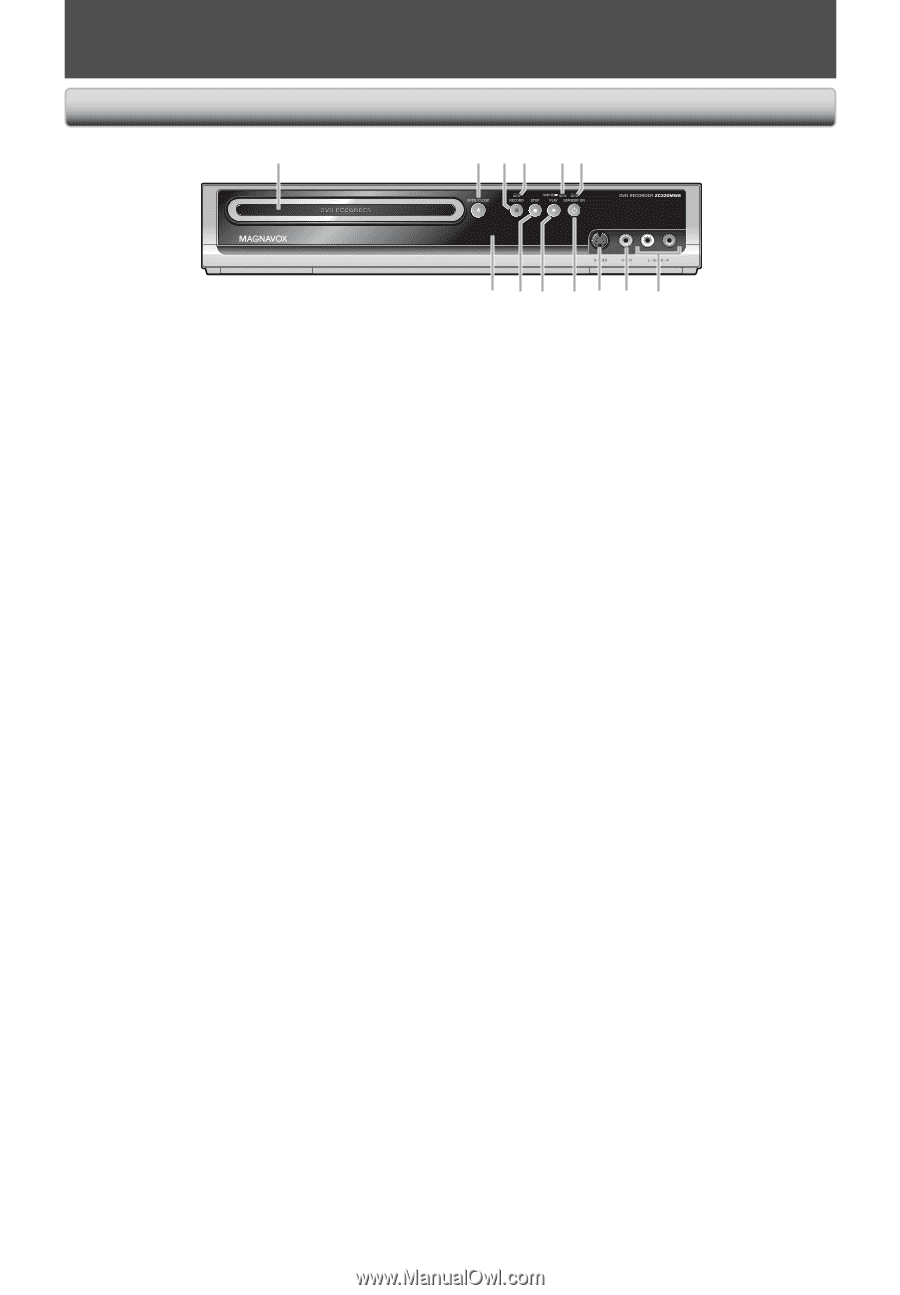
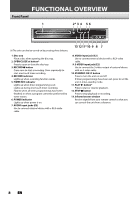
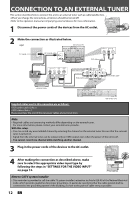
FUNCTIONAL OVERVIEW Front Panel 1 2* 3 4 5 6 DVD RECORDER (*) The unit can also be turned on by pressing these buttons. 13 1211*10 9 8 7 1. Disc tray Place a disc when opening the disc tray. 2. OPEN/CLOSE A button* Press to open or close the disc tray. 3. RECORD I button Press once to start a recording. Press repeatedly to start one-touch timer recording. 4. RECORD indicator Lights up when recording function works. 5. TIMER REC indicator Lights up when timer programming is set. Lights up during one-touch timer recording. Flashes when all timer programmings have been finished, or when a program cannot be performed by some reason. 6. POWER indicator Lights up when power is on. 7. AUDIO input jacks (E2) Use to connect external device with a RCA audio cable. 8. VIDEO input jack (E2) Use to connect external device with a RCA video cable. 9. S-VIDEO input jack (E2) Use to connect the S-video output of external device with an S-video cable. 10.STANDBY-ON y button Press to turn the unit on and off. If timer programmings have been set, press to set the unit in timer-standby mode. 11. PLAY B button* Press to start or resume playback. 12. STOP C button Press to stop playback or recording. 13. Infrared sensor window Receive signals from your remote control so that you can control the unit from a distance. 8 EN
-
 1
1 -
2
-
3
-
4
-
 5
5 -
 6
6 -
 7
7 -
 8
8 -
 9
9 -
 10
10 -
 11
11 -
 12
12 -
 13
13 -
 14
14 -
 15
15 -
16
-
17
-
18
-
19
-
20
-
21
-
22
-
23
-
24
-
25
-
26
-
27
-
28
-
29
-
30
-
31
-
32
-
33
-
34
-
35
-
36
-
37
-
38
-
39
-
40
-
41
-
42
-
43
-
44
-
45
-
46
-
47
-
48
-
49
-
50
-
51
-
52
-
53
-
54
-
55
-
56
-
57
-
58
-
59
-
60
-
61
-
62
-
63
-
64
-
65
-
66
-
67
-
68
-
69
-
70
-
71
-
72
-
73
-
74
-
75
-
76
-
77
-
78
-
79
-
80
-
81
-
82
-
83
-
84
-
85
-
86
-
87
-
88
 |
 |