Marantz DV9500 DV9500 User Manual - Page 13
Controls & Displays
 |
View all Marantz DV9500 manuals
Add to My Manuals
Save this manual to your list of manuals |
Page 13 highlights
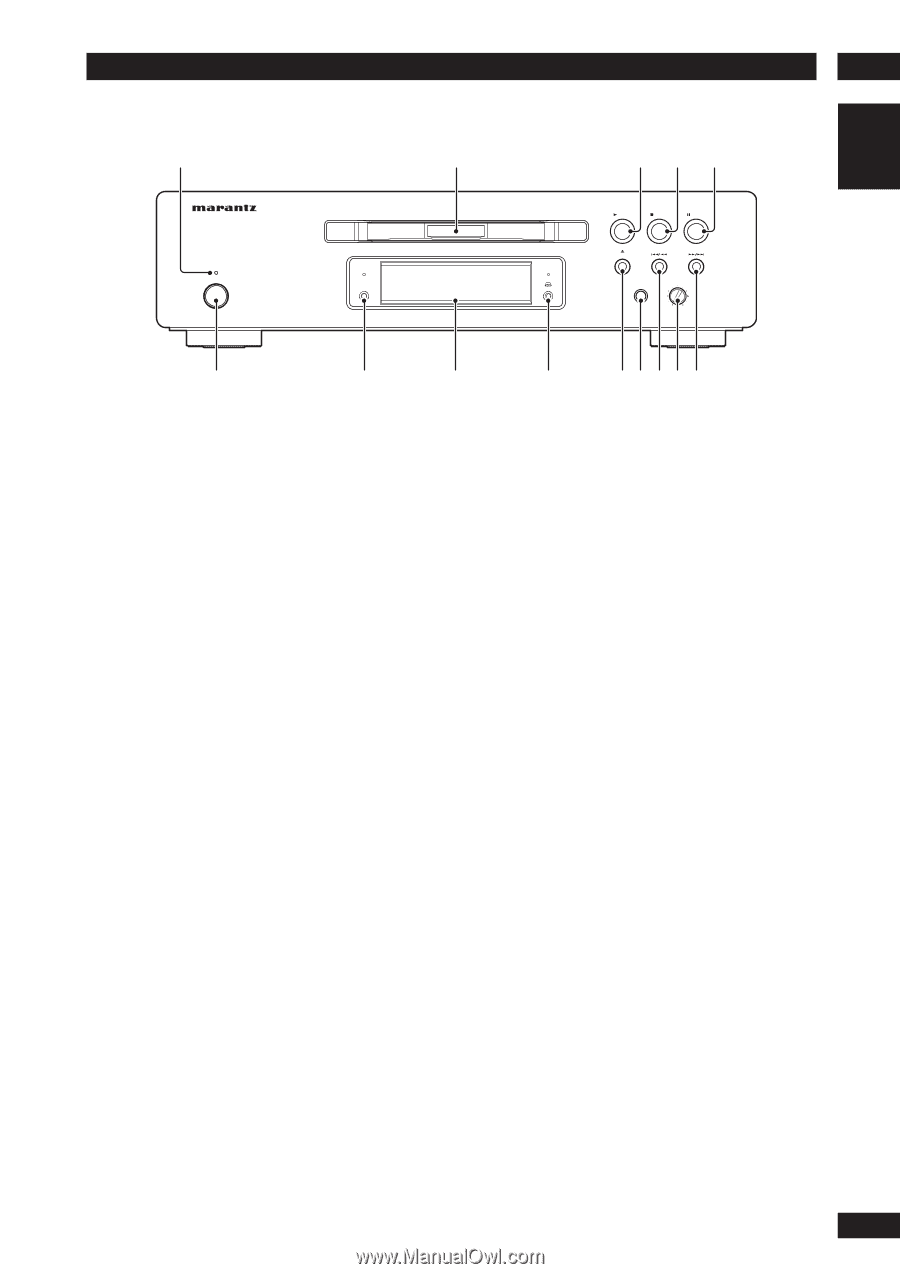
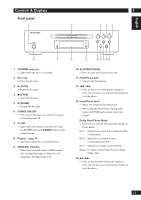
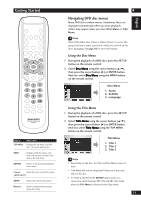
English Controls & Displays Front panel 1 2 3 345 STANDBY POWER ON/OFF FL OFF HDMI/DVI PLAY STOP PAUSE OPEN/CLOSE PHONES LEVEL - + 6 7 8 9 0-=~! 1 STANDBY indicator • Lights when the unit is in standby. 2 Disc tray • Place the disc here. 3 3 (PLAY) • Begin the disc play. 4 7 (STOP) • Stops the disc play. 5 8 (PAUSE) • Pausing the disc play. 6 POWER ON/OFF • Press to turn the power on, and press it again to turn the power off. 7 FL OFF • Lights when the display is switched off using the FL OFF button and DIMMER button on the remote control. 8 Display - page 14 • Operation indications are displayed here. 9 HDMI/DVI indicator • When the connected device is HDMI compatible, the light flashes green. When it is DVI compatible, the light flashes red. 10 0 (OPEN/CLOSE) • Press to open and close the disc tray. 11 Head Phone Jack • Connect the head phone. 12 4 /1 • Press to skip reverse title/group, chapter, or track. You can also press and hold this button to scan the above. 13 Head Phone Level • Adjust the output of the head phone. • When using the Head Phone, Analog audio output and HDMI audio output cannot be output. Dolby Head Phone Mode • Each time it is pushed, the operation changes as shown below. DH 1: Reproduces a room that is small with little reverberation. DH 2: Reproduces a room with more reverberation than DH1. DH 3: Reproduces a larger room than DH1. Bypass: It outputs normal Audio Sound without Dolby effect. 14 ¡/¢ • Press to skip forward title/group, chapter, or track. You can also press and hold this button to scan the above. 13
-
 1
1 -
2
-
3
-
4
-
5
-
6
-
7
-
 8
8 -
 9
9 -
 10
10 -
 11
11 -
 12
12 -
 13
13 -
 14
14 -
 15
15 -
 16
16 -
 17
17 -
 18
18 -
19
-
20
-
21
-
22
-
23
-
24
-
25
-
26
-
27
-
28
-
29
-
30
-
31
-
32
-
33
-
34
-
35
-
36
-
37
-
38
-
39
-
40
-
41
-
42
-
43
-
44
-
45
-
46
-
47
-
48
-
49
-
50
-
51
-
52
-
53
-
54
-
55
-
56
-
57
-
58
-
59
-
60
-
61
-
62
 |
 |