Marantz SR7001 User Manual
Marantz SR7001 Manual
 |
View all Marantz SR7001 manuals
Add to My Manuals
Save this manual to your list of manuals |
Marantz SR7001 manual content summary:
- Marantz SR7001 | User Manual - Page 1
Model SR7001/SR8001 User Guide AV Surround Receiver - Marantz SR7001 | User Manual - Page 2
CAUTION RISK OF ELECTRIC SHOCK DO NOT OPEN CAUTION: TO REDUCE THE RISK OF ELECTRIC SHOCK, DO NOT REMOVE COVER (OR BACK) NO USER-SERVICEABLE PARTS INSIDE REFER SERVICING TO QUALIFIED SERVICE PERSONNEL The lightning flash with arrowhead symbol within an equilateral triangle is intended to alert the - Marantz SR7001 | User Manual - Page 3
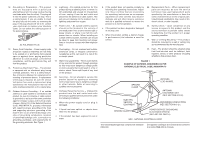
product is equipped with an attachment plug having overload protection. This is a safety feature. See Instruction Manual for replacement or resetting of protective device. If replacement of the plug is required, be sure the service technician has used a replacement plug specified by the manufacturer - Marantz SR7001 | User Manual - Page 4
ROOM OUTPUTS WITH THE REMOTE CONTROL FROM MULTI A 57 REMOTE CONTROLLER OPERATION 58 CONTROLLING MARANTZ COMPONENTS 58 BASIC OPERATION 60 PROGRAMMING MACROS 63 CLONE MODE 65 SETUP 66 TROUBLESHOOTING 67 HDMI 68 TROUBLESHOOTING 68 TECHNICAL SPECIFICATIONS ..........69 DIMENSIONS 69 SETUP - Marantz SR7001 | User Manual - Page 5
cm) or more AV SURROUND RECEIVER SR8001 INPUT SELECTOR PURE DIRECT DSD DISP MULTI AUTO TUNED SLEEP AUTO SURR DIRECT ST SPKR A B V-OFF PEAK ATT DISC 6.1 MT X 6.1 NIGHT EQ ANALOG DIGITAL AAC PCM SURROUND DIGITAL LCR LFE SL S SR STANDBY POWER ON/STANDBY PHONES SURROUND MODE AUTO MULTI MULTI - Marantz SR7001 | User Manual - Page 6
power amplifier performance, and pre-amplifier performance and operation for both digital and analog domains. THX Select2 receivers also feature proprietary THX technologies (e.g., THX Mode DTS digital process sets the standard of bandlimited surround it can be disappointing to users accustomed problem - Marantz SR7001 | User Manual - Page 7
Surround II (CS-II) is a powerful and versatile multichannel technology. CS-II is designed to enable up to 6.1 multichannel surround HDMI, the and High-Definition Multimedia Interface are trademarks or registered trademarks of HDMI solution to this problem is to apply alerts the user if there are - Marantz SR7001 | User Manual - Page 8
authentication. Its purpose is to protect digital video content. Both this receiver and the connected component (such as a video player or monitor) must support HDCP. Before connecting a component to this receiver, refer to its instruction manual. • THX / THX Surround EX • Dolby Digital EX, Dolby - Marantz SR7001 | User Manual - Page 9
u io!0!1 !2 !3 !4 AV SURROUND RECEIVER SR8001 INPUT SELECTOR PURE DIRECT DSD DISP MULTI AUTO TUNED SLEEP AUTO SURR DIRECT ST SPKR A B V-OFF PEAK ATT DISC 6.1 MTX 6.1 NIGHT EQ ANALOG DIGITAL AAC PCM SURROUND DIGITAL LCR LFE SL S SR STANDBY POWER ON/STANDBY PHONES SURROUND MODE AUTO MULTI - Marantz SR7001 | User Manual - Page 10
behind the front panel door, open the door by gently pressing on the lower part of the panel. Keep the door closed when not using these controls. INPUT AV SELECTOR SURROUND RECEIVER SR7001 STANDBY POWER ON/OFF PHONES DISP SLEEP MULTI AUTO AUTO SURR DTIRUENCETD ST DISCS6P.1KR A B MT - Marantz SR7001 | User Manual - Page 11
center, surround left, surround right, surround back left and surround back right speakers. o SPEAKER C switch Set to ON to connect a bi-amp to this receiver or set to OFF for normal speaker connection (surround back and multiroom speakers). (See page 20) !0 AC OUTLETS Connect the AC power cables - Marantz SR7001 | User Manual - Page 12
emits infrared light. Press the buttons while pointing the transmitter towards the infrared receiver window of the SR7001 or other AV equipment. Be sure to also point towards other remote controls when using the learning function. x POWER ON and OFF buttons (When AMP mode is selected) These buttons - Marantz SR7001 | User Manual - Page 13
change channels. ¤0 CURSOR buttons These buttons are used when controlling the cursor of the SR7001, DVD, or other AV equipment. ¤1 LCD Information about the sources and modes are shown on the LCD. LCD INDICATORS Information about currently selected source and direct code names are displayed on the - Marantz SR7001 | User Manual - Page 14
IR SENSOR or if there is an obstacle between them, use of the remote control may not be possible. Remote-controllable range SR7001 Approx. 5 m 60° INPUT SELECTORAV SURROUND RECEIVER SR7100 STANDBY POWER ON/OFF PHONES DISP SLEEP MULTI AUTO AUTO SURR DTIRUENCETD ST DISCS6P.1KR A B MT - Marantz SR7001 | User Manual - Page 15
and TUNER mode. CH VOL OK PREV MENU TEST 1 7.1CH 4 DISP 7 CLEAR LIP.SYNC GUIDE CH.SEL 2 ATT 5 OSD 8 THX 0 MUTE EXIT SURR 3 SPK-AB 6 SLEEP 9 MEMO TV DVD VCR DSS TUNER CD CD-R MD TAPE 1 AUX1 AUX2 LIGHT RC8001SR Learning Remote Controller AMP 2 SOURCE ON/OFF POWER ON POWER OFF D1 - Marantz SR7001 | User Manual - Page 16
SLAVE REMOTE CONT. MIN MAX VIDEO/ SYSTEM OUT OUT IN +5~13V DC FUSE SPEAKER SYSTEM MINIMUM 4 OHMS Powered subwoofer Surround HDMI Ver1.2 TV(1) DVD(2) VCR1(3) DSS/VCR2(4) MONITOR MULTI OUT OUT TV(1) DVD(2) VCR1(3) DSS/VCR2(4) MONI. OUT MODEL NO. SR8001 RS-232C XM AC IN SURROUND - Marantz SR7001 | User Manual - Page 17
part of this unit. • Do not touch the speaker terminals when the power is on. It may cause you to receive CB/PB CR/PR OUT PUT 2 HDMI Ver1.2 TV(1) DVD(2) VCR1(3) DSS/ selected. Caution: • Do not connect this unit and other components to mains power • Refer to the instructions for each component. - Marantz SR7001 | User Manual - Page 18
with the above format. • Refer to the instruction manual of the TV or display to be connected to the SR7001 for detailed information regarding the HDMI terminal. * HDCP: High-bandwidth Digital Content Protection CONNECTING HDMI DEVICES An HDMI cable (sold separately) is used to connect the - Marantz SR7001 | User Manual - Page 19
HDMI Ver1.2 TV(1) DVD(2) VCR1(3) DSS/VCR2(4) MONITOR MULTI OUT OUT TV(1) DVD(2) VCR1(3) DSS/VCR2(4) MONI. OUT MODEL NO. SR8001 RS-232C XM AC IN SURROUND DC OUT IN OUT IN L 1 1 IR FLASHER RECEIVER IN IN 2 2 CD/CDR EMITTER OUT R MULTI Refer to the instructions of the each - Marantz SR7001 | User Manual - Page 20
each speaker to the corresponding external power amplifier. q You can control other Marantz products through the SR7001 with the remote control by connecting the REMOTE CONTROL terminals on each unit. The signal transmitted from the remote control is received by the remote sensor on the SR7001. Then - Marantz SR7001 | User Manual - Page 21
antenna The supplied AM loop antenna is for indoor use only. Set it in the direction and position it to where you receive the clearest sound. Put it as far away as possible from the unit, televisions, speaker cables, and power cords. If you experience poor reception quality, an outdoor antenna may - Marantz SR7001 | User Manual - Page 22
OUTPUT 1 OUTPUT 2 CB/PB CR/PR OUT PUT 2 HDMI Ver1.2 OR MULTI T OUT TV(1) DVD(2) VCR1(3) DSS/VCR2(4) MONI. OUT MODEL NO. SR8001 RS-232C XM AC IN SURROUND BACK L R L RC IN OUT TAPE DC OUT IN OUT IN L 1 1 IR FLASHER RECEIVER IN IN 2 2 CD/CDR EMITTER OUT R MULTI OUT - Marantz SR7001 | User Manual - Page 23
STANDBY indicator will flash.) In such case, recheck the connections between the speakers and the receiver. • Turn power to the receiver off before changing the setting of the SPEAKER C selector switch. • If the speaker is fitted with a shorting bar, remove the shorting bar. ODEL NO. SR8001 SURROUND - Marantz SR7001 | User Manual - Page 24
control device or other device for servicing. (Use a straight cable for the connection.) s DC OUT (DC TRIGGER) External devices can be controlled from the SR7001 by connecting them to the DC OUT terminal (12 V). d EMITTER OUT (SR8001 Only) Outputs the remote control signal input to the IR RECEIVER - Marantz SR7001 | User Manual - Page 25
UP button ENTER button AUTO MULTI MULTI SPEAKER BAND T-MODE MEMORY THX 7.1CH INPUT MENU ENTER DISPLAY EXIT MultEQ MIC RIGHT button AMP (Amplifier) button TUNER CD CD-R MD TAPE 1 AUX1 AUX2 LIGHT RC8500SR Learning Remote Controller AMP 2 MENU button Press this button to display - Marantz SR7001 | User Manual - Page 26
2.SPKR SETUP AUTO SETUP MANUAL SETUP THX AUDIO SETUP RETURN NEXT EXIT SURROUND SETUP" (P. 33) 5.PREFERENCE MULTI ROOM SETUP A B DC TRIGGER SETUP 1 2 STANDBY : NORMAL BILINGUAL : MAIN+SUB HDMI and B selection options. 4.VIDEO SETUP VIDEO CONVERT TV.AUTO OSD INFO I/P CONVERT HDMI OUT - Marantz SR7001 | User Manual - Page 27
setting the matching the output of connected audio devices and the input jacks of this receiver. • FUNC INPUT SETUP : "1-1 FUNC INPUT SETUP" (see page 25) • 7.1 CH INPUT SETUP : "1-2 7.1 CH INPUT SETUP" (see page 25) • FUNC RENAME : "1-3 FUNCTION RENAME" (see page 26) 1. Select E DIG HDMI COMP V/S - Marantz SR7001 | User Manual - Page 28
. HDMI Assign the number of an HDMI input jack to the device. Note: • When FUNCTION MODE is set to HDMI and HDMI AUDIO of "5. PREFERENCE" is set to ✽ mark in AUX.1 indicates that other inputs cannot be assigned. 3. Press the OK/ENTER button. 4. Select each mode setting and input terminal with the - Marantz SR7001 | User Manual - Page 29
is for renaming input source. This menu is for renaming function name. Names can be up to 10 characters long, including spaces. (Characters are selected from those appearing on the display.) This name appears on the receiver's FL display and the OSD, but it does not appear in the OSD Setup menu - Marantz SR7001 | User Manual - Page 30
settings, it is important that you first determine the following characteristics: • AUTO SETUP: "2-1 AUTO SETUP (MultEQ Setup)" (see page 28) • MANUAL SETUP: "2-2 MANUAL SETUP" (see page 31) • THX AUDIO SETUP: "2-3 THX AUDIO SETUP" (see page 32) 1. Select SPEAKER LEVEL TEST MODE : MANUAL FRONT L : - Marantz SR7001 | User Manual - Page 31
jack on the SR7001. AV SURROUND RECEIVER SR7500 INPUT SELECTOR DISP MULTI AUTO TUNED SLEEP AUTO SURR DIRECT ST SPKR A B V-OFF PEAK ATT DISC 6.1 MTX 6.1 NIGHT ANALOG DIGITAL AAC PCM SURROUND DIGITAL LCR LFE SL S SR VOLUME DOWN UP STANDBY POWER ON/STANDBY PHONES ENTER DIGITAL AUX 1 INPUT - Marantz SR7001 | User Manual - Page 32
results and calculation results, therefore operate the remote control unit with care. When storing operations end, the following OSD appears on the display. 2.SPKR SETUP AUTO SETUP MANUAL SETUP THX AUDIO SETUP RETURN EXIT Note: Do not turn the power to the SR7001 off while storing parameters in - Marantz SR7001 | User Manual - Page 33
connected backwards. In the examples at left, the following trouble is detected. • The polarity of the left and right surround back speaker, but it is connected to the surround back R-channel (To use just one surround back speaker, connect it to the Lchannel.) • Check the speaker that is indicated - Marantz SR7001 | User Manual - Page 34
by THX Ltd: • The front, center and surround speaker size should be "SMALL". • The subwoofer should be "YES". • LPF/HPF (the crossover frequency) should be "80Hz". You need to set the number of surround back speakers and the surround back speaker size should be "SMALL". SUB W YES: Select when - Marantz SR7001 | User Manual - Page 35
speaker in turn unit it reads 75dB SPL when the meter is set to "C" weighting and Slow responce. Note: • The speaker level settings are not available in 7.1 Channel Input mode, Pure Direct mode and Source Direct mode. 32 TEST MODE: Select "MANUAL" or "AUTO" generation of the test tone with the 1 or - Marantz SR7001 | User Manual - Page 36
0dB : 0.0dB : 0.0dB RETURN EXIT 4. Select the desired menu item with the 3 or 4 cursor buttons, set the desired level with the 1 or 2 cursor buttons, and press the OK/ENTER button. SURROUND MODE: The surround mode can be independently set for 3 modes. 1. Multi Ch STEREO 2. CSII 3. Others CHANNEL - Marantz SR7001 | User Manual - Page 37
mode creates a rich and enveloping surround ambience from stereo sources such as CDs. In this mode, the SR7001 includes three controls to fine-tune the sound field as follows. 1. Select widest setting, all the sound from the center is mixed into the left and right speakers. This control may help - Marantz SR7001 | User Manual - Page 38
TV : ANA&HDMI DVD : ANA&HDMI VCR1 : ANA&HDMI DSS : ANA&HDMI AUX1 : ANA&HDMI TAPE : ANA&HDMI CD/R : ANA&HDMI AUX2 : ANA&HDMI RETURN BACK EXIT 3. Select "FUNCTION" with the 3 / 4 cursor buttons and set the video conversion mode with the 1 / 2 cursor buttons ANA&HDMI: This mode both up - Marantz SR7001 | User Manual - Page 39
BILINGUAL : MAIN HDMI AUDIO: ENABLEH RETURN NEXT EXIT 2. Select the desired menu with the 3 or 4 cursor buttons and press the OK/ENTER button. STAND BY: When this is set to "ECONOMY", you can reduce the power consumption when the unit is in the Standby mode. When "ECONOMY" is selected, "TV AUTO - Marantz SR7001 | User Manual - Page 40
SETUP The SR8001 has source selectors, sleep timers and multispeaker output remote control units (Room A only) for the two other rooms in the multi room system. (The SR7001 has only one other room in the multi-room system.) These features can be set from this menu. 1. Select "5. PREFERENCE" from - Marantz SR7001 | User Manual - Page 41
was determined "NON" in Auto Setup is manually turned on, the "AUDYSSEY", "FRONT" and "FLAT" modes cannot be selected. • The equalizer turns off when the Pure Direct mode, Source Direct mode, Dolby Headphone or Virtual mode is set. AUDYSSEY: This mode adjusts the frequency characteristics of all - Marantz SR7001 | User Manual - Page 42
OK/ENTER button to enter the setting. "ALL" : Resets all channels. "CH" : Resets only the currently displayed channel. CH: Select the channel ("FL", "C", same as in the Preset G. EQ modes. • FL and FR are not indicated on the CHECK AUTO 2 menu. 4. Once finished checking, select "RETURN" with the 3 / - Marantz SR7001 | User Manual - Page 43
MONITOR OUT terminal. 40 SELECTING THE SURROUND MODE Example: AUTO SURROUND AV SURROUND RECEIVER SR8001 INPUT SELECTOR PURE DIRECT DSD DISP MULTI AUTO TUNED SLEEP AUTO SURR DIRECT STANDBY POWER ON/STANDBY PHONES SURROUND MODE AUTO MULTI MUL SPEAK PURE DIRECT THX 7.1CH INPUT MENU USE - Marantz SR7001 | User Manual - Page 44
video performance, THX recommends setting the "VIDEO CONVERT" mode "DISABLE". CONNECTION EXAMPLE • When a monitor is connected to the HDMI MONITOR OUT terminal of the SR7001 AV SURROUND RECEIVER SR8001 INPUT SELECTOR PURE DIRECT DSD STANDBY POWER ON/STANDBY PHONES SURROUND MODE AUTO MULTI - Marantz SR7001 | User Manual - Page 45
is encoded in Surround EX, you can manually select the THX Surround EX playback mode, otherwise the THX SELECT2 Cinema mode will apply ASA processing to provide optimum replay. THX MUSIC For the replay of multichannel music, the THX Music mode should be selected. In this mode, THX ASA processing is - Marantz SR7001 | User Manual - Page 46
or Dolby Digital Surround EX • When playing Dolby Digital Surround EX-encoded software in 6.1 channels, it is required to set the EX/ES mode. • Note that some Dolby Digital Surround EX-encoded software does not contain the identification signal. In this case, set the EX/ES mode manually. Note for 96 - Marantz SR7001 | User Manual - Page 47
ENGLISH The relationship between the selected surround mode and the input signal The surround mode is selected with the surround mode selector on the SR7001 or the remote control unit. However, the sound you hear is subject to the relationship between the selected surround mode and the input signal - Marantz SR7001 | User Manual - Page 48
-PCM + THX Select2 Cinema Pro Logic IIx movie + THX Pro Logic IIx movie + THX Pro Logic IIx movie + THX Pro Logic IIx movie + THX Output Channel L/R C SL SR SBL SBR SubW Signal format indicators O - - - - 2 DIGITAL EX O - - - - 2 DIGITAL O - - - - 2 DIGITAL O - - - - 2 DIGITAL 2 SURROUND - Marantz SR7001 | User Manual - Page 49
.) AV SURROUND RECEIVER SR8001 INPUT SELECTOR PURE DIRECT DSD DISP MULTI AUTO TUNED SLEEP AUTO SURR DIRECT ST SP DISC 6.1 STANDBY POWER ON/STANDBY PHONES SURROUND MODE AUTO MULTI MULTI SPEAKER PURE DIRECT THX 7.1CH INPUT MENU Note: • The surround mode returns to the previous setting as - Marantz SR7001 | User Manual - Page 50
AUTO TUNED SLEEP AUTO SURR DIRECT STANDBY POWER ON/STANDBY PHONES SURROUND MODE AUTO MULTI MULTI SPEAKE PURE DIRECT THX 7.1CH INPUT MENU 1. TV DVD VCR DSS TUNER CD CD-R MD TAPE 1 AUX1 AUX2 LIGHT RC8001SR Learning Remote Controller AMP 2 1. Select the input source to record by - Marantz SR7001 | User Manual - Page 51
AV SURROUND RECEIVER SR8001 INPUT SELECTOR PURE DIRECT DSD DISP MULTI AUTO SLEEP AUTO SURR STANDBY POWER ON/STANDBY PHONES SURROUND MODE AUTO MULTI PURE DIRECT THX the remote controller. Set the remote controller to the AMP mode before operating the LIP.SYNC feature. The initial setting is - Marantz SR7001 | User Manual - Page 52
1. AV SURROUND RECEIVER SR8001 INPUT SELECTOR PURE DIRECT DSD DISP MULTI SLEEP AUTO S STANDBY POWER ON/STANDBY PHONES SURROUND MODE AUTO MU PURE DIRECT THX USE PAGE 2 CH D2 D3 3. D4 D5 2. VOL TV DVD VCR DSS TUNER CD CD-R MD TAPE 1 AUX1 AUX2 LIGHT RC8500SR Learning Remote - Marantz SR7001 | User Manual - Page 53
memory. 2. 4. 1. 3. 2. 5. AV SURROUND RECEIVER SR8001 INPUT SELECTOR PURE DIRECT DSD DISP MULTI AUTO TUNED SLEEP AUTO SURR DIRECT ST SPKR A B V-OFF PEAK ATT DISC 6.1 MTX 6.1 NIGHT EQ ANALOG DIGITAL AAC PCM SURROUND DIGITAL LCR LFE SL S SR STANDBY POWER ON/STANDBY PHONES SURROUND MODE AUTO - Marantz SR7001 | User Manual - Page 54
PRESET STATIONS AV SURROUND RECEIVER SR8001 INPUT SELECTOR PURE DIRECT DSD DISP MULTI AUTO TUNED SLEEP AUTO SURR DIRECT ST SPKR A B V-OFF PEAK ATT DISC 6.1 MTX 6.1 NIGHT EQ ANALOG DIGITAL AAC PCM SURROUND DIGITAL LCR LFE SL S SR STANDBY POWER ON/STANDBY PHONES SURROUND MODE AUTO MULTI - Marantz SR7001 | User Manual - Page 55
MULTI SLEEP AUT STANDBY POWER ON/STANDBY PHONES SURROUND MODE AUTO M PURE DIRECT THX USE PAGE 1 M D1 2. D2 D D33 D4 2. D5 TV DVD VCR DSS TUNER CD CD-R MD TAPE 1 AUX1 AUX2 LIGHT RC8500SR Learning Remote Controller AMP 2 1. 2. AV SURROUND RECEIVER SR8001 INPUT SELECTOR PURE - Marantz SR7001 | User Manual - Page 56
− (D2) button. PRESET SEARCH MODE AV SURROUND RECEIVER SR8001 INPUT SELECTOR 2. PURE D STANDBY POWER ON/STANDBY PHONES CH VOL OK PREV LIP.SYNC GUIDE MUTE TV DVD VCR DSS TUNER CD CD-R MD TAPE 1 AUX1 AUX2 LIGHT RC8500SR Learning Remote Controller AMP 2 1. (Using the SR7001 - Marantz SR7001 | User Manual - Page 57
You can select the desired channel by directly tapping the numeric keypads on the remote control unit. PREV MENU TEST 1 7.1CH 4 DISP 7 CLEAR LIP.SYNC GUIDE CH.SEL 2 ATT 5 OSD 8 THX 0 MUTE EXIT SURR 3 SPK-AB 6 SLEEP 9 MEMO 2. 3. TV DVD VCR DSS TUNER CD CD-R MD TAPE 1 AUX1 AUX2 LIGHT - Marantz SR7001 | User Manual - Page 58
M D1 D2 D3 D D44 D5 TV DVD VCR DSS TUNER CD CD-R MD TAPE 1 AUX1 AUX2 LIGHT RC8500SR Learning Remote Controller AMP 2 3.5. 2. 5. 1. CH VOL OK PREV MENU TEST 1 7.1CH 4 DISP LIP.SYNC GUIDE CH.SEL 2 ATT 5 OSD MUTE EXIT SURR 3 SPK-AB 6 SLEEP CLEARING STORED PRESET STATIONS You can - Marantz SR7001 | User Manual - Page 59
cannot be used with the SR7001.) This receiver supports multiroom system functions such as source selectors, OSD menu systems, sleep timers and remote control. MULTI ROOM PLAYBACK USING THE MULTI ROOM OUT TERMINALS 2. 1. AV SURROUND RECEIVER SR8001 INPUT SELECTOR PURE DIRECT DSD DISP MULTI - Marantz SR7001 | User Manual - Page 60
control to set the desired volume. 3. In multi room mode, the multi room remote control can be used in the multiroom to operate the following functions. General: Controlling volume level, sleep timer, and muting. SeIecting input audio and video source. Tuner: Selecting band, controlling preset - Marantz SR7001 | User Manual - Page 61
TEST 1 7.1CH 4 DISP 7 CLEAR LIP.SYNC GUIDE CH.SEL 2 ATT 5 OSD 8 THX 0 MUTE EXIT SURR 3 SPK-AB 6 SLEEP 9 MEMO TV DVD VCR DSS TUNER CD CD-R MD TAPE 1 AUX1 AUX2 LIGHT RC8001SR Learning Remote Controller AMP 2 CONTROLLING A MARANTZ VCR (VCR MODE) POWER OFF ON/OFF SOURCE USE PAGE - Marantz SR7001 | User Manual - Page 62
RC8001SR Learning Remote Controller AMP 2 CONTROLLING A MARANTZ MD DECK (MD MODE) POWER OFF ON/OFF SOURCE USE PAGE 1 ON M D D11 D2 D3 D4 D5 CH VOL OK PREV MENU TEST 1 7.1CH 4 DISP 7 CLEAR LIP.SYNC GUIDE CH.SEL 2 ATT 5 OSD 8 THX 0 MUTE EXIT SURR 3 SPK-AB 6 SLEEP 9 MEMO SOURCE ON - Marantz SR7001 | User Manual - Page 63
to the indicators on the LCD. Four pages are available, and press the > button to select a page. The current page position is displayed on the LCD. PRESET MODE (When operating non-Marantz AV equipment products) This remote control is preset with remote control codes from AV equipment by - Marantz SR7001 | User Manual - Page 64
is completed, the remote control automatically switches to name rewriting mode. The left end " " indicator on the MENU blinks to indicate that the blinking part can be rewritten. • If no names will be rewritten, press the OK cursor button. The display returns to learning standby mode by pressing the - Marantz SR7001 | User Manual - Page 65
indicator blinks. The " " blinks to indicate that the letter can be changed. 4. Press the 2 cursor button twice. The D in DVD blinks to indicate that the letter can be changed. 5. Press the 1 numeric button to select this button resets to the indicator lights up to indicate that the remote control - Marantz SR7001 | User Manual - Page 66
. The USE and LEARN indicators blink. 3. Press the CLEAR button while holding down the POWER ON and OFF buttons at the same time. 4. Press the D4 (YES) direct button to erase. All programmed codes and names are erased and reset to the factory default settings. • To cancel the erasing operation - Marantz SR7001 | User Manual - Page 67
blinks to indicate that rewriting is possible. 5. Press the 5 numeric button to select M. 6. Press the 2 cursor button to next. The " " blinks to indicate erased. Modified macro names are also returned to the factory default settings. This example shows how to clear a macro with the name MOVIE - Marantz SR7001 | User Manual - Page 68
M-01. 2 3 4 EXECUTING THE MACRO TIMER The macro program starts when the time that was set is reached. The TIMER indicator lights up whenever the macro timer is activated. Note: • To execute the macro timer, place the remote control facing the infrared sensor of the device to be operated. If the - Marantz SR7001 | User Manual - Page 69
the M button on both remote controls. SETUP SETTING THE LIGHTING TIME • The LCD lights up when the LIGHT buttons are pressed. The LCD set the interval time. Holding down the cursor button fast-forwards the time indicator. 5. Press the OK cursor button to enter the interval time. 6. Once the setting - Marantz SR7001 | User Manual - Page 70
. Disconnect the headphones. Note: • After "PROTECT" appears on the unit's display, the standby indicator may start flashing. If it does, there is a problem in the unit or the connection. If this problem reoccurs even when power is activated from the remote control unit, call for servicing. 67 - Marantz SR7001 | User Manual - Page 71
TV's instruction manual. The HDMI output on the source Set HDMI output so that it turns on, as component (DVD, Set Top Box, explained in the source component's etc.) is not on. instruction manual. The HDMI mode is not correctly Set HDMI input on the FUNC INPUT set on the SR7001/SR8001. SETUP - Marantz SR7001 | User Manual - Page 72
TO RESET THE UNIT AV SURROUND RECEIVER SR8001 INPUT SELECTOR PURE DIRECT DSD DISP MULTI AUTO TUNED SLEEP AUTO SURR DIRECT ST SPKR A B V-OFF PEAK ATT DISC 6.1 MTX 6.1 NIGHT EQ ANALOG DIGITAL AAC PCM SURROUND DIGITAL LCR LFE SL S SR STANDBY POWER ON/STANDBY PHONES SURROUND MODE AUTO MULTI - Marantz SR7001 | User Manual - Page 73
0335 Thorens 0296 Victor 0358 Wards 0105, 0040 Yamaha 0381 RECEIVER/TUNER Source button name : AMP, TUNER Brand name Setup code 1439 Kenwood 1340, 1054 MCS 0066 Magnavox 1216, 1296, 0558, 1116 Marantz 1216, 0066, 1116, 1316 Micromega 1216 Musicmagic 1116 Myryad 1216 NAD - Marantz SR7001 | User Manual - Page 74
0847, 1141, 1280 Samsung 1303, 1136, 1044, 1319 Sat Control 1327 Satstation 1110 Schwaiger 1138 Seemann 0423 Siemens 0200 Sony 0666, ii TV Source button name : TV Brand name Setup code MARANTZ 0001 TV1 (TV, VDP) MARANTZ 0002 TV2 (Plasma) AGB 0543 AOC 0478, 0120, 0207, - Marantz SR7001 | User Manual - Page 75
TV Source button name : TV Brand name Setup code Chun Yun 0027, 0207, 0036, 0119 Chung Hsin 0207, 0080, 0135 Cimline 0036 Cineral 0478, 0119 Citizen 0087, 0057, 0119 Clarion 0207 Clarivox 0064 Clatronic 0274, 0397 Condor 0347, 0397 Conrac 0835 Contec 0207, 0036 Craig 0207 - Marantz SR7001 | User Manual - Page 76
0027 MEI 0062 MGA 0267, 0070 MGN Technology 0267 MTC 0267, 0027 Magnasonic 1305 Magnavox 0062, 0066, 0108, 0027, 1808 Magnin 0267 Manesth 0072, 0099 Marantz 0062, 0108 Marta 0064 - Marantz SR7001 | User Manual - Page 77
0068 Yamishi 0099 Yokan 0099 Yoko 0267 Zenith 0066, 0060, 0027, 1506 DVD Source button name : DVD Brand name Setup code MARANTZ DVD1 0001 MARANTZ DVD2 0002 Acoustic Solutions 0757 Alba 0744 Amstrad 0740 Apex Digital 0699, 0744, 0782, 0821, 0823, 0857, 1127 Blaupunkt 0744 Blue - Marantz SR7001 | User Manual - Page 78
Command Note PAGE 1 1 AUTO SELECT AUTO SURROUND 2 2 SELECT DOLBY MODE 3 DTS SELECT DTS MODE 4 EX/ES SELECT EX/ES 5 DIRECT SELECT PURE DIRECT PAGE 2 1 MCH-ST SELECT MULTI CHANNEL STEREO 2 STEREO SELECT STEREO MODE 3 VIRTUA SELECT VIRTUAL MODE 4 CS-II SELECT CS-II MODE 5 HT-EQ - PAGE - Marantz SR7001 | User Manual - Page 79
Printed in China www.marantz.com You can find your nearest authorized distributor or dealer on our website. is a registered trademark. 06/2006 00M05CW851250 ecmf-d
-
 1
1 -
 2
2 -
 3
3 -
 4
4 -
 5
5 -
 6
6 -
 7
7 -
8
-
9
-
10
-
11
-
12
-
13
-
14
-
15
-
16
-
17
-
18
-
19
-
20
-
21
-
22
-
23
-
24
-
25
-
26
-
27
-
28
-
29
-
30
-
31
-
32
-
33
-
34
-
35
-
36
-
37
-
38
-
39
-
40
-
41
-
42
-
43
-
44
-
45
-
46
-
47
-
48
-
49
-
50
-
51
-
52
-
53
-
54
-
55
-
56
-
57
-
58
-
59
-
60
-
61
-
62
-
63
-
64
-
65
-
66
-
67
-
68
-
69
-
70
-
71
-
72
-
73
-
74
-
75
-
76
-
77
-
78
-
79
 |
 |

Model SR7001/SR8001 User Guide
AV Surround Receiver