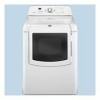
Maytag MEDB800VQ Use and Care Guide
Maytag MEDB800VQ - MaytagR BravosR Steam Electric Dryer Manual
 |
UPC - 883049140506
View all Maytag MEDB800VQ manuals
Add to My Manuals
Save this manual to your list of manuals |
Maytag MEDB800VQ manual content summary:
- Maytag MEDB800VQ | Use and Care Guide - Page 1
ELECTRIC DRYER USE & CARE GUIDE p p SECHEUSE ELECTRIQUE BRAVOS ® AVEC SYSTEME 'K DE SOIN DES TISSUS A LA VAPEUR GUIDE D'UTILISATION ET D'ENTRETIEN FOR QUESTIONS ABOUT FE,a(IURES, OPERATION/PERFORMANCE, CAll: 1.800.688.9900 IN CANADA, CAll: 1.800.807.6777 PARTS, ACCESSORIES OR SERVICE - Maytag MEDB800VQ | Use and Care Guide - Page 2
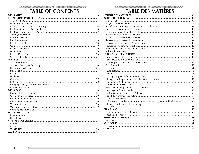
and Options Drying Rack Option ...DRYER CARE ...Cleaning the Dryer I.ocation Cleaning the I_int Screen ...Cleaning the Dryer Interior Removing Accumulated I.int Water Inlet Hoses ...Vacation, Storage and Moving Care Changing the Drum Light ...TROUBLESHOOTING ...Dryer Operation ...Dryer Results - Maytag MEDB800VQ | Use and Care Guide - Page 3
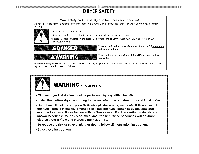
DRYER SAFETY Your safety and the safety of others are very important. We have provided many important safety messages in this manual and on - install the clothes dryer according to the manufacturer's instructions and local codes, - Do not install a clothes dryer with flexible plastic venting - Maytag MEDB800VQ | Use and Care Guide - Page 4
to the weather. • Do not tamper with controls. • Do not repair or replace any part of the dryer or attempt any servicing unless specifically recommended in this Use and Care Guide or in published user-repair instructions that you understand and have the skills to carry out. • Do not use fabric - Maytag MEDB800VQ | Use and Care Guide - Page 5
"Electrical Requirements" and "Venting Requirements" before purchasing parts. Mobile home installations require metal exhaust system hardware available for purchase from the dealer from whom you purchased your dryer. For information on ordering, please refer to the "Assistance or Service" section - Maytag MEDB800VQ | Use and Care Guide - Page 6
) should be at [east twice as large as the dryer exhaust opening. Electrical Connection To properly install your dryer; you must determine the type of electrical connection you will be using and follow the instructions provided for it here. • This dryer is manufactured ready to install with a 3-wire - Maytag MEDB800VQ | Use and Care Guide - Page 7
copper wire (do not use aluminum). • At [east 5 ff (1.52 m) long. GROUNDING INSTRUCTIONS I For a grounded, cord-connected dryer: This dryer must be grounded, in the event of malfunction or breakdown, grounding will reduce the risk of electric shock by providing a path of least resistance for - Maytag MEDB800VQ | Use and Care Guide - Page 8
phase, 120/240 volt, 60 Hz., AC only electrical supply on a separate 30-amp circuit, fused on Part Number 3394208. For further information, please reference the service numbers located in the "Assistance or Service" section. GROUNDING iNSTRUCTiONS [] For a grounded, cord-connected dryer: This dryer - Maytag MEDB800VQ | Use and Care Guide - Page 9
¢;cA O ly Direct Wire Fire Hazard Use a new UL listed 30 amp power supply cord. Use a UL listed strain relief. Disconnect power before making electrical connections. Connect neutral wire (white or center wire) to center terminal (silver). Ground wire (green or bare wire) must be connected to green - Maytag MEDB800VQ | Use and Care Guide - Page 10
the strain relief. The strain relief should have a tight fit with the dryer cabinet and be in a horizontal position. Do not further tighten strain relief instructions for your type of electrical connection: 3-wire (if 4-wire is not available) Electrical Connection Options If your home has - Maytag MEDB800VQ | Use and Care Guide - Page 11
connection is required not permit the use of 3-wire connections. for mobile homes and where F local codes do 3. Connect ground wire (green or block cover into slot of dryer rear panel. Secure cover with hold- down screw. 7. You have completed your electrical connection. Now go to "Venting - Maytag MEDB800VQ | Use and Care Guide - Page 12
4-wire connection: Direct Wire IMPORTANT: A 4-wire connection is required for mobile homes and where local codes do not permit the use of 3 wire connections. Direct wire cable must have 5 ft (1.52 m) of extra length so dryer can be moved if needed. Strip 5" (127 mm) of outer covering from end of - Maytag MEDB800VQ | Use and Care Guide - Page 13
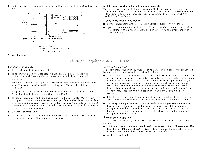
screw. A 5. Tighten strain relief screw. 6. Insert tab of terminal block cover into slot of dryer rear panel. Secure cover with hold- down screw. 7. You have completed your electrical connection. Now go to "Venting Requirements." A. External ground conductor screw B. Neutral ground wire C. Center - Maytag MEDB800VQ | Use and Care Guide - Page 14
. Tighten screw. 4. Tighten strain relief screws. 5. Insert tab of terminal block cover into slot of dryer rear panel. Secure cover with hold- down screw. 6° You have completed your electrical connection. Now go to "Venting Requirements." 3-wire connection: Direct Wire Use where local codes permit - Maytag MEDB800VQ | Use and Care Guide - Page 15
. I)o not use plastic or metal foil vent. • 4" (1 02 mm) heavy metal exhaust vent and clamps must be used. 4" ( 102 ram) heavy metal exhaust vent Vent products can be purchased from your dealer or by calling Maytag Services. For more information, see the "Assistance or - Maytag MEDB800VQ | Use and Care Guide - Page 16
drying performance, rigid metal vents are recommended. • Rigid metal vent is recommended Flexible metal vent to avoid crushing and kinking. • Flexible metal vents are acceptable only if accessible for cleaning. • Flexible metal vent must be fully extended and supported when the dryer the home. • - Maytag MEDB800VQ | Use and Care Guide - Page 17
to follow these instructions can result in death, fire, electrical shock, or serious injury. This dryer can be Service" section to order. • Over-the-Top Installation: Part Number 4396028 are available for purchase. • Periscope Installation (For use with dryer vent to wail vent mismatch): Part - Maytag MEDB800VQ | Use and Care Guide - Page 18
fastened to a noncombustible portion of the mobile home structure and must not terminate beneath the mobile home. Terminate the exhaust vent outside. f Number will: • Shorten the life of the dryer. • Reduce performance, resulting in longer drying times and increased energy usage. The Vent system - Maytag MEDB800VQ | Use and Care Guide - Page 19
models) Check that there are no kinks in the flexible gas line. 4. Once the exhaust vent connection is made, remove the corner posts and cardboard. The dryer must be connected to the cold water faucet using the new inlet hoses. I)o not use old hoses. 1. Turn cold water faucet off and remove washer - Maytag MEDB800VQ | Use and Care Guide - Page 20
using a wood block. Use a wrench to adjust the legs up or down and check again for levelness. A. Loosen these screws. t:3. Remove these screws. 4. Remove the dryer door and the hinges by lifting upward on the door. I.ay the door on a flat, protected surface, with the inside of the door facing up - Maytag MEDB800VQ | Use and Care Guide - Page 21
opening from where they were removed. NOTE: Door strike and plugs must be on the same side of the dryer door opening. Reinstall the door 1. Remove the 4 screws and 2 hinges from the dryer door. 2. Replace the 4 screws in the same holes. Screw locations 4° Install the 2 hinges to the front panel of - Maytag MEDB800VQ | Use and Care Guide - Page 22
with your home power supply keeping the dryer's heater from turning on. See "Troubleshooting." If you receive an "AF" code, your dryer vent may be crushed or blocked. See "Troubleshooting." NOTE: You may notice an odor when the dryer is first heated. This odor is common when the heating element is - Maytag MEDB800VQ | Use and Care Guide - Page 23
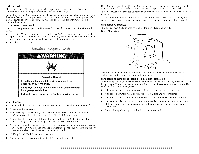
fire. can result in death WARNING: To reduce the risk of fire, electric shock, or injury to persons, read the IMPORTANT SAFETY INSTRUCTIONS before operating this appliance. This manual covers several different models. Your dryer may not have all of the cycles and features described. Follow these - Maytag MEDB800VQ | Use and Care Guide - Page 24
cycle. Coo[ Down tumbles the load without heat during the last few minutes of all size and dryness [eve[. Drying tips • Follow care [abe[ directions when they are available. • If desired, add a fabric softener sheet. Follow package instructions. • To reduce wrinkling, remove the load from the dryer - Maytag MEDB800VQ | Use and Care Guide - Page 25
your dryer with the drying Status indicator lights. wet damp cool down dry wrinkle steam prevent part of the cycle. I.aundry cools for Dry The I)ry light illuminates when Wrinkle Prevent Plus setting. the drying to get medium heat for drying large items that require very long drying times such - Maytag MEDB800VQ | Use and Care Guide - Page 26
drum after several minutes of tumbling with heat. The dryer will continue to tumble with heat followed by a brief coo[ down. The dry time and temperature can be adjusted for this cycle. NOTE: Overloading the dryer may not yield the same results. Steam Preset Cycle Settings Timed Cycles Load Type - Maytag MEDB800VQ | Use and Care Guide - Page 27
item completely. Foam rubber pillows are slow to dry. NOTE: Air Fluff is not available with Sensor Cycles. You can customize your cycles by selecting options. options Drum Light On some models, select Drum I.ight to turn on the light inside the dryer drum. During a cycle, if Drum Light is selected - Maytag MEDB800VQ | Use and Care Guide - Page 28
may be able to purchase one for your model. To find out whether your model allows drying rack usage and for information on ordering, please refer to the front page of the manual or contact the dealer from whom you purchased your dryer. NOTE: The drying rack must be removed for normal tumbling. I1o - Maytag MEDB800VQ | Use and Care Guide - Page 29
the drying rack. Stuffed toys or pillows Cotton o r po [yester fiber fi lied Timed Dry I.ow 60 Stuffed toys or pillows Foam rubber filled Timed Dry Air Fluff 90 (no heat) Sneakers or canvas shoes Timed Dry Air Fluff 90 (no heat) *Reset time to complete drying, if needed. DRYER CARE - Maytag MEDB800VQ | Use and Care Guide - Page 30
with the brush to 5. Thoroughly dry lint screen with a clean towel. Replace screen in dryer. 1. Apply a liquid, nonflammable household dryer. If storing or moving your dryer during freezing weather; winterize it. g0 Electrical Shock Hazard Disconnect power before servicing. Replace all parts - Maytag MEDB800VQ | Use and Care Guide - Page 31
. 4. Plug in dryer or reconnect power. bulb only. TROUBLESHOOTING First try the solutions suggested here or visit our website and reference FAQs (Frequently Asked Questions) to possibly avoid the cost of a service call... In U.S.A. www.maytag.com/help - In Canada www.maytag.ca Dryer will not run - Maytag MEDB800VQ | Use and Care Guide - Page 32
problem with your home power supply keeping the dryer's heater from turning on. The dryer breaker has tripped. Electric dryers use two household drying times. See the Installation Instructions. 32 Explosion Hazard Keep flammable materials and vapors, such as gasoline, away from dryer. Place dryer - Maytag MEDB800VQ | Use and Care Guide - Page 33
odors or fumes are gone from the area, rewash and dry the clothing. Is the dryer being used for the first time? The new electric heating element may have an odor. The odor will be gone after the first cycle. Is water connected to the dryer? Check that water inlet hose is connected to both the - Maytag MEDB800VQ | Use and Care Guide - Page 34
installation kit 4 ft (1.2 m) dryer cord, 3-wire, 30 amp 4 ft (1.2 m) dryer cord, 4-wire, 30 amp 6 ft (1.8 m) dryer cord, 4-wire, 30 amp Dryer vent lint brush All-purpose appliance cleaner I.aundry supply storage cart I.P Gas conversion kit 8577312 W10044609A Drying rack Steam hose kit g4 - Maytag MEDB800VQ | Use and Care Guide - Page 35
and maintained according to instructions attached to or furnished with the product, Maytag brand of Whirlpool Corporation or Whirlpool Canada I P (hereafter "Maytag") will pay for factory specified parts and repair labor to correct defects in materials or workmanship. Service must be provided by - Maytag MEDB800VQ | Use and Care Guide - Page 36
potentiel et vous disent comment r_duire le risque de blessure et ce qui peut se produire en cas de non-respect des instructions. AVERTISSEMENT - "Risque d'incendie" m L'installation de la s_cheuse & linge doit Ctre effectu_e par un installateur qualifi_. m installer la s_cheuse conform_ment aux - Maytag MEDB800VQ | Use and Care Guide - Page 37
d'une recommandation specifique dans le guide d'utilisation et d'entretien, ou publiee dans les instructions de reparation par I'utilisateur que Iorsque la secheuse est utilisee pres d'eux. [] Avant d'enlever la secheuse du service ou la jeter, enlever la porte du compartiment de sechage. [] Ne pas - Maytag MEDB800VQ | Use and Care Guide - Page 38
r6f6rer _ [a section "Assistance ou service". Vous pouvez 6ga[ement contacter [e un garage. Le non=respect de ces instructions peut causer un d_c?_s, une explosion s6cheuse. Voir "Sp6cifications 61ectriques". Un plancher robuste capable de supporter un poids total (s6cheuse et charge) de 200 Ib ( - Maytag MEDB800VQ | Use and Care Guide - Page 39
installation dans un encastrement ou dans un placard On recommande les dimensions d'espacement suivantes pour cette s6cheuse. Cette s6cheuse a 6t6 test6e prise a 4 aiv_oies reli6e _ la terre. Le non-respect de cette instruction peut causer un d_c_s ou un choc _lectrique. C'est _ I'utilisateur - Maytag MEDB800VQ | Use and Care Guide - Page 40
le cordon d'alimentation de rechange num6ro de pi6ce 3394208. Pour plus d'information, veuillez consulter les num6ros de service qui se trouvent _ la section "Assistance ou service". iNSTRUCTiONS DE LiAiSON A LA TERRE [] Pour une s6cheuse reli6e & la terre et connec%e par un cordon : Cette s6cheuse - Maytag MEDB800VQ | Use and Care Guide - Page 41
6vacuation aupr6s du marchand ou en t6[6phonant Maytag Services. Pour plus de renseignements, voir [a section "Assistance ou service". Conduit m6tallique rigide • Pour un mei , peinture, papier-peint, tapis, etc. [] Problemes de nettoyage dans la maison et problemes de sant6. Bride de serrage - Maytag MEDB800VQ | Use and Care Guide - Page 42
suivante : 8212503 Contacter votre marchand local Le non-respect de ces instructions peut causer un d_c?_s, un incendie, un choc _lectrique ou une le d6gagement est r6duit. Veuillez consulter la section "Assistance ou service" de ce guide pour commanden • Installation au-dessus de la s6cheuse : - Maytag MEDB800VQ | Use and Care Guide - Page 43
Dispositiosnp6sciales pour les installations dans une maison mobile I.e syst&rne d'6vacuation doit &tre solidernent fix6 _ une section non combustible de la structure de [a maison mobile et ne doit pas se terminer en dessous de [a maison mobile. en sorte que [e syst6me d'6vacuation se termine _ [' - Maytag MEDB800VQ | Use and Care Guide - Page 44
Risque du poids e×cessif Utiliser deu× ou plus de personnes pour d_placer et installer la s@cheuse. Le non=respect de cette instruction peut causer une blessure au dos ou d'autre blessure. 1. Pour prot6ger le plancher, utiliser une grande pi6ce de carton de la bo?te de la - Maytag MEDB800VQ | Use and Care Guide - Page 45
10. Terminer le serrage des raccords - deux tiers de tour suppl6mentaires avec une pince. Si la s6cheuse n'est pas d'aplomb, la relever _ I'aide d'un bloc de bois. Utiliser une cl6 pour ajuster les pieds vers le haut ou vers le bas, et v6rifier _ nouveau si elle est d'aplomb. REMARQUE : Ne pas - Maytag MEDB800VQ | Use and Care Guide - Page 46
5° Retirer les quatre chevilles de plastique situ6es _ I'ext6rieur de I'ouverture de la porte de la s6cheuse. R6installation de la porte 1. Retirer les quatre vis et les deux charni6res de la porte de la s6cheuse. 2. Replacer [es quatre vis dans [es m6mes trous. II Emp/acement des chevi//es de p/ - Maytag MEDB800VQ | Use and Care Guide - Page 47
5° Installer les vis dans les trous sup6rieurs de la porte destin6s _ la pose des charni6res. Ne pas serrer les vis. I.aisser les vis en retrait d'environ %" (5 mm). A A. Installer d'abord ces vis. 6° Suspendre la porte : ins6rer les t6tes de vis dans les trous de fente supdrieurs des charni6res et - Maytag MEDB800VQ | Use and Care Guide - Page 48
_own prew_t quiet series 4oo with steam sensor cydes start modifiers adjust senso_ s_chage _ I'air. Le non-respect de ces instructions peut causer un d_c_s ou un incendie. 1° Nettoyer "Nettoyage du filtre b_charpie". REMARQUE : Votre sdcheuse Maytag _"est 6quipde d'une fonction "Auto Wake-Up" - Maytag MEDB800VQ | Use and Care Guide - Page 49
• Ajuster le degr6 de s6chage. Idamp Iless II normal mmore m very dry I dryn,ess 1 adjust sensor cycle only REMARQUE : I_es s6lections du degr6 CANCEl. (mise sous tension/annulation). Tourner le bouton au programme Steam (vapeur) d6sir6. Pour le programme Custom Refresh (rafra?chissement - Maytag MEDB800VQ | Use and Care Guide - Page 50
et le degr6 de s6chage sont pr6r6gl6s Iorsqu'on choisit un programme Sensor Dry (s6chage par d6tection). On peut s6[ectionner un degr6 de s6chage diff6rent d6sir6, ajouter une feuille d'assouplissant de tissu. Suiwe les instructions figurant sur I'emballage. Pour r6duire le froissement, enlever la - Maytag MEDB800VQ | Use and Care Guide - Page 51
ou minut6s. normal heavyd_inkle control sensor cycles timed cycles rapid dry steam cycles d refresh custom refresh Programmes de s_chage par d_tection DUTY (service intense) Charges mixtes Iourdes, articles en coton, jeans Regular* (ordinaire) On peut s6lectionner Medium heat (niveau de - Maytag MEDB800VQ | Use and Care Guide - Page 52
sdcheuse peut alt6rer la qualit6 des rdsultats. Pr_r_glages du programme Steam (vapeur) Programmes minutes Type de charge Temperature par d_faut* minut6 peut 6tre 6ga[ement uti[is6 avec [a grille de s6chage. Rapid Dry (s_chage Utiliser ce programme s6chage. rapide) pour le s6chage de petites - Maytag MEDB800VQ | Use and Care Guide - Page 53
s6[ection du programme Normal REMARQUE : Si vous ne s6lectionnez pas le r6glage Wrinkle Prevent Plus, la s6cheuse s'arr6te apr@s [e refroidissement. Damp Dry Signal (signal de s_chage humide) S6lectionner le signal de s6chage humide pour 6tre averti Iorsque les v6tements sont secs b_ environ 80 - Maytag MEDB800VQ | Use and Care Guide - Page 54
REMARQUE : Si vous n'appuyez pas sur Start/Pause dans un d61ai de 5 minutes apr6s avoir s61ectionn6 le programme, la s6cheuse s'6teint automatiquement. Changement des modificateurs et options apr6s avoir appuy_ sur Start II est possible de changer une option ou un modificateur en tout temps avant - Maytag MEDB800VQ | Use and Care Guide - Page 55
s_cheuse. Placer [a s_cheuse au rnoins 460 mrn {18 po) au-dessus du piancher pour une installation dans un garage. Le non=respect de ces instructions peut causer un d_ces, une explosion ou un incendie. Nettoyage avant chaque charge 1. I.e filtre _ charpie se trouve dans I'ouverture de la porte de - Maytag MEDB800VQ | Use and Care Guide - Page 56
Nettoyage au besoin I.es d6tergents et les assouplissants de tissu peuvent causer une accumulation de r6sidus sur le fi[tre _ charpie. Cette accumulation peut augmenter [es dur6es de s6chage ou entraTner un arr6t de [a s6cheuse avant que [a charge ne soit comp[_tement s_che. I.e fi[tre est probab[ - Maytag MEDB800VQ | Use and Care Guide - Page 57
source de courant _lectrique I'entretien. avant Replacer pi_ces et panneau× avant de faire la remise en marche. Le non-respect de ces instructions peut causer un d_c_s ou un choc _lectrique. 1. I)6connecter la source de courant 6lectrique. 2. I)6connecter le c&blage. 3. Fermer le robinet d'eau - Maytag MEDB800VQ | Use and Care Guide - Page 58
la FAQ (Foire aux questions) pour _viter le co_t d'un appel de service... www.maytag.ca La s_cheuse ne fonctionne pas Un fusible est-il grill_ ou le s6cheuse peut vibrer si e[[e n'est pas correctement insta[[6e. Voir [es Instructions d'insta[[ation. Les v_tements sont-ils emm_l_s ou en boule? Une - Maytag MEDB800VQ | Use and Care Guide - Page 59
de [a s_cheuse. Placer [a s_cheuse au moins 460 rnm (18 po) au=dessus du plancher pour une installation dans un garage. Le non=respect de ces instructions peut causer un d_c_s, une explosion ou un incendie. La s_cheuse se trouve-t-elle dans une piece o_ la temperature ambiante est inf_rieure 45 - Maytag MEDB800VQ | Use and Care Guide - Page 60
personnes pour d_placer et installer la s_cheuse. Le non-respect de cette instruction peut causer une blessure au dos ou d'autre blessure. Le programme et de synth6tiques non froiss6s. Charge toujours froiss_e apr_s un programme Steam (vapeur)? S'assurer que ['a[imentation en eau est connect6e _ - Maytag MEDB800VQ | Use and Care Guide - Page 61
service, consulter la section "D6pannage". Ce guide peut vous faire 6conomiser [e coot d'une visite de service. Si vous avez encore besoin d'aide, suivre [es instructions [[es uti[is6es dans [a fabrication de chaque nouve[ apparei[ MAYTAG (_. Pour [oca[iser des pi_ces sp6cifi6es par ['usine dans - Maytag MEDB800VQ | Use and Care Guide - Page 62
- Maytag MEDB800VQ | Use and Care Guide - Page 63
situ6 dans une r6gion 6[oign6e o_ un service d'entretien Maytag autoris6 n'est pas disponib[e. 10. I.a d6pose et [a r6insta[[ation de votre gros apparei[ si ce[ui-ci est install6 dans un endroit inaccessible ou n'est pas install6 conform6ment aux instructions d'insta[[ation fournies. 11. I.es gros - Maytag MEDB800VQ | Use and Care Guide - Page 64
-
 1
1 -
 2
2 -
 3
3 -
 4
4 -
 5
5 -
 6
6 -
 7
7 -
8
-
9
-
10
-
11
-
12
-
13
-
14
-
15
-
16
-
17
-
18
-
19
-
20
-
21
-
22
-
23
-
24
-
25
-
26
-
27
-
28
-
29
-
30
-
31
-
32
-
33
-
34
-
35
-
36
-
37
-
38
-
39
-
40
-
41
-
42
-
43
-
44
-
45
-
46
-
47
-
48
-
49
-
50
-
51
-
52
-
53
-
54
-
55
-
56
-
57
-
58
-
59
-
60
-
61
-
62
-
63
-
64
 |
 |
BRAVOS ® STEAM FABRIC CARE
SYSTEM ELECTRIC DRYER
USE & CARE
GUIDE
p
p
SECHEUSE ELECTRIQUE BRAVOS ®
AVEC SYSTEME
'K
DE SOIN
DES TISSUS A LA VAPEUR
GUIDE
D'UTILISATION
ET D'ENTRETIEN
FOR
QUESTIONS
ABOUT
FE,a(IURES,
OPERATION/PERFORMANCE,
PARTS, ACCESSORIES
OR SERVICE
CAll:
1.800.688.9900
IN CANADA,
CAll:
1.800.807.6777
VISIT
OUR
WEBSITE
AT WWW.MAYTAG.COM
IN CANADA,
WWW.MAYTAG.CA
AU
CANADA,
POUR
ASSISTANCE,
INSTAllATION
OU
SERVICE,
COMPOSEZ
IE
: 1.800.807.6777
OU
VISITEZ
NOTRE
SITE INTERNET
,_
WWW.
M AYTAG.
CA
W10201176B