NEC PX-50XR5A 42XR4/50XR5/61XR4 UM - Page 32
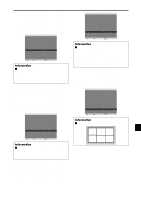
Signal Information Menu
 |
View all NEC PX-50XR5A manuals
Add to My Manuals
Save this manual to your list of manuals |
Page 32 highlights
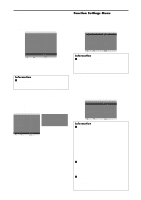
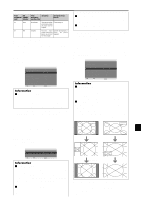
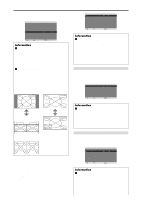
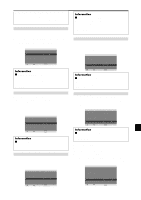
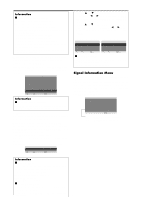
Information Ⅵ CLOSED CAPTION settings OFF: This exits the closed caption mode. CAPTION1~4: Text is superimposed. TEXT1~4: Text is displayed in full screen. A closed caption signal may not be decoded in the following signature; 1. when a video tape has been dubbed. 2. when the signal reception is weak. 3. when the signal reception is nonstandard. When using closed captioned channel or the text mode, the text screen always appears. When there is no signal, however, the text screen will not display text characters. Reducing the brightness of Closed Caption Use this to reduce the brightness of Closed Caption. Example: Setting "NORMAL" Set "ADVANCED OSM" to "ON" in the FUNCTION menu. On "CAPTION CONT." of "FUNCTION" menu, select "NORMAL". FUNCTION ADVANCED OSM : OFF POWER MGT. : OFF INPUT SKIP : OFF SUB. PICTURE ZOOM NAV : BTM LEFT PICTURE FREEZE : S BY S1 PDP SAVER : MANUAL CLOSED CAPTION : OFF CAPTION CONT. : NORMAL PWR. ON MODE SEL. ADJ. EXIT RETURN Information Ⅵ CAPTION CONT. settings NORMAL: Closed Caption brightness is set to normal. LOW: Closed Caption brightness is set to lower. Setting the power on mode This function sets the input mode and the sound volume at the time the power is switched on. Example: Setting the input mode to "VIDEO2" Set "ADVANCED OSM" to "ON" in the FUNCTION menu. On "FUNCTION" menu, select "PWR.ON MODE ", then press the MENU/ENTER button. The "PWR.ON MODE " screen appears. On "INPUT " of "PWR.ON MODE " menu, select "VIDEO2". The available inputs depend on the setting of input. INPUT VOLUME SEL. PWR. ON MODE : VIDEO2 : 22 ADJ. EXIT RETURN • Use the ᮡ and ᮢ buttons to select "MULTI MODE ", then use the ᮤ and ᮣ buttons to choose from "SIDE BY SIDE1~3" and "PICTURE IN PICTURE (BOTTOM LEFT~TOP LEFT)". • Use the ᮡ and ᮢ buttons to select "MAIN "/"SUB " and "LEFT "/"RIGHT ", then use the ᮤ and ᮣ buttons to choose from "VIDEO1~2 ", "DVD/HD1~4 " and "RGB ". PICTURE IN PICTURE PWR. ON MODE MULTI SCREEN SETTING MULTI MODE : BOTTOM RIGHT INPUT MODE MAIN : VIDEO1 SUB : DVD/HD1 SEL. ADJ. EXIT RETURN SIDE BY SIDE PWR. ON MODE MULTI SCREEN SETTING MULTI MODE : SIDE BY SIDE1 INPUT MODE LEFT : VIDEO1 RIGHT : DVD/HD1 SEL. ADJ. EXIT RETURN Ⅵ VOLUME settings LAST: Last mode (the volume that was last selected at the time the power was switched off). 0 to 44: The level of sound volume. Signal Information Menu Checking the frequencies, polarities of input signals, and resolution Use this function to check the frequencies and polarities of the signals currently being input from a computer, etc. On "MAIN MENU", select "SIGNAL INFO.", then press the MENU/ENTER button. The "SIGNAL INFORMATION" is displayed. SIGNAL INFORMATION H. FREQUENCY : 48.4KHz V. FREQUENCY : 60.0Hz H. POLARITY V. POLARITY : NEGATIVE : NEGATIVE MEMORY RESOLUTION : 24 : 1024768 EXIT RETURN PC: MEMORY will be displayed. Others: MODE will be displayed. Information Ⅵ INPUT settings LAST: Last mode (the input that was last selected at the time the power was switched off). VIDEO1, 2: VIDEO input mode. DVD/HD1~4: DVD/HD input mode. RGB: RGB input mode. MULTI: Multi screen mode. Ⅵ To set MULTI INPUT • Set the INPUT button to "MULTI ", then press the MENU/ENTER button. The "MULTI SCREEN SETTING " will appear on the screen. En-30
-
 1
1 -
2
-
3
-
4
-
5
-
6
-
7
-
8
-
9
-
10
-
11
-
12
-
13
-
14
-
15
-
16
-
17
-
18
-
19
-
20
-
21
-
22
-
23
-
24
-
25
-
26
-
 27
27 -
 28
28 -
 29
29 -
 30
30 -
 31
31 -
 32
32 -
 33
33 -
 34
34 -
 35
35 -
 36
36 -
 37
37 -
38
-
39
-
40
-
41
-
42
-
43
-
44
-
45
-
46
-
47
-
48
-
49
-
50
-
51
-
52
-
53
-
54
-
55
-
56
-
57
-
58
-
59
-
60
-
61
-
62
-
63
-
64
-
65
-
66
-
67
-
68
-
69
-
70
-
71
-
72
-
73
-
74
-
75
-
76
-
77
-
78
-
79
-
80
-
81
-
82
-
83
-
84
-
85
-
86
-
87
-
88
-
89
-
90
-
91
-
92
-
93
-
94
-
95
-
96
-
97
-
98
-
99
-
100
-
101
-
102
-
103
-
104
-
105
-
106
-
107
-
108
-
109
-
110
-
111
-
112
-
113
-
114
-
115
-
116
-
117
-
118
-
119
-
120
-
121
-
122
-
123
-
124
-
125
-
126
-
127
-
128
-
129
-
130
-
131
-
132
-
133
-
134
-
135
-
136
-
137
-
138
-
139
-
140
 |
 |