Netgear RND4000 RND4000 Setup Manual - Page 12
Setting the Clock, Configuring Alert Contacts, Next., Clock, Apply
 |
UPC - 606449053272
View all Netgear RND4000 manuals
Add to My Manuals
Save this manual to your list of manuals |
Page 12 highlights
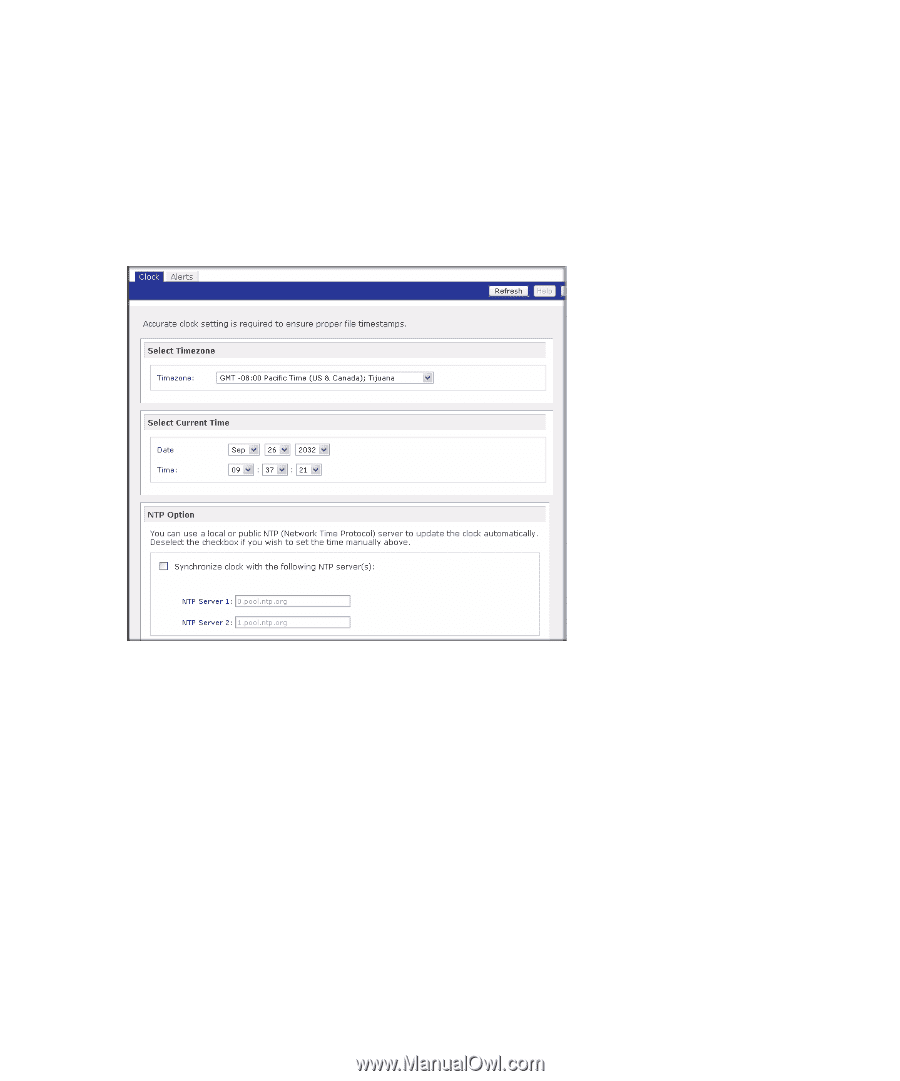
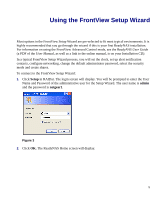
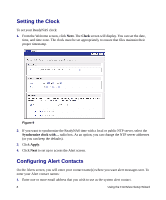
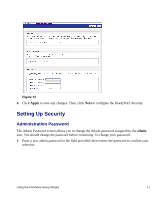
Setting the Clock To set your ReadyNAS clock: 1. From the Welcome screen, click Next. The Clock screen will display. You can set the date, time, and time zone. The clock must be set appropriately to ensure that files maintain their proper timestamp. Figure 9 2. If you want to synchronize the ReadyNAS time with a local or public NTP server, select the Synchronize clock with... radio box. As an option, you can change the NTP server addresses (or you can keep the defaults). 3. Click Apply. 4. Click Next to set up to access the Alert screen. Configuring Alert Contacts On the Alerts screen, you will enter your contact name(s) where you want alert messages sent. To enter your Alert contact names: 1. Enter one or more email address that you wish to use as the system alert contact. 8 Using the FrontView Setup Wizard
-
 1
1 -
2
-
3
-
4
-
5
-
6
-
 7
7 -
 8
8 -
 9
9 -
 10
10 -
 11
11 -
 12
12 -
 13
13 -
 14
14 -
 15
15 -
 16
16 -
 17
17 -
18
-
19
-
20
-
21
-
22
-
23
-
24
 |
 |