Nikon F55 Instruction Manual - Page 16
Hold Camera and Focus
 |
UPC - 074101484663
View all Nikon F55 manuals
Add to My Manuals
Save this manual to your list of manuals |
Page 16 highlights
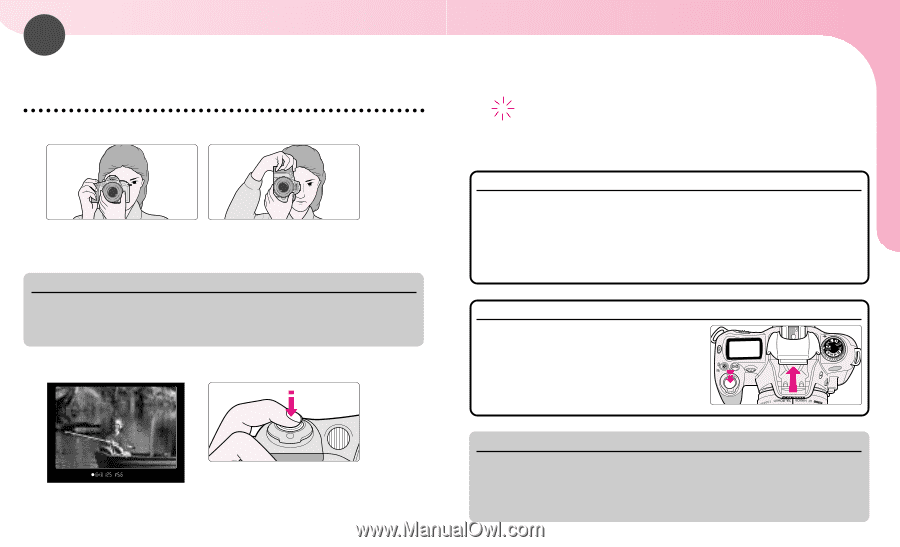
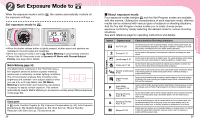
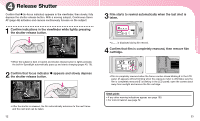
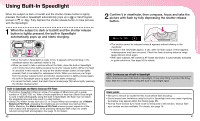
BASIC OPERATION 1 3 Hold Camera and Focus Lightly pressing the shutter release button automatically focuses the camera on the subject and when the subject is in focus, causes / to appear in the viewfinder. 1 Hold the camera properly. • Keep your elbow propped against your body for support. • Stand with one foot forward a half step and keep your upper body still. • Grasp the camera handgrip with your right hand and use your left hand to cradle the camera (or lens). NOTE: Camera shake Camera shake is likely to occur when the camera is not held steady or with slow shutter speed. The built-in Speedlight automatically fires in dark conditions (where slow shutter speed is required) in a or Vari-Program (except for d and g) with this camera but always remember to hold the camera correctly. 2 Compose frame, centre focus brackets on your subject, and focus by lightly pressing the shutter release button. • When shutter release button is lightly pressed, the camera focuses automatically and focus indicator appears or blinks as follows: / appears: Subject is in focus. / blinks: Unable to focus using autofocus. • With dark subjects, the camera's AF-Assist Illuminator (page 50) is automatically activated to guide autofocus (except in d or g). Check points • Dioptre adjustment (page 73) enables you to see more clearly through the viewfinder. • To take a picture of a subject outside the focus area, shift the focus area (page 48) or use focus lock (page 52). • In situations where autofocus may not work as expected, see page 27. Built-in Speedlight When the subject is dark or backlit and the shutter release button is lightly pressed, the builtin Speedlight automatically pops up in a or VariProgram (except in d or g). See page 40 for details. • Compose frame so that the subject to be focused is located closest at any of three focus areas and lightly press the shutter release button. When the Dynamic AF Mode with Closest-Subject Priority (pages 26, 48) is set, camera automatically maintains 30 focus on the subject located closest to any of three focus areas. NOTE: Composing frame This camera's viewfinder frame shows approximately 89% of the image actually exposed on the film frame. Therefore, the actual exposed frame is somewhat larger than the image you see through the viewfinder. Note that the edges of a negative film are partially cropped by most labs. 31
-
 1
1 -
2
-
3
-
4
-
5
-
6
-
7
-
8
-
9
-
10
-
 11
11 -
 12
12 -
 13
13 -
 14
14 -
 15
15 -
 16
16 -
 17
17 -
 18
18 -
 19
19 -
 20
20 -
 21
21 -
22
-
23
-
24
-
25
-
26
-
27
-
28
-
29
-
30
-
31
-
32
-
33
-
34
-
35
-
36
-
37
-
38
-
39
-
40
-
41
-
42
-
43
-
44
-
45
-
46
-
47
-
48
-
49
-
50
-
51
-
52
-
53
-
54
-
55
-
56
-
57
-
58
-
59
-
60
-
61
 |
 |