Nikon F55 Instruction Manual - Page 37
Film Rewind, Dioptre Adjustment/Viewfinder Accessories
 |
UPC - 074101484663
View all Nikon F55 manuals
Add to My Manuals
Save this manual to your list of manuals |
Page 37 highlights
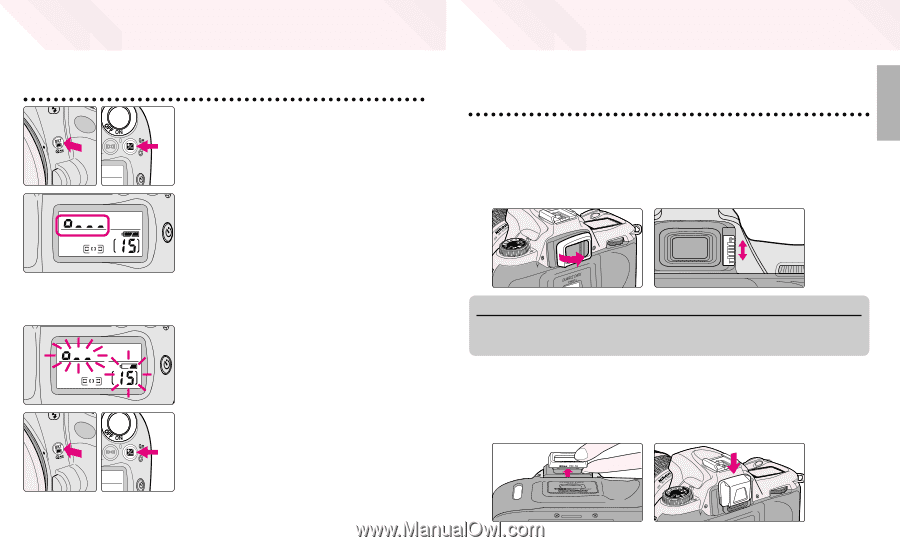
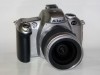
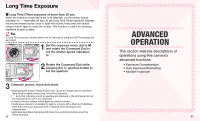
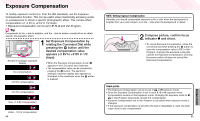
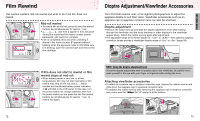
OTHER FUNCTIONS Film Rewind This section explains mid-roll rewind and what to do if the film does not rewind. Mid-roll rewind • To rewind film at mid-roll, press the two film rewind buttons „ simultaneously for approx. 1 sec. • o---, o--, o- and then o appear in the LCD panel during film rewind and the frame counter counts backwards until rewind is complete. • Film is completely rewound when a blinking E shows in the frame counter. (E appears without blinking when the exposure meter is off.) Make sure E is blinking, open the camera back and remove the film cartridge. Dioptre Adjustment/Viewfinder Accessories The F55/F55D enables near- or far-sighted photographers to adjust the eyepiece dioptre to suit their vision. Viewfinder accessories such as an eyepiece cap or eyepiece correction lens can also be attached. Dioptre adjustment • Remove the rubber eyecup and slide the dioptre adjustment lever while looking through the viewfinder until the focus brackets or other displays in the viewfinder appear sharp. Attach the rubber eyecup again after adjustment. • The adjustable range of the finder dioptre is -1.5m-1 to +0.8m-1. Nine optional eyepiece correction lenses provide a viewfinder dioptre range of -5m-1 to +3m-1 (page 98). If film does not start to rewind or film rewind stops at mid-roll • When battery power is very low, or at low temperatures, film may not start rewinding or film rewind may stop at mid-roll, and o--, frame number and insufficient battery power indication M will blink in the LCD panel. In this case, turn the power switch off, change batteries, then turn the power switch on and press the two film rewind buttons „ simultaneously for approx. 1 sec. to rewind film again. NOTE: Using the dioptre adjustment lever Since the dioptre adjustment lever is located next to the viewfinder, be careful not to poke yourself in the eye with your finger or fingernail while sliding the lever. Attaching viewfinder accessories • To attach an eyepiece cap or eyepiece correction lens, remove the rubber eyecup and slide down the eyepiece cap or eyepiece correction lens. • To reattach the rubber eyecup after removing the eyepiece cap or eyepiece correction lens, make sure the "K DK-16" stamp is at the bottom. 72 73
-
 1
1 -
2
-
3
-
4
-
5
-
6
-
7
-
8
-
9
-
10
-
11
-
12
-
13
-
14
-
15
-
16
-
17
-
18
-
19
-
20
-
21
-
22
-
23
-
24
-
25
-
26
-
27
-
28
-
29
-
30
-
31
-
 32
32 -
 33
33 -
 34
34 -
 35
35 -
 36
36 -
 37
37 -
 38
38 -
 39
39 -
 40
40 -
 41
41 -
 42
42 -
43
-
44
-
45
-
46
-
47
-
48
-
49
-
50
-
51
-
52
-
53
-
54
-
55
-
56
-
57
-
58
-
59
-
60
-
61
 |
 |