Nikon F55 Instruction Manual - Page 31
Manual Exposure Mode
 |
UPC - 074101484663
View all Nikon F55 manuals
Add to My Manuals
Save this manual to your list of manuals |
Page 31 highlights
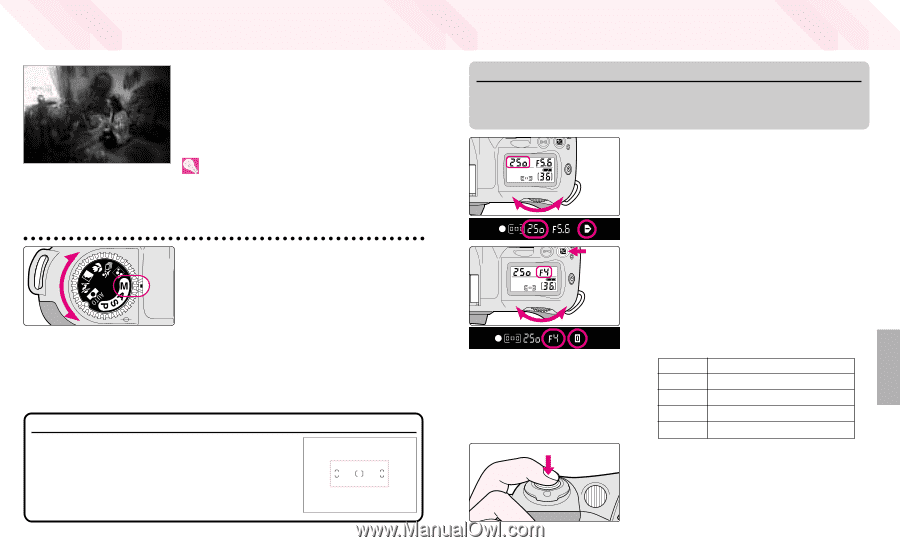
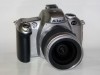
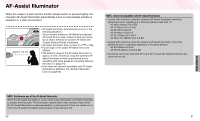
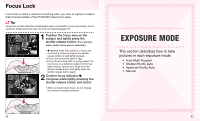
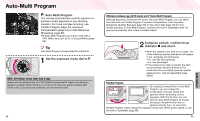
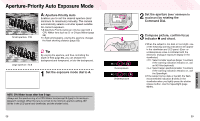
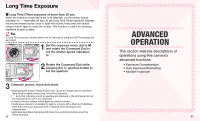
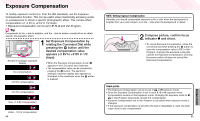
Manual Exposure Mode M: Manual Enables you to set both shutter speed (-[Time] and 30-1/2000 sec.) and aperture (lens' minimum to maximum) manually. • Non-CPU lenses (page 90) can only be used in Manual exposure mode. Tip With electronic analogue exposure display in the viewfinder, you can produce various creative effects by adjusting the exposure. Long Time exposure (Time) can be set in Manual exposure mode. 1 Set the exposure mode dial to M. • Metering system automatically switches to Centre Partial from Matrix in Manual exposure mode. • When a non-CPU Nikkor lens is attached, ƒ-appears in the LCD panel and viewfinder. Set/confirm aperture with the lens aperture ring. Camera's exposure meter cannot be used. See page 90 for details. Centre Partial Metering Centre Partial Metering places special emphasis on brightness around three focus areas in the centre of the viewfinder and is thus useful for basing exposure on the centre area of the scene. 60 NOTE: CPU Nikkor lenses other than G-type Always set the aperture ring of a CPU Nikkor lens (except G-type) to its minimum (largest f-number). When the lens is not set to its minimum aperture setting, ƒEE blinks in the LCD panel and viewfinder, and the shutter locks. 2 Set the shutter speed and aperture while checking the electronic analogue exposure display in the viewfinder. • Set the shutter speed (-- [Time] and 30-1/2000 sec.) by rotating the Command Dial and aperture (minimum to maximum) by rotating the Command Dial while pressing the Q aperture button. • The electronic analogue display in the viewfinder indicates the difference between the selected exposure (shutter speed and aperture) and the correct exposure. The electronic analogue exposure display blinks when the subject brightness is beyond the camera's exposure range. (Electronic analogue exposure display is not available with Long Time exposure.) The following examples show electronic analogue exposure display indications: # Over 1 EV #$ +1/2 EV $ Correct exposure $ % -1/2 EV % Under -1 EV 3 Compose picture, focus and shoot. • If the subject is too dark or backlit, the flash recommended indication fi blinks in the viewfinder when you lightly press the shutter release button. Use the Speedlight (page 80/91). 61 EXPOSURE MODE
-
 1
1 -
2
-
3
-
4
-
5
-
6
-
7
-
8
-
9
-
10
-
11
-
12
-
13
-
14
-
15
-
16
-
17
-
18
-
19
-
20
-
21
-
22
-
23
-
24
-
25
-
 26
26 -
 27
27 -
 28
28 -
 29
29 -
 30
30 -
 31
31 -
 32
32 -
 33
33 -
 34
34 -
 35
35 -
 36
36 -
37
-
38
-
39
-
40
-
41
-
42
-
43
-
44
-
45
-
46
-
47
-
48
-
49
-
50
-
51
-
52
-
53
-
54
-
55
-
56
-
57
-
58
-
59
-
60
-
61
 |
 |