NordicTrack Elite 9500 Pro Treadmill User Manual - Page 11
IMPORTANT: Make sure
 |
View all NordicTrack Elite 9500 Pro Treadmill manuals
Add to My Manuals
Save this manual to your list of manuals |
Page 11 highlights
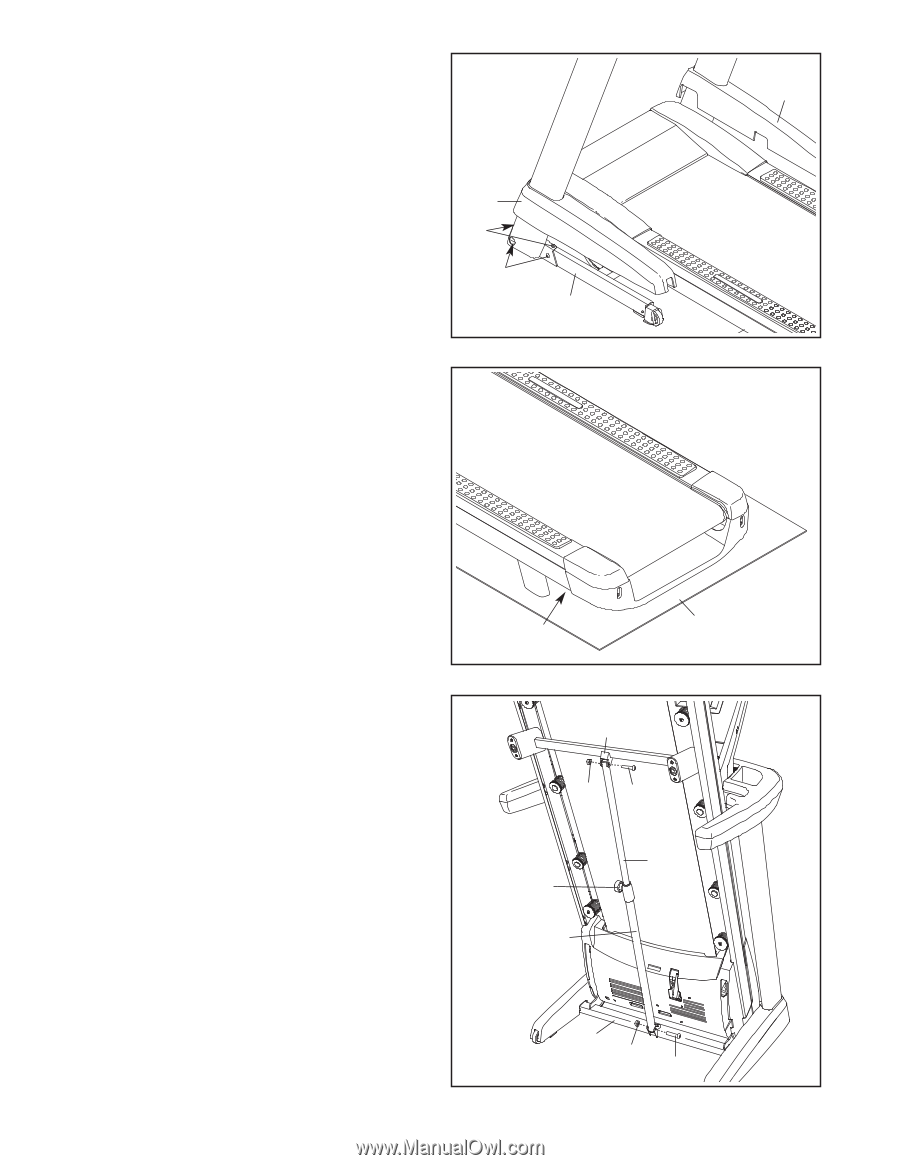
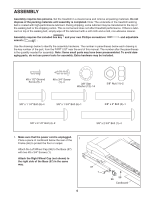
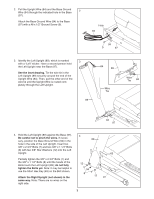
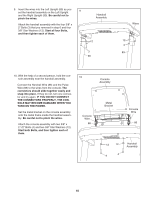
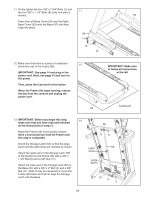
11. Firmly tighten the four 3/8" x 2 3/4" Bolts (7) and the four 3/8" x 1 1/4" Bolts (8) (only one side is 11 shown). 93 Press the Left Base Cover (92) and the Right Base Cover (93) onto the Base (97) until they snap into place. 92 7 8 97 12. Make sure that there is a piece of cardboard below the rear of the Frame (56). 12 IMPORTANT: See page 14 and plug in the power cord. Next, see page 16 and turn on the power. Then, press the 0 percent Incline button. When the Frame (56) stops moving, remove the key from the console and unplug the power cord. 56 IMPORTANT: Make sure to follow all instructions at the left Cardboard 13. IMPORTANT: Before you begin this step, make sure that you have read and followed 13 all the instructions in step 12. 56 Raise the Frame (56) to the position shown. Have a second person hold the Frame until this step is completed. 11 6 Orient the Storage Latch (53) so that the large barrel and the latch knob are oriented as shown. Attach the upper end of the Storage Latch (53) to the bracket on the Frame (56) with a 3/8" x 1 3/4" Bolt (6) and a 3/8" Nut (11). Attach the lower end of the Storage Latch (53) to the Base (97) with a 3/8" x 2" Bolt (3) and a 3/8" Nut (11). Note: It may be necessary to move the Frame (56) back and forth to align the Storage Latch with the Base. Latch 53 Knob Large Barrel 97 11 3 11
-
 1
1 -
2
-
3
-
4
-
5
-
 6
6 -
 7
7 -
 8
8 -
 9
9 -
 10
10 -
 11
11 -
 12
12 -
 13
13 -
 14
14 -
 15
15 -
 16
16 -
17
-
18
-
19
-
20
-
21
-
22
-
23
-
24
-
25
-
26
-
27
-
28
-
29
-
30
-
31
-
32
-
33
-
34
-
35
-
36
-
37
-
38
-
39
-
40
 |
 |