Olympus E-420 E-420 Instruction Manual (English) - Page 34
Shooting guides, Improving your shooting skills, Using exposure compensation, Changing shooting mode - zoom lenses
 |
UPC - 050332163898
View all Olympus E-420 manuals
Add to My Manuals
Save this manual to your list of manuals |
Page 34 highlights
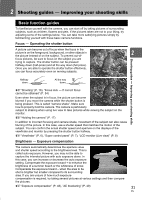
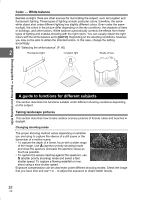
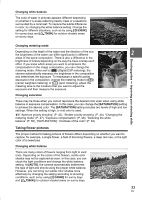
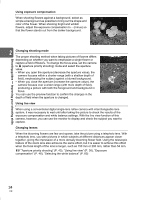
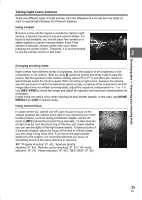
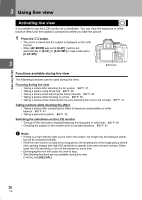
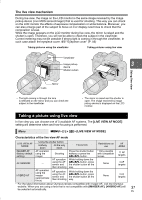
Shooting guides k Improving your shooting skills Using exposure compensation When shooting flowers against a background, select as simple a background as possible to bring out the shape and color of the flower. When shooting bright and whitish flowers, adjust the exposure compensation to - (minus) so that the flower stands out from the darker background. 2 Changing shooting mode The proper shooting method when taking pictures of flowers differs depending on whether you want to emphasize a single flower or capture a field of flowers. To change the focus area, set the camera to A (aperture priority shooting) mode and select the aperture value. • When you open the aperture (decrease the aperture value), the camera focuses within a shorter range (with a shallow depth of field), emphasizing the subject against a blurred background. • When you close the aperture (increase the aperture value), the camera focuses over a wider range (with more depth of field), producing a picture with both the foreground and background in focus. You can use the preview function to confirm the changes in the depth of field when the aperture is changed. Using live view When using a conventional digital single-lens reflex camera with interchangeable lens system, it was necessary to wait until after taking the picture to check the results of the exposure compensation and white balance settings. With the live view function of this camera, however, you can use the monitor to display and check the subject you want to capture. Changing lenses When the blooming flowers are few and sparse, take the picture using a telephoto lens. With a telephoto lens, you take pictures in which subjects at different distances appear closer together, giving the impression of a more densely blooming flower field. Using the telescopic feature of the zoom lens also achieves the same effect, but it is easier to achieve this effect when the focal length of the lens is longer, such as 150 mm or 200 mm, rather than 54 mm. g"Aperture priority shooting" (P. 43), "Using live view" (P. 36), "Exposure compensation" (P. 48), "Selecting the white balance" (P. 60) 34 EN
-
 1
1 -
2
-
3
-
4
-
5
-
6
-
7
-
8
-
9
-
10
-
11
-
12
-
13
-
14
-
15
-
16
-
17
-
18
-
19
-
20
-
21
-
22
-
23
-
24
-
25
-
26
-
27
-
28
-
 29
29 -
 30
30 -
 31
31 -
 32
32 -
 33
33 -
 34
34 -
 35
35 -
 36
36 -
 37
37 -
 38
38 -
 39
39 -
40
-
41
-
42
-
43
-
44
-
45
-
46
-
47
-
48
-
49
-
50
-
51
-
52
-
53
-
54
-
55
-
56
-
57
-
58
-
59
-
60
-
61
-
62
-
63
-
64
-
65
-
66
-
67
-
68
-
69
-
70
-
71
-
72
-
73
-
74
-
75
-
76
-
77
-
78
-
79
-
80
-
81
-
82
-
83
-
84
-
85
-
86
-
87
-
88
-
89
-
90
-
91
-
92
-
93
-
94
-
95
-
96
-
97
-
98
-
99
-
100
-
101
-
102
-
103
-
104
-
105
-
106
-
107
-
108
-
109
-
110
-
111
-
112
-
113
-
114
-
115
-
116
-
117
-
118
-
119
-
120
-
121
-
122
-
123
-
124
-
125
-
126
-
127
-
128
-
129
-
130
-
131
-
132
-
133
-
134
-
135
-
136
-
137
-
138
-
139
-
140
 |
 |