Olympus E-420 E-420 Instruction Manual (English) - Page 98
Connecting the camera to a computer, to select [STORAGE]. Press
 |
UPC - 050332163898
View all Olympus E-420 manuals
Add to My Manuals
Save this manual to your list of manuals |
Page 98 highlights
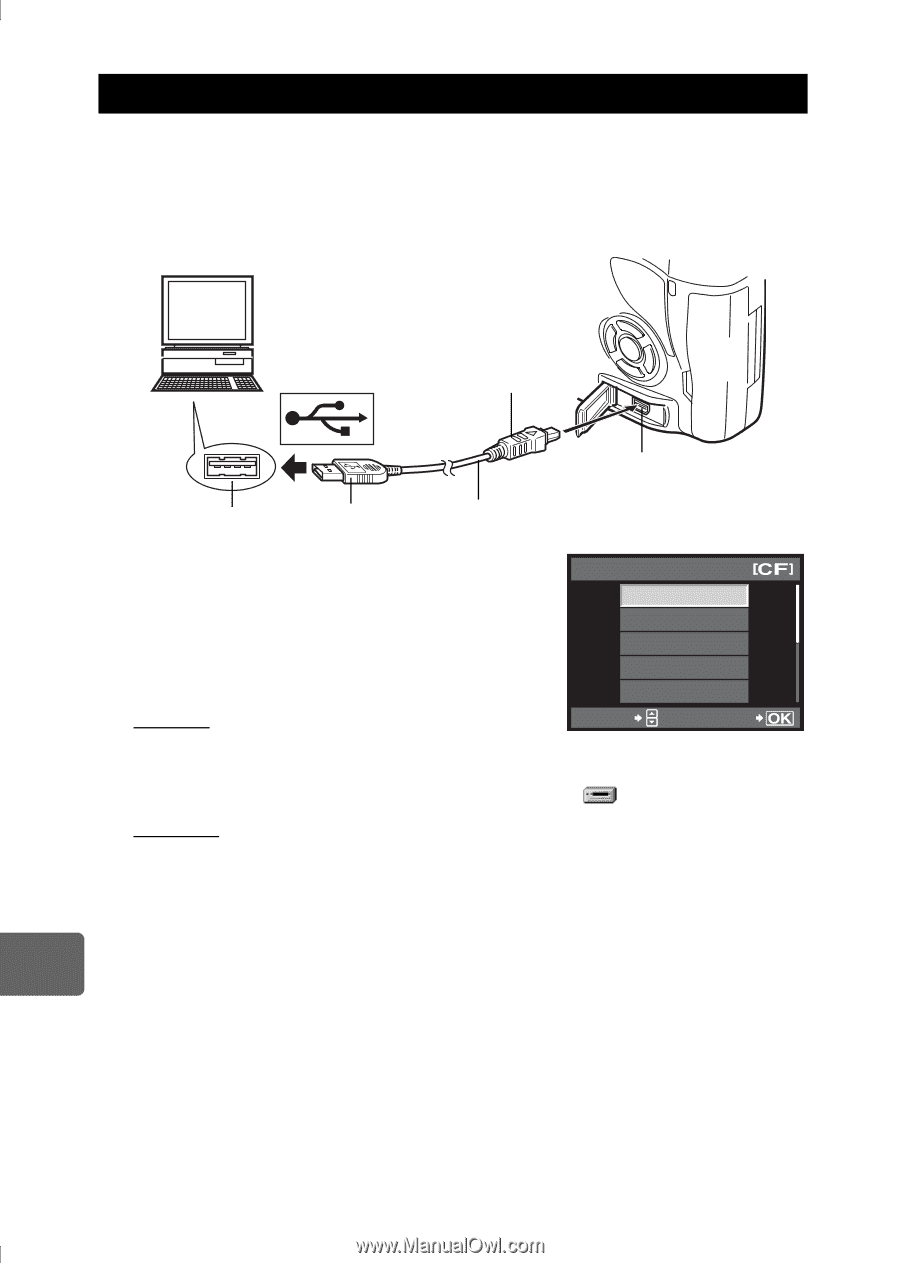
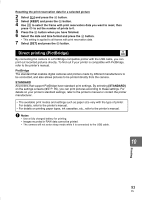
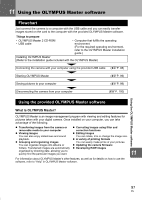
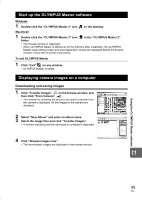
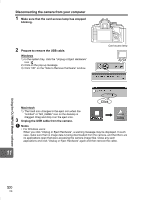
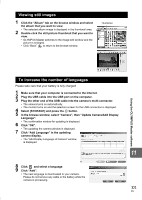
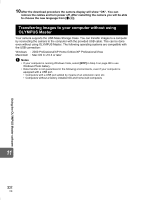
Connecting the camera to a computer Connect the camera to your computer with the provided USB cable. 1 Use the provided USB cable to connect the computer's USB port to the camera's multi-connector. • The location of the USB port varies with the computer. For details, refer to your computer's manual. Look for this mark. Smaller terminal Multi-connector 11 Using the OLYMPUS Master software USB port Terminal USB cable 2 Set the camera's power switch to ON. • The selection screen for the USB connection is displayed. 3 Press ac to select [STORAGE]. Press the i button. 4 The computer recognizes the camera as a new device. USB STORAGE MTP CONTROL EASY PRINT CUSTOM PRINT Windows SELECT GO • When you connect the camera to the computer for the first time, the computer automatically recognizes the camera. Click "OK" when the message saying that the installation is completed appears. The computer recognizes the camera as a "Removable Disk ". Macintosh • iPhoto is the default image management application for Mac OS. When you connect your Olympus digital camera for the first time, iPhoto will start up automatically. Close iPhoto and start OLYMPUS Master. x Notes • When the camera is connected to the computer, none of the camera buttons are functional. 98 EN
-
 1
1 -
2
-
3
-
4
-
5
-
6
-
7
-
8
-
9
-
10
-
11
-
12
-
13
-
14
-
15
-
16
-
17
-
18
-
19
-
20
-
21
-
22
-
23
-
24
-
25
-
26
-
27
-
28
-
29
-
30
-
31
-
32
-
33
-
34
-
35
-
36
-
37
-
38
-
39
-
40
-
41
-
42
-
43
-
44
-
45
-
46
-
47
-
48
-
49
-
50
-
51
-
52
-
53
-
54
-
55
-
56
-
57
-
58
-
59
-
60
-
61
-
62
-
63
-
64
-
65
-
66
-
67
-
68
-
69
-
70
-
71
-
72
-
73
-
74
-
75
-
76
-
77
-
78
-
79
-
80
-
81
-
82
-
83
-
84
-
85
-
86
-
87
-
88
-
89
-
90
-
91
-
92
-
 93
93 -
 94
94 -
 95
95 -
 96
96 -
 97
97 -
 98
98 -
 99
99 -
 100
100 -
 101
101 -
 102
102 -
 103
103 -
104
-
105
-
106
-
107
-
108
-
109
-
110
-
111
-
112
-
113
-
114
-
115
-
116
-
117
-
118
-
119
-
120
-
121
-
122
-
123
-
124
-
125
-
126
-
127
-
128
-
129
-
130
-
131
-
132
-
133
-
134
-
135
-
136
-
137
-
138
-
139
-
140
 |
 |