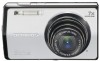
Olympus Stylus 7000 Silver STYLUS-7000 Instruction Manual (English) - Page 27
Selecting the method for measuring - spot
 |
UPC - 050332167490
View all Olympus Stylus 7000 Silver manuals
Add to My Manuals
Save this manual to your list of manuals |
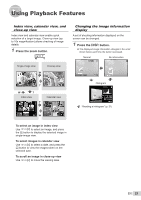
Page 27 highlights
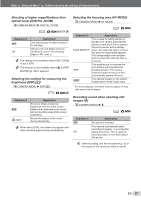
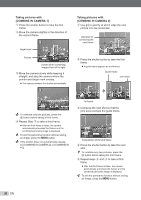
Refer to "Using the Menu" (p. 3) when adjusting the settings of these functions. Shooting at higher magnifications than optical zoom [DIGITAL ZOOM] B CAMERA MENU X DIGITAL ZOOM : K s I A Submenu 2 OFF ON Application Only optical zoom is used to zoom in for shooting. Optical zoom and digital zoom are combined to zoom in for shooting (Approx. 35× (max.)). The setting is not available when [FINE ZOOM] is set to [ON]. This function is not available when [% SUPER MACRO] (p. 20) is selected. Selecting the method for measuring the brightness [ESP/n] B CAMERA MENU X ESP/n : K s A Submenu 2 ESP 5 (spot) Application Shoots to obtain a balanced brightness over the entire screen (Meters the brightness at the center and surrounding areas of the screen separately). Shoots the subject at the center during backlighting. When set to [ESP], the center may appear dark when shooting against strong backlighting. Selecting the focusing area [AF MODE] B CAMERA MENU X AF MODE : K s Submenu 2 Application FACE DETECT*1 This is used for taking pictures of people (The camera automatically detects a face and a frame appears. Press the shutter button halfway down, and when the face is in focus, the green AF target mark appears. The orange target mark indicates that the area other than the face is in focus). iESP This enables you to compose the shot without worrying about the focusing position. The camera finds the subject to focus on and automatically adjusts the focus. SPOT The camera focuses on the subject located within the AF target mark. *1 For some subjects, the frame may not appear or may take some time to appear. Recording sound when shooting still images [R] B CAMERA MENU X R : K s Submenu 2 OFF ON Application No sound is recorded. The camera automatically starts recording for approx. 4 seconds after taking the picture. This is useful for recording notes or comments about the picture. When recording, aim the microphone (p. 6) at the source of the sound you want to record. EN 27
-
 1
1 -
2
-
3
-
4
-
5
-
6
-
7
-
8
-
9
-
10
-
11
-
12
-
13
-
14
-
15
-
16
-
17
-
18
-
19
-
20
-
21
-
 22
22 -
 23
23 -
 24
24 -
 25
25 -
 26
26 -
 27
27 -
 28
28 -
 29
29 -
 30
30 -
 31
31 -
 32
32 -
33
-
34
-
35
-
36
-
37
-
38
-
39
-
40
-
41
-
42
-
43
-
44
-
45
-
46
-
47
-
48
-
49
-
50
-
51
-
52
-
53
-
54
-
55
-
56
-
57
-
58
-
59
-
60
-
61
-
62
-
63
-
64
-
65
-
66
-
67
-
68
-
69
-
70
 |
 |
