Olympus Stylus 7000 Silver STYLUS-7000 Instruction Manual (English) - Page 40
playback [PIC ORIENTATION]
 |
UPC - 050332167490
View all Olympus Stylus 7000 Silver manuals
Add to My Manuals
Save this manual to your list of manuals |
Page 40 highlights
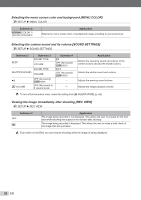
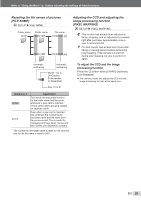
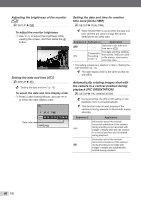
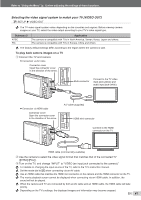
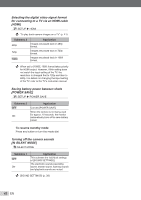
Adjusting the brightness of the monitor [s] E SETUP X s To adjust the monitor brightness 1 Use LM to adjust the brightness while viewing the screen, and then press the E button. s BACK MENU SET OK Setting the date and time [X] E SETUP X X "Setting the date and time" (p. 13) To select the date and time display order 1 Press O after setting Minute, and use LM to select the date display order. X Date order Y M D TIME 2009 08 26 12 30 Y M D CANCEL MENU Setting the date and time for another time zone [DUALTIME] E SETUP X DUALTIME When [DUALTIME] is set to [ON], the date and time set here are used in image file names, dated prints and other data. Submenu 2 Submenu 3 Application OFF - Switches to the date and time set in [X]. ON (Proceeds to the setting screen*1.) The date and time settings from [DUALTIME] are used in file names, dated prints and other data. *1 The setting procedure is identical to that in "Setting the date and time" (p. 13). The date display order is the same as that set with [X]. Automatically rotating images shot with the camera in a vertical position during playback [PIC ORIENTATION] E SETUP X PIC ORIENTATION During shooting, the [y] (p.35) setting on the playback menu is set automatically. This function may not work properly if the camera is facing upwards or downwards during shooting. Submenu 2 OFF ON Application Information about the vertical/ horizontal orientation of the camera during shooting is not recorded with images. Images shot with the camera in a vertical position are not rotated during playback. Information about the vertical/ horizontal orientation of the camera during shooting is recorded with images. Images are automatically rotated during playback. 40 EN
-
 1
1 -
2
-
3
-
4
-
5
-
6
-
7
-
8
-
9
-
10
-
11
-
12
-
13
-
14
-
15
-
16
-
17
-
18
-
19
-
20
-
21
-
22
-
23
-
24
-
25
-
26
-
27
-
28
-
29
-
30
-
31
-
32
-
33
-
34
-
 35
35 -
 36
36 -
 37
37 -
 38
38 -
 39
39 -
 40
40 -
 41
41 -
 42
42 -
 43
43 -
 44
44 -
 45
45 -
46
-
47
-
48
-
49
-
50
-
51
-
52
-
53
-
54
-
55
-
56
-
57
-
58
-
59
-
60
-
61
-
62
-
63
-
64
-
65
-
66
-
67
-
68
-
69
-
70
 |
 |
