Onkyo 8555 Instruction Manual - Page 20
Connecting a VCR, Connecting a TV or Other Component, with an Audio Output, Connecting, Components
 |
UPC - 751398008313
View all Onkyo 8555 manuals
Add to My Manuals
Save this manual to your list of manuals |
Page 20 highlights
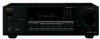
Connecting Your Components-Continued Connecting a VCR Use an analog audio cable to connect the VCR/DVR IN L/R jacks to the analog audio output jacks on the VCR, and use a video cable to connect the VCR/DVR IN V jack to the composite video output jack on the VCR. Then use an analog audio cable to connect the VCR/DVR OUT L/R jacks to the analog audio input jacks on the VCR, and use a video cable to connect the VCR/DVR OUT V jack to the composite video input jack on the VCR. In addition, connect the MONITOR OUT jack to a composite video input jack on the TV. You can select the video and sound from the VCR simultaneously by pressing the VCR/DVR input selector button. MONITOR OUT V VCR/DVR V VCR/DVR V IN L R VCR/DVR L R VCR/DVR VCR/DVR IN L R L R AUDIO IN VIDEO IN AUDIO OUT VIDEO OUT Connecting a TV or Other Component with an Audio Output Use an analog audio cable to connect the unused audio input L/R jacks on the receiver to the analog audio output jacks on the connected component. IN L R L R AUDIO OUT Connecting Components If you connect other Onkyo components to the receiver with the appropriate and audio cables, you can use the following system functions. cables are special cables solely for use with Onkyo products (no cables are supplied with the receiver). Auto Power On When you turn on the power or start playback on a component that's connected to the receiver, the receiver will turn on automatically. And when you set the receiver to Standby, all connected components will go on Standby as well. Direct Change When playback is started on an audio component connected via , the receiver will automatically select that component as the input source. Remote Control Operation You can control all components in your system by using the receiver's remote controller. See pages 11-12 for more information. 20
-
 1
1 -
2
-
3
-
4
-
5
-
6
-
7
-
8
-
9
-
10
-
11
-
12
-
13
-
14
-
 15
15 -
 16
16 -
 17
17 -
 18
18 -
 19
19 -
 20
20 -
 21
21 -
 22
22 -
 23
23 -
 24
24 -
 25
25 -
26
-
27
-
28
-
29
-
30
-
31
-
32
-
33
-
34
-
35
-
36
-
37
-
38
-
39
-
40
-
41
-
42
-
43
-
44
-
45
-
46
-
47
-
48
 |
 |
