Onkyo FR-N3X User Manual English
Onkyo FR-N3X Manual
 |
View all Onkyo FR-N3X manuals
Add to My Manuals
Save this manual to your list of manuals |
Onkyo FR-N3X manual content summary:
- Onkyo FR-N3X | User Manual English - Page 1
Basic Operation Thank you for purchasing the Onkyo CD/MD TUNER AMPLIFIER. Please read this manual thoroughly before making connections and turning on the power. Following the instructions in this manual will enable you to obtain optimum performance and listening pleasure from your new CD/MD TUNER - Onkyo FR-N3X | User Manual English - Page 2
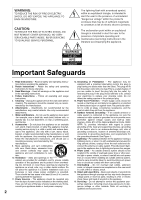
to the presence of important operating and maintenance (servicing) instructions in the literature accompanying the appliance. WARNING RISK OF bracket, or table.The appliance may fall, grounding of the mast and supporting structure, grounding causing serious injury to a child or adult, and serious - Onkyo FR-N3X | User Manual English - Page 3
or any other liquid enters the case, take this unit to an authorized service center for inspection. 5. Location of this unit Place this unit in PRODUCT." To use this model properly, read this Instruction Manual carefully. In case of any trouble, please contact the store where you purchased the unit - Onkyo FR-N3X | User Manual English - Page 4
adjusts the recording level of CD-toMD dubbing. • Adjustable digital recording volume level. • Supports MDLP long hour recording mode (2X/4X). • Double-speed CD-to-MD dubbing function is exposed to a humid climate. • 75/300 ohm antenna • Instruction Man- adapter [1] ual (this manual) [1] 4 - Onkyo FR-N3X | User Manual English - Page 5
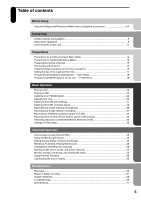
erasing MD tracks 55 Using the timer functions ...60 Customizing the source names 65 Miscellaneous Messages ...66 Rules for digital recording...67 System limitations...68 Troubleshooting ...69 Specifications ...71 5 - Onkyo FR-N3X | User Manual English - Page 6
Connecting Antenna (aerial) and speakers Do not connect the AC power cord (main lead) when you connect the antenna or speakers. You will connect the AC power cord on page 11. Speaker connectors Antenna (aerial) connector Subwoofer connector N Connecting the supplied indoor FM antenna (aerial) - Onkyo FR-N3X | User Manual English - Page 7
N Directional Iinkage Do not use the same antenna for both FM and TV (or VCR) reception since these signals may interfere with each other. If you must use a common FM/TV (or VCR) antenna, use a directional linkage type splitter. N Connecting the AM antenna Assembling the AM loop antenna Assemble - Onkyo FR-N3X | User Manual English - Page 8
Antenna (aerial) and speakers (continued) 1 2 3 1 10mm Push down the lever. Insert the tip of the speaker cable. Release the lever to replace it. -+ -+ Peel the insulation to expose about 10mm of the core wire. 2 Twist the core wire. Right Left speaker speaker Notes • Connecting the - Onkyo FR-N3X | User Manual English - Page 9
Audio/video equipment Connect the white plugs of the audio cables to the L jacks and connect the red plugs of the audio cables to the R jacks. Tip The source names appearing in the display can be customized for the connected component (see page 65). Optical digital audio output connector Jacks for - Onkyo FR-N3X | User Manual English - Page 10
-N3X for digital recording. Use a standard optical fiber audio cable for connection. Digital recording is allowed only for the first generation. (See "Guide to the serial copy management system" on page 67.). : Signal flow Jacks on the compact disc ANALOG recorder's rear panel INPUT OUTPUT REMOTE - Onkyo FR-N3X | User Manual English - Page 11
Connecting the power cord To wall outlet STANDBY indicator When the power cord is connected to the AC outlet, the FR-N3X enters stand-by mode. The STANDBY indicator lights up. 11 - Onkyo FR-N3X | User Manual English - Page 12
Preparations Precautions for handling Compact Discs (CDs) Precautions for handling MiniDiscs (MDs) Important notes on handling CDs 1 Carefully lift the disc from the disc case, making sure to hold the disc by its edges or the hole in the middle. The MD is housed in a cartridge, so you can handle - Onkyo FR-N3X | User Manual English - Page 13
Preparing the remote controller N Inserting the batteries 1 Detach the battery cover. N Using the remote controller Point the remote controller toward the remote control sensor. 2 Insert the two R6 (size AA) batter- ies. Be sure to match the + and - ends of the batteries with the dia- - Onkyo FR-N3X | User Manual English - Page 14
Part names and functions N Front panel MULTI JOG dial Enables you to skip tracks forward or backward. When the system is stopped, it enables you to select a track to play. It is also used to select a type of editing and characters to input. Press this dial to confirm the settings. MD disc slot Insert - Onkyo FR-N3X | User Manual English - Page 15
N Display CD indicator MD/CD setting indicators MD indicator CH (channel) indicator S.BASS indicator Recording level indicator TIMER indicator MUTING indicator L.SYNC indicator DIGITAL indicator N Remote controller Multi-purpose display CD/MD indicator Playback mode indicators FM reception - Onkyo FR-N3X | User Manual English - Page 16
Understanding preparatory and common operations This section explains the following preparatory and common operations: turning the unit on and off, selecting a source, adjusting the volume, etc. Source selector buttons VOLUME STANDBY/ON STANDBY indicator STANDBY/ ON INPUT buttons VOLUME / N - Onkyo FR-N3X | User Manual English - Page 17
Setting the day of the week and the time You can select either the 12-hour or 24-hour display. (This section explains how to set the time based on the 12-hour display.) DISPLAY 1 2-6 EDIT/ CLEAR/NO 1 Press TIMER repeatedly until 6 Press MULTI JOG in sync with "Clock" appears in the display. - Onkyo FR-N3X | User Manual English - Page 18
may store noise instead of a station with a clear signal to some preset channels, depending on your location. In such cases, erase the preset manually (see page 50). If auto presetting is unsuccessful Check the antenna (aerial) connection and position (see page 6). If you have a power failure or - Onkyo FR-N3X | User Manual English - Page 19
Programming AM/FM stations one by one - Preset Write You can store the frequencies of AM stations one by one manually into the preset memory channels. (You can store FM stations manually or by using the auto preset function.) • You can preset up to 30 channels including both FM and AM stations. For - Onkyo FR-N3X | User Manual English - Page 20
Playing a CD Basic Operation 1- 2 / DISPLAY MULTI JOG 1- 1 3 2 1 CD 2 CD Insert a CD (Compact Disc). 1 Press CD to extend the disc tray. 2 Place the CD in the tray with the label side facing up. If you play a CD single, place it in the center circle of the tray. 3 Press CD to retract the tray. - Onkyo FR-N3X | User Manual English - Page 21
N Changing the display information Press DISPLAY on the unit repeatedly to change the display as follows: While the CD is stopped During playback or pause Total number Total playing of tracks time "DISC" Lights up while the disc information is displayed. CD name or artist name*1 "DISC NAME" - Onkyo FR-N3X | User Manual English - Page 22
Playing an MD 1 / 2 DISPLAY MULTI JOG 1 2 MD Insert an MD (Mini Disc). Tip The MD must be pre-recorded. If the unit is in standby mode, it turns on automatically when you The arrow on the MD must face up and point to the unit. insert the MD. Push gently to load the MD into the unit. Press - Onkyo FR-N3X | User Manual English - Page 23
N Changing the display information Press DISPLAY on the unit repeatedly to change the display as follows: While the MD is stopped Total number of tracks Total playing time During playback or pause The elapsed time of the playing track "DISC" is lit while the disc information is displayed. " - Onkyo FR-N3X | User Manual English - Page 24
Listening to an FM/AM station First, program the stations into preset channels (see pages 18 and 19). 1 2 VOLUME 3 DISPLAY 1 Turn on the power to the FR-N3X. 2 Select FM or AM. Pressing FM/AM toggles between FM and AM. The channel selected most recently will be recalled. 3 Turn MULTI JOG or - Onkyo FR-N3X | User Manual English - Page 25
Pressing selects a lower channel number and pressing selects a higher channel number.) Enables you to manually tune in a broadcast station. (See below.) N Manually tuning a broadcast station You can also tune in radio stations manually. 1 Turn on the power to the FR-N3X. 2 Select FM or AM. 3 Press - Onkyo FR-N3X | User Manual English - Page 26
Adjusting the tone 1-4 1 S.BASS MUTING PHONES N Adjusting the tonal quality 1 Press the TONE/S.BASS button to select "Bass±0" (bass adjust- ment), then turn MULTI JOG to adjust the bass. 2 Press MULTI JOG to select "Tre- ble±0" (treble adjustment), then turn MULTI JOG to adjust the tre- - Onkyo FR-N3X | User Manual English - Page 27
Dubbing CD to MD (CD dubbing) • This operation is one-touch recording that enables the DLA LINK. • The tracks are automatically numbered. 1 2- 1 3 2 3 1 Insert a CD and MD. See Step 1 of "Playing a CD" on page 20. See Step 1 of "Playing an MD" on page 22. Use a recordable MD. 2 Check the - Onkyo FR-N3X | User Manual English - Page 28
Dubbing CD to MD at double speed • You can copy a CD to an MD at double speed. • The tracks are automatically numbered. 1 MULTI JOG EDIT/CLEAR/NO 3 1 Insert a CD and an MD. Tip! See Step 1 of "Playing a CD" on page 20. • The quality of data recorded See Step 1 of "Playing an MD" on page 22 - Onkyo FR-N3X | User Manual English - Page 29
Recording CD to MD (Various CD Dubbing) N Recording from the top of a song you are listening to (specified track dubbing) You cannot use double-speed CD dubbing for this operation. 1 Insert a CD and an MD and press the CD / to start playback. Be sure to insert a recordable MD with the recordprotect - Onkyo FR-N3X | User Manual English - Page 30
Recording CD to MD (Various CD Dubbing) (continued) 1-3 1 N Switching to Fade Out mode (while the input source is MD and the sys- tem is stopped) This mode fades out (gradually lowers the volume level of) the end of a track that cannot be recorded to its conclusion during CD dubbing, specified - Onkyo FR-N3X | User Manual English - Page 31
Recording CD to MD (Synchro recording) After you select songs, this function enables you to edit and record the songs. 1 5 1 Insert a CD and an MD. See Step 1 of "Playing a CD" on page 20. See Step 1 of "Playing an MD" on page 22. Use a recordable MD. 2 Check the necessary recording time. - Onkyo FR-N3X | User Manual English - Page 32
Recording an FM/AM broadcast program to an MD To record a very long program, switch 1 the recording mode. (Refer to page 36.) 1 Insert an MD. Refer to Step 1 on page 22. Use a recordable MD. 2 Check the available recording time on the MD. Refer to Step 2 on page 27. 3 Select "FM" or "AM - Onkyo FR-N3X | User Manual English - Page 33
the stereo cassette tape deck to the MD unit. For more information on Synchro recording from a CD or MD to a cassette tape, refer to the instruction manual for the cassette tape deck. This section explains how to perform Synchro recording from a cassette tape deck to an MD in the FR-N3X. 1 Set - Onkyo FR-N3X | User Manual English - Page 34
Recording data from a connected external device to an MD You can record data from an external device (that you have connected following the explanation on page 9) to an MD. 5 Press MD / to start recording. 5 MD 2 1 When an MD is recorded up to its end, the MD automatically stops. 3 1 - Onkyo FR-N3X | User Manual English - Page 35
Settings for Recording N About the recording indicators Switching the display information during recording • Pressing CD/MD repeatedly toggles between the CD and MD information display. MD information ("MD" lights up.) Track the song number being played on the CD Track the song number being - Onkyo FR-N3X | User Manual English - Page 36
Settings for Recording (continued) N An MD after recording When the power is down If the power is down or if you dis- connect the power cord acciden- The TOC indicator flashes. tally while the TOC indicator is lit or flashing, the data recorded prior to power down will be TOC indicator erased. - Onkyo FR-N3X | User Manual English - Page 37
is twice the length of "SP." If you have recorded a disc in LP2 or LP4 mode, you cannot play it on a player that does not support LP2 or LP4 mode. If you play such a disc on another MD player, "LP:" may appears in the display as a title. LP4: Normal stereo data - Onkyo FR-N3X | User Manual English - Page 38
Settings for Recording (continued) N Adjusting the recording level You can adjust the recording level for better recording quality. This operation is available during Synchro recording and Signal recording. You cannot adjust the recording level during CD dubbing with DLA LINK or during double- - Onkyo FR-N3X | User Manual English - Page 39
N Numbering the songs - Level Sync • The Level Sync function of the FR-N3X automatically numbers the song at the beginning of signal input. Turn on this function to automatically number songs during recording. (The songs may not be numbered if the gap (silence) between songs is too short.) • During - Onkyo FR-N3X | User Manual English - Page 40
Advanced Operation Various ways to play CDs and MDs Five different playback modes are available in addition to normal playback. Insert a CD or MD before you begin operations (see pages 20 and 22). N MEMORY playback You can select and store track numbers (up to 25) in a desired playback order. By - Onkyo FR-N3X | User Manual English - Page 41
N 1 TR (one track) playback You can play back only a single track using this mode. In addition, using the CD dubbing function along with this mode enables you to create a single track CD easily. N RANDOM playback All tracks on the disc will be shuffled, then played back. 2 2 1 3 1 2 2 While - Onkyo FR-N3X | User Manual English - Page 42
Various ways to play CDs and MDs (continued) N REPEAT/CHAIN REPEAT playback • The REPEAT mode plays back a CD or MD repeatedly, and the CHAIN REPEAT mode plays back both the CD and MD in turn. • You can combine either REPEAT or CHAIN REPEAT mode with MEMORY, 1 TR, or RANDOM mode. In CHAIN REPEAT - Onkyo FR-N3X | User Manual English - Page 43
try to play an MD that contains groups on a device that does not support Groups, the disc name will not be displayed correctly. Do not edit an MD that contains groups on a device that does not support Groups. Group Set (while the source is MD and the unit is stopped) - Onkyo FR-N3X | User Manual English - Page 44
Using the MD Group Function (continued) Group Out (while the source is MD and the unit is stopped) This function enables you to remove a track from the group. 1 Turn MULTI JOG to select a track you wish to remove from the group. 2 Press EDIT/CLEAR/NO and turn MULTI JOG until "XX Tr Gr.Out?" - Onkyo FR-N3X | User Manual English - Page 45
Editing Groups (Move, Combine and Erase) You can perform three editing functions: move a group to change the order, combine two groups into one, and erase tracks in a group. N Outline of edit function 1 Erasing a group-G.Erase All tracks in the specified group will be erased. Moving a group-G. - Onkyo FR-N3X | User Manual English - Page 46
Editing Groups (Move, Combine and Erase) (continued) N Moving a group - G.Move 4 • You can execute this function only when the input source is MD and an MD is stopped or paused. • To cancel the operation, press MD . 1 2 1 2-6 3 5 Press MULTI JOG. The group will be assigned this group - Onkyo FR-N3X | User Manual English - Page 47
N Combining groups - G.Combine 5 • You can execute this function only when the input source is MD and an MD is playing or paused. • The name of the lower-numbered group is assigned to the combined group. • To cancel the operation, press MD . 1 2 1 2-5 3 1 Insert an MD, and select MD as the - Onkyo FR-N3X | User Manual English - Page 48
MD Group Functions (Playing MD Groups) Before you use this function, you need to create a group on the disc (see page 43). N MD Group playback N MD 1Group playback The selected group and all subsequent groups will be played. Only the selected group will be played. 1 1 2, 4 2, 3 3 1 Press - Onkyo FR-N3X | User Manual English - Page 49
N MD Group skip You can specify groups to skip during playback. 1 2 1 Press the GROUP button during playback. 2 Rotate MULTI JOG to select the desired group. Playback starts from the first track of the selected group. 49 - Onkyo FR-N3X | User Manual English - Page 50
Changing the FM/AM preset channels Using the delete and copy functions, you can delete preset stations, copy a preset station to another channel, or change the channel number. Tips for changing the preset channels To change the channel number: Use the copy and delete functions. For example, if you - Onkyo FR-N3X | User Manual English - Page 51
N Copying a preset channel - Preset 5 Copy If you copy a preset channel to another channel, the name of the preset channel (see page 52) is also copied to the other channel. 2-5 5 2, 5 1 Call the preset channel you wish to copy. 2 Press EDIT/CLEAR/NO and turn MULTI JOG until "PresetCopy?" - Onkyo FR-N3X | User Manual English - Page 52
Naming an MD and its tracks, and preset channels N Naming an MD disc or track N Entering a name • You can enter up to 100 alphabetical characters per name. • Use a recordable MD with the record-protect tab closed. 1 Insert the MD, then select MD as the source. 2 To name the disc, proceed to Step - Onkyo FR-N3X | User Manual English - Page 53
4 Turn MULTI JOG to select the Note If you press and hold EDIT/CLEAR/NO on the unit for more character (or title when in Easy than two seconds, the FR-N3X returs to the previous indica- Title mode), then press it to enter. tion without erasing characters. Repeat this step for the next - Onkyo FR-N3X | User Manual English - Page 54
Naming an MD and its tracks, and preset channels (continued) N Inputting characters from the remote controller Number buttons NAME DISPLAY SCROLL 1 2 3 54 Press NAME. Press DISPLAY repeatedly until the character type you wish to enter appears in the display. Each press of the DISPLAY button - Onkyo FR-N3X | User Manual English - Page 55
Moving, dividing, combining, and erasing MD tracks N Five basic functions N Erasing all tracks on an MD - All Erase • All Erase This function erases all the tracks and names to initialize the MD. ("Blank Disc" is displayed.) • Erase This function erases the selected track. • Move This function - Onkyo FR-N3X | User Manual English - Page 56
Moving, dividing, combining, and erasing MD tracks (continued) N Erasing a selected track - Erase 4 • You can execute this function only when the input source is MD and an MD is stopped or paused. • To cancel the operation, press MD . 1 1 2-4 3 1 Insert the MD, then select MD as the source. - Onkyo FR-N3X | User Manual English - Page 57
N Moving the selected track - Move 5 • You can execute this function only when the input source is MD and an MD is stopped or paused. • To cancel the operation, press MD . 1 1 2-6 6 3 If necessary, turn MULTI JOG to change the destination track number. The selected number will become this - Onkyo FR-N3X | User Manual English - Page 58
Moving, dividing, combining, and erasing MD tracks (continued) N Dividing a selected track - Divide 6 • You can execute this function only when the input source is MD and an MD is playing or paused. • If a selected track has a name (see page 52), the first part will retain the name after the track - Onkyo FR-N3X | User Manual English - Page 59
N Combining selected tracks 5 - Combine • You can execute this function only when the input source is MD and an MD is playing, paused, or stopped. • When the preceding track has a name, this name will be used as the name of the combined track. • To cancel the operation, press MD . 1 6 1 2-6 - Onkyo FR-N3X | User Manual English - Page 60
Using the timer functions The FR-N3X provides five timer functions: Sleep, Once, Weekday, Weekend, and Rec timer. N Five basic functions N Using the Sleep timer Sleep timer This timer places the FR-N3X into standby mode automatically when the sleep timer counts down to zero. This function is - Onkyo FR-N3X | User Manual English - Page 61
Operating with the unit You can set the Sleep timer for 10 to 90 minutes, in intervals of 10 minutes. It is also possible to set the timer from 1 to 99 in one-minute increments is also possible using MULTI JOG. N Setting the Once, Weekday, Week- end, or Rec timer 2-5, 7 9 1 3, 4 1, 2 1 Press - Onkyo FR-N3X | User Manual English - Page 62
Using the timer functions (continued) 3 4 5 6 62 7 Press MULTI JOG, then turn it to select the start time. 24-hour display 12-hour display 8 Press MULTI JOG, then turn it to select the end time. After you press MULTI JOG in this step, the end time is automatically set to one hour after the start - Onkyo FR-N3X | User Manual English - Page 63
N Setting the timer for weekdays and weekends 1 Press MULTI JOG. Check the ON or OFF setting for each day. If you do not need to change the setting, skip the following steps, then proceed to step 7 on the previous page. Sunday Monday Tuesday Wednesday Thursday Friday Saturday To change the day of - Onkyo FR-N3X | User Manual English - Page 64
Using the timer functions (continued) N Switching the set timer On/Off You can switch each set timer to Off or On. 3 2 1 Check each timer to see whether it is On or Off. The indicator of the timer set to On is lit in the display. N If the start or end time of one timer overlaps another If the - Onkyo FR-N3X | User Manual English - Page 65
Customizing the source names You can change the source name that appears in the display to suit any component you connected per the instructions on pages 9, 10. 5 Press MULTI JOG to enter the new name. "Complete" appears in the display. 1 4, 5 3 2 You may press MODE/YES instead of MULTI JOG - Onkyo FR-N3X | User Manual English - Page 66
Messages Miscellaneous The following table explains the messages that appear in the display. Message MD Blank Disc Cannot Copy Cannot Edit Cannot Rec Cannot Set CD Dub Fail Complete Cannot Read Disc Full Full Impossible MD Writing Mecha Error Memory Full Name Full No Change CD/MD No Disc - Onkyo FR-N3X | User Manual English - Page 67
Rules for digital recording Guide to the serial copy management system Since your MD unit uses the Serial Copy Management System (SCMS), MDs recorded through the digital input terminal cannot - Onkyo FR-N3X | User Manual English - Page 68
Rules for digital recording (continued) System limitations Rule 3 A recordable MD with material recorded from analog sources (analog records or FM programs, etc.) through the line input terminal can be copied to another recordable MD through the digital output terminal. However, you cannot make - Onkyo FR-N3X | User Manual English - Page 69
Use this troubleshooting guide as an aid to remedy problems. Problems may be caused by any component connected to this unit. Please check the table below, cross-referencing with the instruction manuals for the other components. Amplifier CD/MD Symptom Cause Remedy Pages The unit - Onkyo FR-N3X | User Manual English - Page 70
Troubleshooting (continued) Tuner Symptom Cause Remedy Pages Too much . • Connect the system correctly, cross-referencing the Onkyo stereo cassette tape deck and CD recorder instruction manual. • Connect the unit and stereo cassette tape deck and CD recorder correctly using the cable and - Onkyo FR-N3X | User Manual English - Page 71
Specifications General Power supply AC 220-230 V, 50/60 Hz AC 120 V, 60 Hz Power consumption 46 W (220-230 V, 50/60 Hz) 55 W (120 V, 60 Hz) (Standby) 1.5 W Clock precision monthly error: +/-30 seconds (at 25 degrees Celsius) Dimensions (W × H × D) 155 × 190 × 361 mm Weight 4.7 kg Ampli - Onkyo FR-N3X | User Manual English - Page 72
72 SN 29343349 Sales & Product Planning Div. : 2-1, Nisshin-cho, Neyagawa-shi, OSAKA 572-8540, JAPAN Tel: 072-831-8111 Fax: 072-833-5222 http://www.onkyo-intl.com ONKYO U.S.A. CORPORATION 18 Park Way, Upper Saddle River, N.J. 07458, U.S.A. Tel: 201-785-2600 Fax: 201-785-2650 http://www.onkyousa.com
-
 1
1 -
 2
2 -
 3
3 -
 4
4 -
 5
5 -
 6
6 -
 7
7 -
8
-
9
-
10
-
11
-
12
-
13
-
14
-
15
-
16
-
17
-
18
-
19
-
20
-
21
-
22
-
23
-
24
-
25
-
26
-
27
-
28
-
29
-
30
-
31
-
32
-
33
-
34
-
35
-
36
-
37
-
38
-
39
-
40
-
41
-
42
-
43
-
44
-
45
-
46
-
47
-
48
-
49
-
50
-
51
-
52
-
53
-
54
-
55
-
56
-
57
-
58
-
59
-
60
-
61
-
62
-
63
-
64
-
65
-
66
-
67
-
68
-
69
-
70
-
71
-
72
 |
 |

CD/MD TUNER AMPLIFIER
FR-N3X
Instruction Manual
Thank you for purchasing the Onkyo CD/MD TUNER
AMPLIFIER.
Please read this manual thoroughly before making
connections and turning on the power.
Following the instructions in this manual will enable
you to obtain optimum performance and listening
pleasure from your new CD/MD TUNER
AMPLIFIER.
Please retain this manual for future reference.
Contents
Before Using
Preparations
Connecting
Basic Operation
Advanced Operation
Additional Operation