Onkyo HT-SR800 Owner Manual - Page 61
Digital Input Signal Formats, Correcting Sound and Picture Sync
 |
View all Onkyo HT-SR800 manuals
Add to My Manuals
Save this manual to your list of manuals |
Page 61 highlights
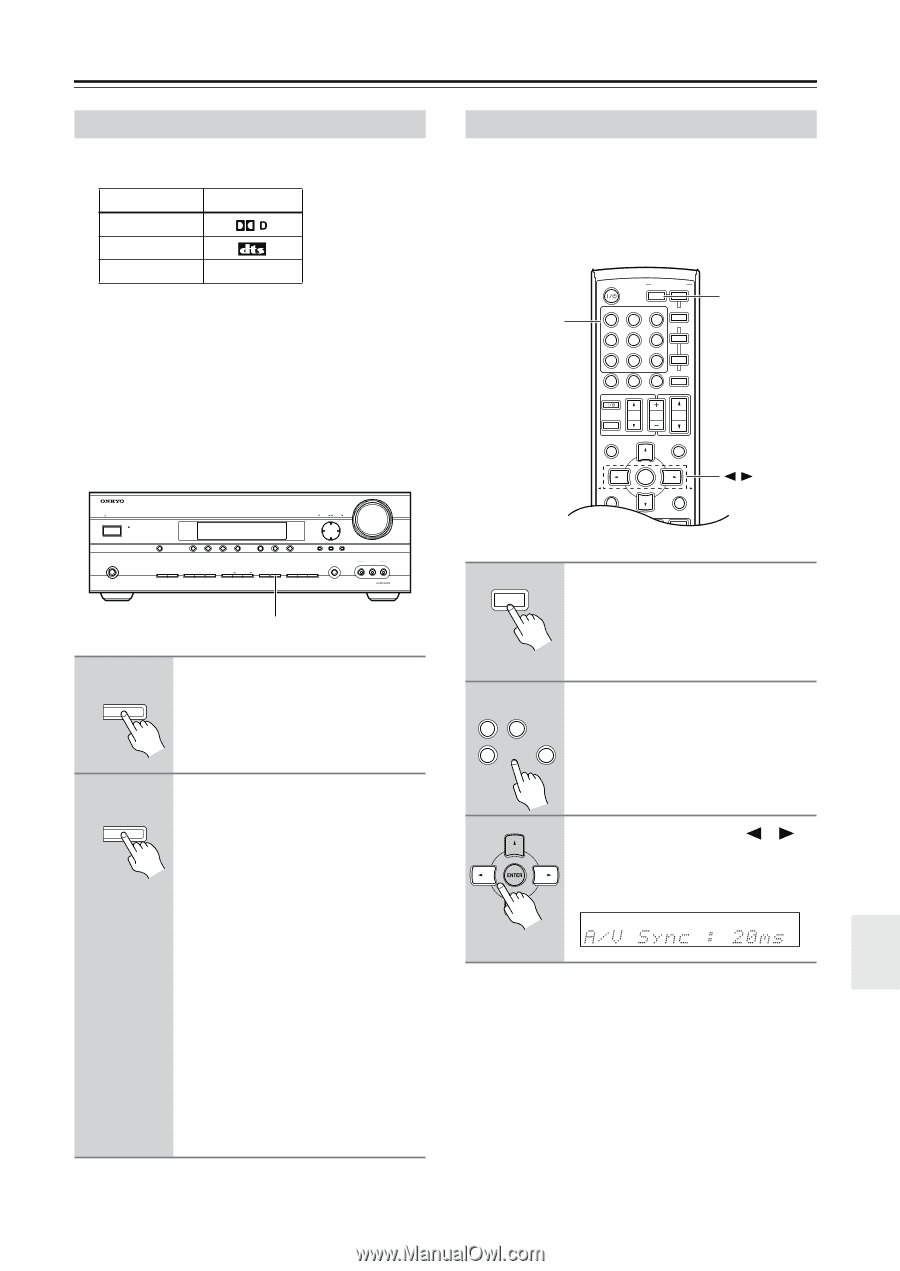
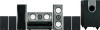
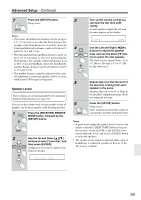
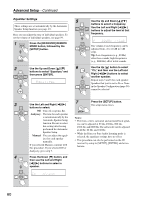
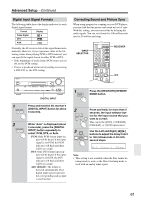
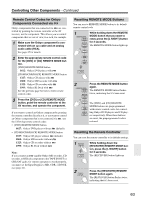
Advanced Setup-Continued Digital Input Signal Formats The following table shows the display indicator for each digital signal format. Format Dolby Digital DTS PCM Display PCM Normally, the AV receiver detects the signal format automatically. However, if you experience either of the following issues when playing PCM or DTS material, you can specify the signal format as either PCM or DTS: • If the beginnings of tracks from a PCM source are cut off, try the PCM setting. • If noise is produced when fast forwarding or reversing a DTS CD, try the DTS setting. STANDBY/ON STANDBY TUNING PRESET MASTER VOLUME PHONES MULTI CH A SPEAKERS B DVD VCR/DVR CBL/SAT AUX TAPE TUNER C D SETUP ENTER RETURN TONE STEREO LISTENING MODE DISPLAY DIGITAL INPUT DIMMER MEMORY TUNING MODE CLEAR SETUP MIC AUX INPUT VIDEO L AUDIO R DIGITAL INPUT 1 DIGITAL INPUT Press and hold the AV receiver's [DIGITAL INPUT] button for about 3 seconds. 2 DIGITAL INPUT While "Auto" is displayed (about 3 seconds), press the [DIGITAL INPUT] button repeatedly to select: PCM, DTS, or Auto. PCM: Only PCM format input signals will be heard. If the input signal is not PCM, the PCM indicator will flash and there will be no sound. DTS: Only DTS format input signals will be heard. If the input signal is not DTS, the DTS indicator will flash and there will be no sound. Auto (default): The format is detected automatically. If no digital input signal is present, the corresponding analog input is used instead. Correcting Sound and Picture Sync When using progressive scanning on your DVD player, you may find that the picture and sound are out of sync. With this setting, you can correct this by delaying the audio signals. You can set it from 0 to 100 milliseconds (ms) in 20 millisecond steps. INPUT SELECTOR STANDBY/ON REMOTE MODE RECEIVER DVD TAPE/AMP INPUT SELECTOR M D/CDR 1 2 3 VCR/DVR CBL/SAT C D DOCK 4 5 6 TV AUX MULTI CH DVD 7 8 9 VCR TAPE TUNER 10 11 +10 0 C D 12 CABLE CLR SAT D TUN --/--- ENT DIMMER SLEEP TV VOL INPUT GUIDE TOP MENU CH DISC ALBUM VOL PREVIOUS MENU SP A / B PLAYLIST/CAT ENTER MUTING PLAYLIST/CAT SETUP RETURN RECEIVER 1 RECEIVER Press the [RECEIVER] REMOTE MODE button. 2 1 2 VCR/DVR CBL/SAT 4 AUX 6 DVD Press and hold, for more than 4 seconds, the input selector button for the input source that you want to correct. This can be the [DVD], [VCR/DVR], [CBL/SAT], or [AUX] input source. 3 Use the Left and Right [ ]/[ ] buttons to adjust the delay from 0 to 100 milliseconds in 20 milli- second steps. Note: • This setting is not available when the Pure Audio lis- tening mode is used, or the Direct listening mode is used with an analog input signal. 61
-
 1
1 -
2
-
3
-
4
-
5
-
6
-
7
-
8
-
9
-
10
-
11
-
12
-
13
-
14
-
15
-
16
-
17
-
18
-
19
-
20
-
21
-
22
-
23
-
24
-
25
-
26
-
27
-
28
-
29
-
30
-
31
-
32
-
33
-
34
-
35
-
36
-
37
-
38
-
39
-
40
-
41
-
42
-
43
-
44
-
45
-
46
-
47
-
48
-
49
-
50
-
51
-
52
-
53
-
54
-
55
-
 56
56 -
 57
57 -
 58
58 -
 59
59 -
 60
60 -
 61
61 -
 62
62 -
 63
63 -
 64
64 -
 65
65 -
 66
66 -
67
-
68
-
69
-
70
-
71
-
72
 |
 |