Philips B95/37 User manual - Page 19
Wall mount, your product
 |
View all Philips B95/37 manuals
Add to My Manuals
Save this manual to your list of manuals |
Page 19 highlights
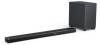
7 Wall mount your product Before you mount your product on the wall, read all safety precautions. (see 'Safety') Wall mount Note • Improper wall mounting may result in accident, injury or damage. If you have any query, contact Consumer Care in your country. • Secure the wall mount to a wall that can support the combined weight of the product and the wall mount. • Before wall mount, you need not remove the four rubber feet at the bottom of the main unit, otherwise the rubber feet cannot be xed back. Screw length/diameter Depending on the type of wall mounting this wall mount bracket, make sure that you use screws of a suitable length and diameter. 3.5-4mm/0.14"-0.16" 4mm/ 0.16"" >25mm/0.98" See the illustration on the quick start guide on how to wall mount the main unit. 1) Drill 2 holes on the wall. Use the supplied paper template to mark 2 holes on the wall, then secure 2 suitable screws in the holes. 2) Secure the wall bracket on the wall with the dowels and screws. 3) Hook the main unit on the wall bracket. 18 EN ~50mm/2.0" " 1 790mm/31.1" 3.5-4mm/0.14"-0.16" 4mm/ 0.16"" >25mm/0.98" 3 2
-
 1
1 -
2
-
3
-
4
-
5
-
6
-
7
-
8
-
9
-
10
-
11
-
12
-
13
-
 14
14 -
 15
15 -
 16
16 -
 17
17 -
 18
18 -
 19
19 -
 20
20 -
 21
21 -
 22
22 -
 23
23
 |
 |
