Philips FWD798 User manual - Page 22
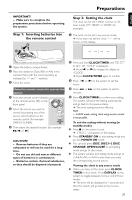
Step 3, Setting the TV set - mini system
 |
View all Philips FWD798 manuals
Add to My Manuals
Save this manual to your list of manuals |
Page 22 highlights
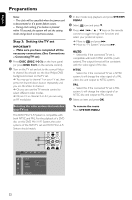
English Preparations Notes: - The clock will be cancelled when the power cord is disconnected or if a power failure occurs. - During clock setting, if no button is pressed within 10 seconds, the system will exit the setting mode and go back to its previous status. Step 3: Setting the TV set IMPORTANT! - Make sure you have completed all the necessary connections. (See Connections - Connecting TV set) 1 Press DISC (DISC 1•2•3) on the front panel (or press DISC 1/2/3 on the remote control). 2 Turn on the TV set and set to the correct Video- In channel.You should see the blue Philips DVD background screen on the TV set. ➜ You may go to channel 1 on your TV set, then press the channel down button repeatedly until you see the Video In channel. ➜ Or, you can use the TV remote control to select different video modes. ➜ Or, set TV to channel 3 or 4 if you are using an RF modulator. 1 In disc mode, stop playback and press SYSTEM MENU. 2 Select icon and press 4. 3 Press 1 / ¡ / 5 / 4 keys on the remote control to toggle through the functions and select your preferred option. ➜ Move to and press ¡. ➜ Move to "TV System" and press ¡. AUTO - Select this if the connected TV set is compatible with both NTSC and PAL (multi system).The output format will be consistent with the video signal of the disc. NTSC - Select this if the connected TV set is NTSC system. It will change the video signal of a PAL video disc and output to NTSC system. PAL - Select this if the connected TV set is PAL system. It will change the video signal of an NTSC disc and output to PAL format. 4 Select an item and press OK. Selecting the color system that matches your TV set This DVD Mini Hi-Fi System is compatible with both NTSC and PAL. For the playback of a DVD disc on this DVD Mini Hi-Fi System, the color systems of the DVD,TV set and DVD Mini Hi-Fi System should match. To remove the menu Press SYSTEM MENU. 1 23 4 22
-
 1
1 -
2
-
3
-
4
-
5
-
6
-
7
-
8
-
9
-
10
-
11
-
12
-
13
-
14
-
15
-
16
-
 17
17 -
 18
18 -
 19
19 -
 20
20 -
 21
21 -
 22
22 -
 23
23 -
 24
24 -
 25
25 -
 26
26 -
 27
27 -
28
-
29
-
30
-
31
-
32
-
33
-
34
-
35
-
36
-
37
-
38
-
39
-
40
-
41
-
42
-
43
-
44
-
45
-
46
-
47
-
48
-
49
-
50
-
51
 |
 |
