Pioneer DVR-550H-S Operating Instructions - Page 41
the Easy Timer Recording screen.
 |
UPC - 012562852980
View all Pioneer DVR-550H-S manuals
Add to My Manuals
Save this manual to your list of manuals |
Page 41 highlights
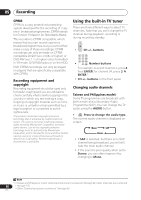
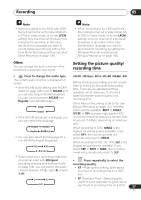
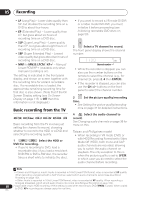
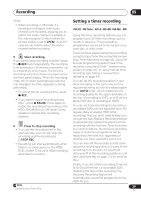
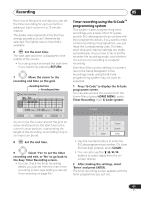
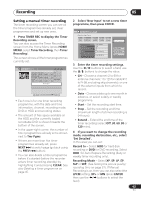
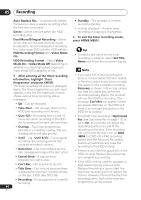
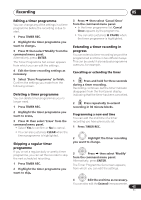
Recording 05 Each row of the grid is one day (you can set the timer recording for up to a month in advance). Each column is a 15 minute interval. The darker area represents time that has already passed and can't therefore be selected. The lighter area is time that's available. 6 ENTER Set the start time. The start date and time is displayed in the middle of the screen. • You can go back and reset the start time if you need to by pressing RETURN. 7 Move the cursor to the recording end time on the grid. Recording start time Recording end time Easy Timer Recording AM PM 11:00 12:00 1:00 2:00 3:00 1/01 1/02 1/03 1/01 MON 11:45 AM - 4:00 5:00 1:45 PM 7ch REC MODE SP HDD/DVD HDD As you move the cursor around the grid, an arrow stretches from the start time to the current cursor position, representing the length of the recording. A recording of up to six hours can be set. 8 ENTER Set the end time. 9 Select 'Yes' to set the timer recording and exit, or 'No' to go back to the Easy Timer Recording screen. • You can check the timer recording details you just set from the main timer recording screen (see Setting a manual timer recording on page 43). Timer recording using the G-Code™ programming system This system makes programming timer recordings very simple. Most TV guides publish G-Code programming numbers with their programme details. If you want to make a timer recording of a programme, you just input the corresponding code. The date, start, stop and channel settings are made automatically. All you have to do is tell the recorder the recording mode, and whether it's a once-only recording or a regular recording. Note that if the country setting is incorrect (set in the Setup Navigator), timer recordings made using the G-Code programming system may not work as expected. 1 Press 'G-Code' to display the G-Code programme screen. You can also access this screen from the Home Menu (press HOME MENU, select Timer Recording, then G-Code system). G-Code# 1 2 3 4 5 6 7 8 9 0 Clear Cancel Details Enter • Use the number buttons to enter the G-Code programming number. (To clear the last digit entered, press CLEAR.) • You can also use the / / / buttons to select digits from the onscreen display. 2 After making the settings, select 'Enter' and press ENTER. The timer recording screen appears with the timer programme you just set. 41 En
-
 1
1 -
2
-
3
-
4
-
5
-
6
-
7
-
8
-
9
-
10
-
11
-
12
-
13
-
14
-
15
-
16
-
17
-
18
-
19
-
20
-
21
-
22
-
23
-
24
-
25
-
26
-
27
-
28
-
29
-
30
-
31
-
32
-
33
-
34
-
35
-
 36
36 -
 37
37 -
 38
38 -
 39
39 -
 40
40 -
 41
41 -
 42
42 -
 43
43 -
 44
44 -
 45
45 -
 46
46 -
47
-
48
-
49
-
50
-
51
-
52
-
53
-
54
-
55
-
56
-
57
-
58
-
59
-
60
-
61
-
62
-
63
-
64
-
65
-
66
-
67
-
68
-
69
-
70
-
71
-
72
-
73
-
74
-
75
-
76
-
77
-
78
-
79
-
80
-
81
-
82
-
83
-
84
-
85
-
86
-
87
-
88
-
89
-
90
-
91
-
92
-
93
-
94
-
95
-
96
-
97
-
98
-
99
-
100
-
101
-
102
-
103
-
104
-
105
-
106
-
107
-
108
-
109
-
110
-
111
-
112
-
113
-
114
-
115
-
116
-
117
-
118
-
119
-
120
-
121
-
122
-
123
-
124
-
125
-
126
-
127
-
128
-
129
-
130
-
131
-
132
-
133
-
134
-
135
-
136
-
137
 |
 |
