Pioneer SEP C1 Owner's Manual - Page 10
Parts And Their Functions - djs control
 |
UPC - 012562891903
View all Pioneer SEP C1 manuals
Add to My Manuals
Save this manual to your list of manuals |
Page 10 highlights
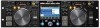
PARTS AND THEIR FUNCTIONS PARTS AND THEIR FUNCTIONS FRONT PANEL 1 8 23 2 910 3 11 12 13 14 18 17 16 4 5 6 7 EJECT TIME CUE/LOOP MEMORY CALL TRACK SEARCH A.CUE IN/CUE OUT/ADJUST HOT LOOP RELOOP/EXIT LOOP SCRATCH SEARCH MASTER TEMPO TEMPO 6/10/16WIDE MT BROWSE MIX PITCH BEND EFFECT UTILITY 22 EJECT TIME CUE/LOOP MEMORY CALL TRACK SEARCH A.CUE IN/CUE OUT/ADJUST HOT LOOP RELOOP/EXIT LOOP SCRATCH SEARCH MASTER TEMPO MT TEMPO 6/10/16WIDE PITCH BEND JOG BREAK JOG BREAK QUE REV 24 0 FWD TEMPO A LOAD B LOAD QUE SEP-C1 REV 19 20 15 21 19 0 FWD TEMPO This section explains the use of the unit when controlling DJS. Depending on the DJ software program used, some functions may not be supported or may require different operations than those described in this manual. 1 EJECT () button Not used during DJS control. 2 Loop control buttons Loop-in button (IN/CUE) Use to set loop-in points. When this button is pressed during loop playback, playback returns to the loop-in point and recommences. Loop-out button (OUT/ADJUST) Use to set loop-out points. If this button is pressed during loop playback, the jog dial or SEARCH buttons can be used to adjust the position of the out point. RELOOP/EXIT button Press this button during loop playback to cancel loop play. When the unit is not in loop play mode, pressing the button will cause loop play to begin from the previously set loop-in point. 3 TEMPO control section TEMPO control range button (±6/10/16/WIDE): Each time the button is pressed, the variable range of the TEMPO adjust slider changes. MASTER TEMPO button and indicator (MT): Each time the button is pressed, the master tempo function alternates ON/OFF. TEMPO adjust slider: From the center detent position, pull the slider towards you (+) to increase the tempo, and push the slider away from you (-) to slow down the tempo. PITCH BEND +/- buttons: When pressed during play, the pitch bend function is enabled. Pressing the "+" button accelerates the pitch bend speed, and pressing the "-" button decelerates the pitch bend speed. The speed of the pitch change can be modified by holding the button depressed while rotating the jog dial. 4 TRACK SEARCH (, ) buttons Use to perform track search. 5 SEARCH (, ) buttons Use to perform fast forward and reverse. 6 CUE button and indicator Use to set cue points. Also when a cue point has been set, pressing the CUE button sets the unit to the cue standby mode. 7 Play/pause () button and indicator Use to start and pause playback. 8 Time mode/auto cue button (TIME/A.CUE) TIME: Each time the button is pressed, the display's time display alternates between the current track's elapsed playing time, and the remaining time (REMAIN). A.CUE: When held depressed for one second or more, the AUTO CUE function alternates ON/OFF. AUTO CUE function Whenever a track is set or track search is performed, this function automatically sets a cue point and cue standby immediately before the point where music starts. 9 SCRATCH button Press to set the scratch mode ON/OFF. 10 JOG BREAK button Not used during DJS control. 11 BROWSE button Use to switch to the BROWSE screen. 12 MIX button Use to switch to the MIX screen. 13 EFFECT button Use to switch to the EFFECT screen. 14 UTILITY button Use to switch to the UTILITY screen (P. 25). 15 Rotary selector dial When in the BROWSE and UTILITY screens, rotating the dial allows track selection and movement of the cursor between selection items. Press the dial to confirm the selection. For operations in the MIX and EFFECT screens, consult the DJS Control Guide. 16 CUE/LOOP MEMORY button Not used during DJS control. 17 CUE/LOOP CALL button Not used during DJS control. 10 En
-
 1
1 -
2
-
3
-
4
-
 5
5 -
 6
6 -
 7
7 -
 8
8 -
 9
9 -
 10
10 -
 11
11 -
 12
12 -
 13
13 -
 14
14 -
 15
15 -
16
-
17
-
18
-
19
-
20
-
21
-
22
-
23
-
24
-
25
-
26
-
27
-
28
-
29
-
30
-
31
-
32
-
33
-
34
-
35
-
36
-
37
-
38
-
39
-
40
-
41
-
42
-
43
-
44
-
45
-
46
-
47
-
48
-
49
-
50
-
51
-
52
-
53
-
54
-
55
-
56
-
57
-
58
-
59
-
60
-
61
-
62
-
63
-
64
-
65
-
66
-
67
-
68
-
69
-
70
-
71
-
72
-
73
-
74
-
75
-
76
-
77
-
78
-
79
-
80
-
81
-
82
-
83
-
84
-
85
-
86
-
87
-
88
-
89
-
90
-
91
-
92
-
93
-
94
-
95
-
96
-
97
-
98
-
99
-
100
-
101
-
102
-
103
-
104
-
105
-
106
-
107
-
108
-
109
-
110
-
111
-
112
-
113
-
114
-
115
-
116
-
117
-
118
-
119
-
120
-
121
-
122
-
123
-
124
-
125
-
126
-
127
-
128
-
129
-
130
-
131
-
132
-
133
-
134
-
135
-
136
-
137
-
138
-
139
-
140
-
141
-
142
-
143
-
144
-
145
-
146
-
147
-
148
-
149
-
150
-
151
-
152
-
153
-
154
-
155
-
156
-
157
-
158
-
159
-
160
-
161
-
162
-
163
-
164
-
165
-
166
-
167
-
168
-
169
-
170
-
171
-
172
-
173
-
174
-
175
-
176
-
177
-
178
-
179
-
180
-
181
-
182
-
183
-
184
-
185
-
186
-
187
-
188
-
189
-
190
-
191
-
192
-
193
-
194
-
195
-
196
-
197
-
198
-
199
-
200
-
201
-
202
-
203
-
204
-
205
-
206
-
207
-
208
-
209
-
210
-
211
-
212
-
213
-
214
-
215
-
216
-
217
-
218
-
219
-
220
-
221
-
222
-
223
-
224
-
225
-
226
-
227
-
228
-
229
-
230
-
231
-
232
-
233
-
234
-
235
-
236
-
237
-
238
-
239
-
240
-
241
 |
 |
