Pioneer VSX-D509S Owner's Manual
Pioneer VSX-D509S Manual
 |
View all Pioneer VSX-D509S manuals
Add to My Manuals
Save this manual to your list of manuals |
Pioneer VSX-D509S manual content summary:
- Pioneer VSX-D509S | Owner's Manual - Page 1
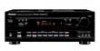
AUDIO/VIDEO MULTI-CHANNEL RECEIVER VSX-D409 VSX-D509S Operating Instructions - Pioneer VSX-D509S | Owner's Manual - Page 2
servicing) instructions in the literature accompanying the appliance. This equipment has been tested and found to comply with the limits for a Class B digital that to which the receiver is connected. - Consult the dealer or an experienced radio/TV technician for help. IMPORTANT NOTICE The serial - Pioneer VSX-D509S | Owner's Manual - Page 3
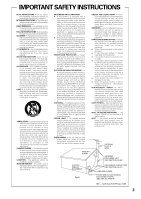
amplifiers) that produce heat. ANTENNA LEAD IN WIRE GROUND CLAMP ANTENNA DISCHARGE UNIT (NEC SECTION 810-20) ELECTRIC SERVICE EQUIPMENT Fig. A GROUNDING CONDUCTORS (NEC SECTION 810-21) GROUND CLAMPS POWER SERVICE GROUNDING ELECTRODE SYSTEM (NEC ART 250, PART H) NEC - NATIONAL ELECTRICAL CODE 3 - Pioneer VSX-D509S | Owner's Manual - Page 4
mode is on, you can enjoy the effects of quality surround sound even at low volumes. DVD 5.1 channel input A special 5.1 Channel input makes the VSX-D409/D509S fully compatible with Dolby Digital decoders and DVD players with 5.1 channel outputs. The Energy-saving Design This unit is designed to - Pioneer VSX-D509S | Owner's Manual - Page 5
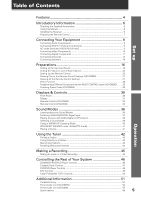
Connecting Video Components 10 Connecting Digital Components 11 Connecting Antennas 13 Connecting Speakers 14 Preparations 16 Setting Up for Surround Sound 16 Setting the Volume Level of Each Channel 22 Setting Up the Remote Control 23 Clearing One of the Remote Control Settings (VSX-D509S - Pioneer VSX-D509S | Owner's Manual - Page 6
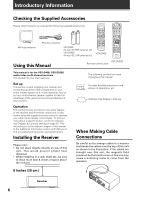
CH SELECT CH LEVEL FL DIMMER LOUDNESS FUNCTION MUTING SETUP Î AV PRE-PROGRAMMED AND LEARNING REMOTE CONTROL UNIT Using this Manual VSX-D509S Remote control units This manual is for the VSX-D409/ VSX-D509S audio/video multi-channel receivers. It is divided into two main sections: Set up This - Pioneer VSX-D509S | Owner's Manual - Page 7
equipment. CONTROL OUT CONTROL IN OUT The remote control signals are received by the remote sensor of this unit, and sent to the other devices via the CONTROL OUT terminal. VSX-D409/ VSX-D509S memo You can also control Pioneer components by pointing the receiver's remote control directly at - Pioneer VSX-D509S | Owner's Manual - Page 8
is turned off and the power cord is disconnected from the wall outlet. NOTE • Only the VSX-D509S has S-video jacks and optical digital out jack. • The arrows indicate the direction of the audio signal. VSX-D509S IN AM LOOP ANTENNA IN O U T IN AUX CD VCR / DVR IN CONTROL OUT OUT IN IN FM - Pioneer VSX-D509S | Owner's Manual - Page 9
, multi-channel decoder equipped with 5.1 analog outputs to the 5.1 analog inputs on this unit. Always make sure that the receiver is switched off and unplugged from the wall outlet before making or changing any connections. VSX-D509S IN AM LOOP ANTENNA IN O U T IN AUX CD VCR / DVR IN CONTROL OUT - Pioneer VSX-D509S | Owner's Manual - Page 10
IN OPT DIGITAL OUT TO S MONTOR OUT TV S OUT VCR / DVR S IN A FRONT SPEAKERS RL CENTER SPEAKERS CENTER PREOUT S TV / IN SAT S IN DVD / LD SURROUND SPEAKERS RL B FRONT SPEAKERS RL VSX-D509S AC OUTLET OUTPUT VIDEO L R DVD player (or LD player) INPUT VIDEO TV (monitor) 7 Audio/Video cords - Pioneer VSX-D509S | Owner's Manual - Page 11
VCR / DVR IN CONTROL OUT OUT IN IN FM UNBAL 75Ω FM ANTENNA R E C P L A Y R TV / SAT IN DVD / LD IN TO MONTOR TV SUB WOOFER PREOUT OUT R CD - R / TAPE / MD IN SUB L WOOFER L SURROUND CENTER DVD 5.1 CH INPUT VSX-D509S only COAX OPT1 OPT2 PCM / 2 / DTS DIGITAL IN OPT DIGITAL OUT TO - Pioneer VSX-D509S | Owner's Manual - Page 12
demodulator changes the RF signal to a digital signal which is then processed by the VSXD409/D509S models through their digital input jacks. For more details, refer to the instruction manual supplied with the RFD-1. VSX-D509S IN AM LOOP ANTENNA IN O U T IN AUX CD VCR / DVR IN CONTROL OUT OUT IN - Pioneer VSX-D509S | Owner's Manual - Page 13
Assemble the antenna and connect to the receiver. Attach to a wall, etc. (if DIGITAL IN OPT DIGITAL OUT TO S MONTOR OUT TV S OUT VCR / DVR S IN A FRONT SPEAKERS RL CENTER SPEAKERS CENTER PREOUT S TV / IN SAT S IN DVD / LD SURROUND SPEAKERS RL B FRONT SPEAKERS RL AC OUTLET VSX-D509S - Pioneer VSX-D509S | Owner's Manual - Page 14
INPUT COAX OPT1 OPT2 PCM / 2 / DTS DIGITAL IN OPT DIGITAL OUT TO S MONTOR OUT TV S OUT VCR / DVR S IN A FRONT SPEAKERS RL CENTER SPEAKERS CENTER PREOUT S TV / IN SAT S IN DVD / LD SURROUND SPEAKERS RL B FRONT SPEAKERS RL VSX-D509S AC OUTLET Powered sub woofer INPUT Be sure to complete - Pioneer VSX-D509S | Owner's Manual - Page 15
inches Use good quality speaker wire to connect the speakers to the receiver. 1 Twist around 1/2 inch of bare wire strands together. 2 Unclip so that the sound of the center channel is localized at the TV screen. To achieve the best possible surround sound, install your speakers as shown below - Pioneer VSX-D509S | Owner's Manual - Page 16
D.ACCESS 1¡ CHANNEL 4¢ LOUDNESS FUNCTION MUTING RECEIVER FL DIMMER REMOTE SETUP MASTER VOLUME AUDIO/VIDEO PRE-PROGRAMMED REMOTE CONTROL UNIT 4 3 16 1 Press RECEIVER to turn the power on. The STANDBY indicator goes out. 2 Press RCV. This switches the remote to the surround setup mode. (On - Pioneer VSX-D509S | Owner's Manual - Page 17
system you have connected. So, for example, here you set whether you have connected surround speakers or not, and how big they are. Selecting "Large" or "Small" will determine how much bass is sent by the receiver to the speakers being set. This setup system has certain constraints. For example, all - Pioneer VSX-D509S | Owner's Manual - Page 18
mode Crossover frequency is the point where the receiver divides the high and low sounds (the ". • If all speakers (front, center, and surround) are set to "Large" in SPEAKERS setting mode Large" speakers). LFE attenuator setting mode Dolby Digital and DTS audio sources include ultra-low bass tones. - Pioneer VSX-D509S | Owner's Manual - Page 19
speakers may be set in a location closer or farther than the FRONT speakers. Set the distance of the SURROUND speakers accurately to hear sounds coming from both FRONT and SURROUND speakers at the same time. memo • Initial setting is 10 ft. ∗ • When "S " is selected in SPEAKERS setting mode - Pioneer VSX-D509S | Owner's Manual - Page 20
sounds. memo • Initial setting is "OFF". • When the volume level is increased, set to OFF. • For listening enjoyment at low volumes, set to "MAX" for maximum dynamic range compression. • Dynamic range control is effective only when a Dolby Digital signal is being played back. Press % or fi to set - Pioneer VSX-D509S | Owner's Manual - Page 21
optical one, whenever you select that component, for example CD, the receiver will automatically change to the digital input setting. You can see this in the DIGITAL/ANALOG indicator on the front of the receiver. Optical digital input setting 2 Sets the input component to be assigned to optical - Pioneer VSX-D509S | Owner's Manual - Page 22
TONE 5 6 SIGNAL ATT SELECT 7 8 CHANNEL LEVEL 9 0 EFFECT ‡ ENTER FUNC 10 DISC CH VOL TV CONTROL VOL FQ ST MENU ST ENTER TOP MENU FQ SOURCE CLASS MPX BAND 7 8 3 D.ACCESS 1¡ CHANNEL 4¢ LOUDNESS FUNCTION MUTING RECEIVER FL DIMMER REMOTE SETUP MASTER VOLUME AUDIO/VIDEO PRE - Pioneer VSX-D509S | Owner's Manual - Page 23
the Remote Control In addition to controlling the receiver, the supplied remote control can operate your other components (DVD, MD, VCR, TV, LD, CD, etc.). If your component(s) are listed in the "Preset Code List", simply recall the corresponding preset code. Recalling preset codes (VSX-D509S) The - Pioneer VSX-D509S | Owner's Manual - Page 24
BAND 7 8 3 TV/SAT : TV or Satellite tuner D.ACCESS 1¡ CHANNEL 4¢ VCR/DVR : VCR or Digital Video Recorder LOUDNESS FUNCTION MUTING CD : CD player RECEIVER FL DIMMER REMOTE SETUP MASTER VOLUME AUDIO/VIDEO PRE-PROGRAMMED REMOTE CONTROL UNIT 1,5 CD-R/TAPE/MD : CD Recorder or Tape deck - Pioneer VSX-D509S | Owner's Manual - Page 25
Set up Preparations 4 Point the remote toward the component to be controlled, enter the 3 digit setup code. When you enter the setup code, the remote emits a power ON/ OFF signal. If the component turns ON or OFF, you have entered the proper code. If the component does not turn ON or OFF and there - Pioneer VSX-D509S | Owner's Manual - Page 26
AV PRE-PROGRAMMED AND LEARNING REMOTE CONTROL UNIT LOUDNESS FUNCTION MUTING SETUP CH SELECT CH LEVEL FL DIMMER DSP TEST TONE DTV ON / OFF DTV MENU TVFUNC MASTERVOLUME EFFECT 4 BAND 1 FQ 8 FQ TNU ENTER MENU CHANNEL 0 8 5 5.1CH 2 MALTI CONTROL VCR T V TV CONTROL SOURCE RECEIVER - Pioneer VSX-D509S | Owner's Manual - Page 27
MENU ST ENTER TOP MENU FQ SOURCE CLASS MPX BAND 7 8 3 D.ACCESS 1¡ CHANNEL 4¢ LOUDNESS FUNCTION MUTING RECEIVER FL DIMMER REMOTE SETUP MASTER VOLUME AUDIO/VIDEO PRE-PROGRAMMED REMOTE CONTROL UNIT VSX-D409 0 Clears all presets and restores factory default settings. Press and hold - Pioneer VSX-D509S | Owner's Manual - Page 28
turn the DIRECT function OFF, you can operate the remote control without affecting the receiver. Thus you could switch the remote control the VCR and operate that component while the receiver plays a different component. MULTI CONTROL VSX-D509S To set a multi-function button to DIRECT OFF: DVD - Pioneer VSX-D509S | Owner's Manual - Page 29
now make the remote function as a VCR controller. Remember to assign the correct preset code for your equipment (the default is for Pioneer equipment). Checking Preset Codes (VSX-D509S) 4 7 DVD RCV TV VCR MULTI CONTROL CD TUN CD-R TVC 1 2 3 MIDNIGHT 5.1CH ATT 4 5 6 SIGNAL SELECT - Pioneer VSX-D509S | Owner's Manual - Page 30
Digital Signal Processor MPX MODE 2/DTS SIGNAL SELECT PHONES 1 R BASS VIDEO TREBLE MIDNIGHT AUX S-VIDEO VIDEO INPUT VIDEO L AUDIO R ~ !@ # $% ^ & * This illustration shows the VSX-D509S model. 1 STANDBY indicator Lights when the receiver is in standby mode (note that the receiver - Pioneer VSX-D509S | Owner's Manual - Page 31
a DOLBY DIGITAL signal is played. DTS: Lights when a source with DTS audio signals is played. 9 2 DIGITAL indicator When the 2 (DOLBY)/DTS mode of the receiver is on, this lights to indicate playback of a Dolby Digital signal. However, 2 PRO LOGIC lights during 2 channel playback of Dolby Digital - Pioneer VSX-D509S | Owner's Manual - Page 32
& Controls Remote Control (VSX-D509S) 1 2 3 4 5 6 7 8 9 0 = ~ ! @ # SOURCE RECEIVER DVD RCV TV VCR MULTI CONTROL CD TUN CD-R TVC 1 2 3 MIDNIGHT 5.1CH ATT 4 5 6 SIGNAL SELECT 7 EFFECT 8 9 +10 DISC 0 ENTER TV CONTROL TV TV VOL TVFUNC MASTERVOLUME MENU CHANNEL FQ - Pioneer VSX-D509S | Owner's Manual - Page 33
CD, tuner, AUX, CD-R/TAPE/MD, VCR/DVR, DVD/LD, VIDEO and TV/SAT. # CHANNEL LEVEL +/- buttons Use to adjust the output level of the selected channel(s). $ LED DISPLAY This display flashes when a command is sent from the remote control to the receiver. It also flashes at other times, for example when - Pioneer VSX-D509S | Owner's Manual - Page 34
TONE 5 6 SIGNAL ATT SELECT 7 8 CHANNEL LEVEL 9 0 FUNC EFFECT ‡ ENTER 10 DISC CH VOL TV CONTROL VOL FQ ST MENU ST ENTER TOP MENU FQ SOURCE CLASS MPX BAND 7 8 3 D.ACCESS 1¡ CHANNEL 4¢ LOUDNESS FUNCTION MUTING RECEIVER FL DIMMER REMOTE SETUP MASTER VOLUME AUDIO/VIDEO PRE - Pioneer VSX-D509S | Owner's Manual - Page 35
button then operate this button. CHANNEL LEVEL +/- (see page 22-note) Use to set up the levels of the surround sound of the receiver. To use first press the RECEIVER button then operate this button. SIGNAL SELECT (see page 37) Use to select the proper signal (analog, digital) for the source your are - Pioneer VSX-D509S | Owner's Manual - Page 36
the power and dynamics of motion picture audio which channel (stereo) signals to faithfully imitate a five speaker sound. Use with Dolby Pro Logic for a stereo surround effect. You can also use with Dolby Digital sources for a wider stereo field than STANDARD mode. DSP modes The DSP (Digital Signal - Pioneer VSX-D509S | Owner's Manual - Page 37
ENTER TV CONTROL TV 1 Press RCV. This switches the remote to the surround setup mode. (On the VSX-D409 the button is called RECEIVER.) 2 Press SIGNAL SELECT to select the input signal corresponding to the source component. Each press switches between ANALOG and DIGITAL signal selection. 3 While - Pioneer VSX-D509S | Owner's Manual - Page 38
SIGNAL ATT SELECT 7 8 CHANNEL LEVEL 9 0 FUNC EFFECT ‡ ENTER 10 DISC CH VOL TV CONTROL VOL FQ ST MENU ST ENTER TOP MENU FQ SOURCE CLASS MPX BAND 7 8 3 D.ACCESS 1¡ CHANNEL 4¢ LOUDNESS FUNCTION MUTING RECEIVER FL DIMMER REMOTE SETUP MASTER VOLUME 3 5 8 1 Turn on the power - Pioneer VSX-D509S | Owner's Manual - Page 39
DVD 5.1 ch. input playback (VSX-D509S) Connect a component with 5.1 channel output to enjoy the surround sound created by 5.1 channel playback. DVD MULTI CONTROL RCV SOURCE RECEIVER DVD RCV TV VCR MULTI CONTROL CD TUN CD-R TVC 1 2 3 MIDNIGHT 5.1CH ATT 4 5 6 SIGNAL SELECT 7 EFFECT - Pioneer VSX-D509S | Owner's Manual - Page 40
INPUT VIDEO L AUDIO R memo • When 5.1 ch input is selected, Dolby mode, DSP mode, SIGNAL SELECT, ATT, DIRECT, TONE, MIDNIGHT mode, LOUDNESS and speakers B cannot be operated. • When 5.1ch input is selected, only the volume level and channel levels can be set. DVD 5.1 ch. input playback (VSX - Pioneer VSX-D509S | Owner's Manual - Page 41
DSP MODE MIDNIGHT 5.1CH 1 2 3 4 CHANNEL TEST SELECT TONE 5 6 SIGNAL ATT SELECT 7 8 CHANNEL LEVEL 19 ¡ 0 EFFECT 4 ‡ E¢ NTER LOUDNESS FUNCTION MUTING RECEIVER FL DIMMER REMOTE SETUP MASTER VOLUME AUDIO/VIDEO PRE-PROGRAMMED REMOTE CONTROL UNIT 3 4 1 Turn on the power of the playback - Pioneer VSX-D509S | Owner's Manual - Page 42
MPX BAND 7 8 3 D.ACCESS 1¡ CHANNEL 4¢ LOUDNESS FUNCTION MUTING RECEIVER FL DIMMER REMOTE SETUP MASTER VOLUME AUDIO/VIDEO PRE-PROGRAMMED REMOTE CONTROL UNIT 3 2 MPX MPX mode If the TUNED or STEREO indicators don't light when tuning to an FM station because the signal is weak, press the - Pioneer VSX-D509S | Owner's Manual - Page 43
SIGNAL ATT SELECT 7 8 CHANNEL LEVEL 9 0 EFFECT ‡ ENTER FUNC 10 DISC CH VOL TV CONTROL VOL FQ ST MENU ST ENTER TOP MENU FQ SOURCE CLASS MPX BAND 7 8 3 D.ACCESS 1¡ CHANNEL 4¢ LOUDNESS FUNCTION MUTING FL REMOTE MASTER 4 2 1 Press the MULTI CONTROL TUN button On the receiver - Pioneer VSX-D509S | Owner's Manual - Page 44
the station memory using the number buttons on the remote control. 1 2 DVD/LD TV/SAT VCR/DVR CD RECEIVER TUNER CD-R/ TAPE/MD TV CONT 2 DSP MODE MIDNIGHT 5.1CH 1 2 3 4 CHANNEL TEST SELECT TONE 5 6 SIGNAL ATT SELECT 7 8 CHANNEL LEVEL 9 0 EFFECT ‡ ENTER FUNC 10 DISC CH VOL TV - Pioneer VSX-D509S | Owner's Manual - Page 45
LOUDNESS FUNCTION MUTING SETUP Î AV PRE-PROGRAMMED AND LEARNING REMOTE CONTROL UNIT 1 SOURCE CLASS MPX BAND 7 8 3 D.ACCESS 1¡ CHANNEL 4¢ LOUDNESS FUNCTION MUTING RECEIVER FL DIMMER REMOTE SETUP MASTER VOLUME AUDIO/VIDEO PRE-PROGRAMMED REMOTE CONTROL UNIT 1 MONITOR 1 Press the - Pioneer VSX-D509S | Owner's Manual - Page 46
SIGNAL ATT SELECT 7 8 CHANNEL LEVEL 9 0 EFFECT ‡ ENTER FUNC 10 DISC CH VOL TV CONTROL VOL FQ ST MENU ST ENTER TOP MENU FQ SOURCE CLASS MPX BAND 7 8 3 D.ACCESS 1¡ CHANNEL 4¢ LOUDNESS FUNCTION MUTING RECEIVER FL DIMMER REMOTE SETUP MASTER VOLUME AUDIO/VIDEO (VSX-D509S only - Pioneer VSX-D509S | Owner's Manual - Page 47
SIGNAL ATT SELECT 7 8 CHANNEL LEVEL 9 0 FUNC EFFECT ‡ ENTER 10 DISC CH VOL TV CONTROL VOL FQ ST MENU ST ENTER TOP MENU FQ SOURCE CLASS MPX BAND 7 8 3 D.ACCESS 1¡ CHANNEL 4¢ LOUDNESS FUNCTION MUTING RECEIVER FL DIMMER REMOTE SETUP MASTER VOLUME AUDIO/VIDEO (VSX-D509S only - Pioneer VSX-D509S | Owner's Manual - Page 48
SIGNAL ATT SELECT 7 8 CHANNEL LEVEL 9 0 FUNC EFFECT ‡ ENTER 10 DISC CH VOL TV CONTROL VOL FQ ST MENU ST ENTER TOP MENU FQ SOURCE CLASS MPX BAND 7 8 3 D.ACCESS 1¡ CHANNEL 4¢ LOUDNESS FUNCTION MUTING RECEIVER FL DIMMER REMOTE SETUP MASTER VOLUME AUDIO/VIDEO (VSX-D509S only - Pioneer VSX-D509S | Owner's Manual - Page 49
ST ENTER TOP MENU FQ SOURCE CLASS MPX BAND 7 8 3 D.ACCESS 1¡ CHANNEL 4¢ LOUDNESS FUNCTION MUTING RECEIVER FL DIMMER REMOTE SETUP MASTER VOLUME AUDIO/VIDEO PRE-PROGRAMMED REMOTE CONTROL UNIT 2 4 ~ 5 & 8 @ % ^ 1 STANDBY/ON (power) Press to switch the TV or CATV between STANDBY and ON - Pioneer VSX-D509S | Owner's Manual - Page 50
TONE 5 6 SIGNAL ATT SELECT 7 8 CHANNEL LEVEL 9 0 EFFECT ‡ ENTER FUNC 10 DISC CH VOL TV CONTROL VOL FQ ST MENU ST ENTER TOP MENU FQ SOURCE CLASS MPX BAND 7 8 3 D.ACCESS 1¡ CHANNEL 4¢ LOUDNESS FUNCTION MUTING RECEIVER FL DIMMER REMOTE SETUP MASTER VOLUME AUDIO/VIDEO PRE - Pioneer VSX-D509S | Owner's Manual - Page 51
the other components and electrical appliances being used. If the trouble cannot be rectified even after exercising the checks listed below, ask your nearest PIONEER authorized service center or your dealer to carry out repair work. Symptom The power does not turn ON. The unit does not respond when - Pioneer VSX-D509S | Owner's Manual - Page 52
onto the unit's remote control signal light-receiving window. • The FL DIMMER button is pushed. Remedy • Connect an outdoor antenna (refer to page 13). • Refer to "SPEAKERS setting mode" on page 17 to check the speaker settings. • Refer to "Setting the volume level of each channel" on page 22 - Pioneer VSX-D509S | Owner's Manual - Page 53
VSX-D509S 0521 0425 Futuretech 0180 Onkyo 0503,0627 Audio-Technica 0000,0036,0053 Funai 0171, 0019 Gradiente 0053,0056,0170 Theta Digital 0571 Bell & Howell 0016,0154 Luxman 0056 Toshiba 0599 Daytron 0019,0039 Matsui 0035 Pioneer 0023,0059,0463 Denon 0145 MGA 0019,0030,0150 - Pioneer VSX-D509S | Owner's Manual - Page 54
1008,1477,1877 Technics 0051,0250 Seawoo 1780 Technal Ace 0179 Signal 1015 Techwood 0051,0056 Signature 1011 Teknika 0016,0019,0039 Tusa 1015 Vector Research 0030 Zenith 1000,1525 Victor 0036,0053,0160 Pioneer 1023,1144,1260 0250 1533,1679 (DTV) Vidikron 0054 1680 (Set - Pioneer VSX-D509S | Owner's Manual - Page 55
Tae Kwang 1733 Toshiba 1486,1790 Uniden 1722,1724 VTech 1321 Victor 1492,1505,1506 Zenith 1856 Pioneer 1662,1329 CD Aiwa 0124,0157 Anam 0362 Burmester 0420 California Audio 0029 Labs Carver 0157,0179,0437 Curtis Mathes 0029 DKK 0000 Denon 0003,0358,0873 Dynamic Bass - Pioneer VSX-D509S | Owner's Manual - Page 56
Funai GE 0047,0104 0035 0000 0035,0048,0060 0240 Garrard General Go Video GoldStar 0000 0052 0432,0526 0037,0038,0225 0480 Gradiente 0000,0008 HI-Q 0240 Vector 0045 Vector Research 0038,0040 Victor 0008,0041,0067 Video Concepts 0040,0045 Videosonic 0240 Wards 0000,0035,0042 0047,0048 - Pioneer VSX-D509S | Owner's Manual - Page 57
Additional Information Preset Code List (VSX-D409) Device DVD LD TV Manufacturer TOSHIBA SONY PANASONIC JVC SAMSUNG SHARP AKAI RCA PIONEER SONY PANASONIC KENWOOD PHILIPS RCA MITSUBISHI PIONEER RCA ZENITH MAGNAVOX GE PANASONIC SONY TOSHIBA MITSUBISHI HITACHI CATV JVC SHARP SANYO PHILIPS - Pioneer VSX-D509S | Owner's Manual - Page 58
R6P (VSX-D409 2 Size AA / IEC LR6 (VSX-D509S 2 Remote Control Unit 1 Operating Instructions 1 NOTE: Specifications and the design are subject to possible modifications without notice, due to improvements. * Measured pursuant to the Federal Trade Commission's Trade Regulation rule on Power Output - Pioneer VSX-D509S | Owner's Manual - Page 59
audio • Start your volume control at a low setting. • Slowly increase the sound until you can hear it comfortably and clearly, and without distortion. Once you have established a comfortable sound level: • Set the dial and leave it there. Taking a minute to do this now will help - Pioneer VSX-D509S | Owner's Manual - Page 60
in the U.S.A. and you wish to locate the nearest Pioneer Authorized Independent Service Company, or if you wish to purchase replacement parts, operating instructions, service manuals, or accessories, please call the number shown below. 8 0 0 - 4 2 1 - 1 4 0 4 Please do not ship your product to
-
 1
1 -
 2
2 -
 3
3 -
 4
4 -
 5
5 -
 6
6 -
 7
7 -
8
-
9
-
10
-
11
-
12
-
13
-
14
-
15
-
16
-
17
-
18
-
19
-
20
-
21
-
22
-
23
-
24
-
25
-
26
-
27
-
28
-
29
-
30
-
31
-
32
-
33
-
34
-
35
-
36
-
37
-
38
-
39
-
40
-
41
-
42
-
43
-
44
-
45
-
46
-
47
-
48
-
49
-
50
-
51
-
52
-
53
-
54
-
55
-
56
-
57
-
58
-
59
-
60
 |
 |

Operating Instructions
AUDIO/VIDEO
MULTI-CHANNEL RECEIVER
VSX-D409
VSX-D509S